



Running the solution
This section describes the login and authentication flow with the agent. Windows attaches the credential provider to the same user account and does not create a separate tile.
Windows Logon (without UCA and FIDO)
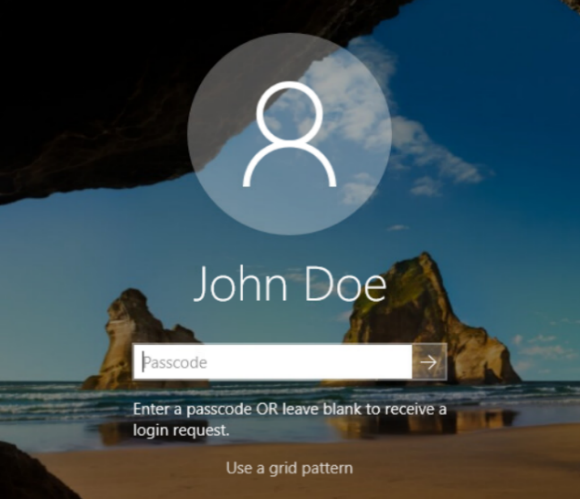
When SafeNet OTP is not exempted
-
Enter the SafeNet OTP and press Enter (or click the forward arrow sign).
For a Challenge-Response authenticator, press Enter or click the forward arrow while leaving the Passcode field blank. Depending on the selected authenticator type, any of the following character passcodes can also be provided:
- g for GrIDsure
- e for E-mail
- s for SMS
- p for Push OTP
-
Enter the Microsoft password.
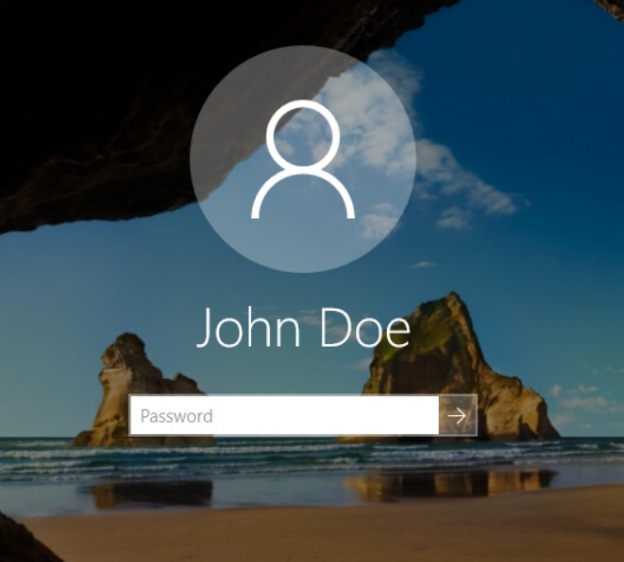
After providing the Microsoft password, you will be successfully logged in to the Windows machine.
When SafeNet OTP is exempted
Enter the Microsoft password.
After providing the Microsoft password, you will be successfully logged in to the Windows machine.
Push with number matching
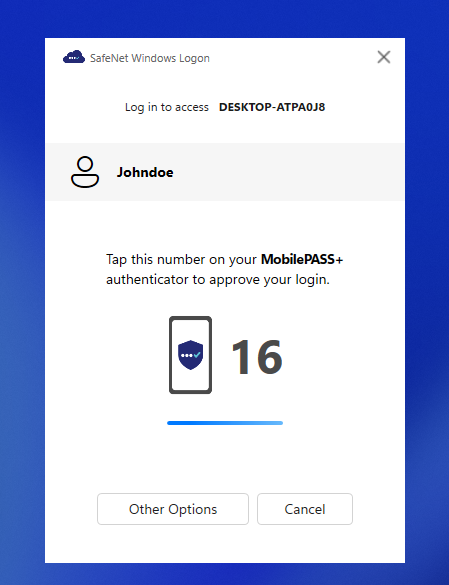
For the users enrolled with the MobilePASS+ token in SAS PCE, the number matching feature makes push notifications more secure and prevents users from approving push notifications by mistake.
During online authentication, the user:
-
Selects Send a push to MobilePASS+ from the list of authenticators.
-
Matches the two-digit number on their MobilePASS+ authenticator push notification with the number that is displayed on the login screen.
Windows Logon (without passwordless)
In the case of multiple authenticators, the user is presented with the choice of authenticators screen while logging in to the WLA-agent installed machine.
Following are the login screens for different scenarios:
Single authenticator in online mode
-
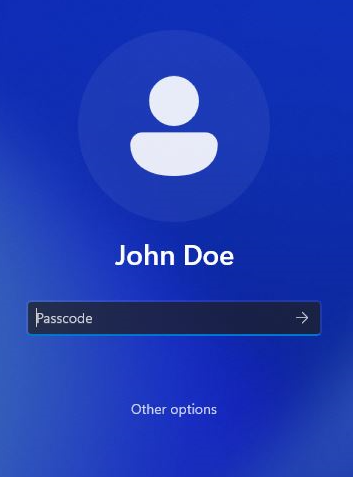
When SafeNet OTP is not exempted, the login window displayed to the user depends on the type of authenticator assigned to the user in SAS PCE. For example, if the user is assigned a GrIDSure authenticator in SAS PCE, the user is presented with a GrIDSure authentication screen.
The following window depicts the user experience enrolled with a single authenticator:
-
Enter the SafeNet OTP and press Enter (or click the forward arrow sign).
For a Challenge-Response authenticator, press Enter or click the forward arrow while leaving the Passcode field blank. Depending on the selected authenticator type, any of the following character passcodes can also be provided:
- g for GrIDsure
- e for E-mail
- s for SMS
- p for Push OTP
-
Enter the Microsoft password.
After providing the Microsoft password, you will be successfully logged in to the Windows machine.
-
Single authenticator in offline mode
The following window shows the offline authentication flow for a user enrolled with a single authenticator. In this case, the user is enrolled with a GrIDsure authenticator in SAS PCE. If a user is assigned any other authenticator, the corresponding authenticator is displayed on the login screen.
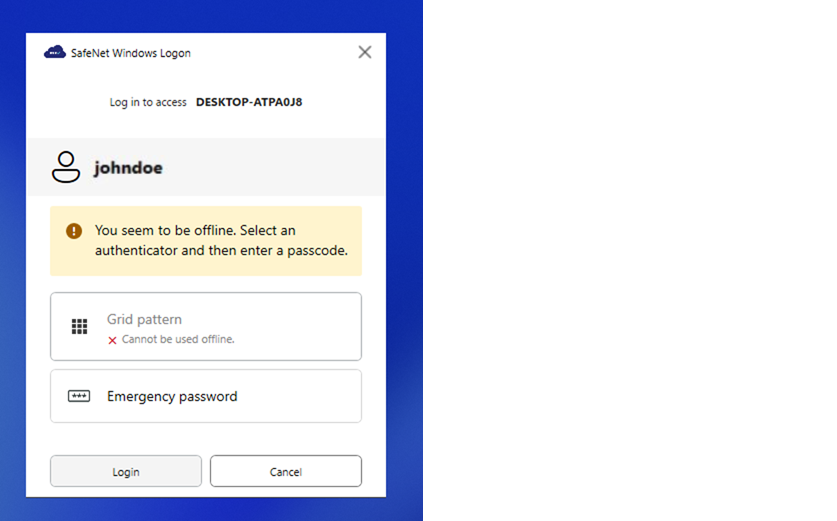
- Grid pattern: [Disabled] This option cannot be used in offline mode. Therefore, it is disabled.
- Emergency password: Allows the user to authenticate a Windows machine using an emergency password provided by the administrator.
Multiple authenticators in online mode
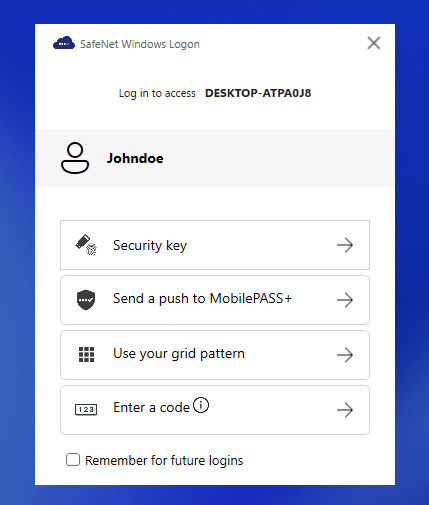
The following window shows the user experience when the user is enrolled with multiple authenticators. It displays a list of authenticators assigned to the user (for example, John Doe) in SAS PCE. Select an authenticator to log in.
Note
A password authenticator cannot be assigned with any other authenticator. It needs to be assigned separately in SAS PCE.
-
Following are the multiple authenticators that are displayed on the login screen:
- Security Key: Allows you to authenticate using the FIDO authenticator.
- Send a push to MobilePASS+: Allows you to use Push OTP when working with MobilePASS+. Selecting this option sends a push notification to the MobilePASS+ application.
- Send a code by text message and email: Sends an OTP via SMS or email to the end user's device.
- Use your grid pattern: Enables the GrIDsure authentication.
- Enter a code: Allows you to manually enter an OTP using an authenticator app or hardware authenticator.
-
Remember for future logins: Select this checkbox to remember the authenticator for future logins. This option remembers the initial authenticator used to log in to the WLA-installed machine. On subsequent logons, the user is presented only with the last selected authentication method.
For example, if the user selects the Use your grid pattern option, then on the next logon, the user is presented with the GrIDsure authentication screen only. Click Other options to display the multiple authenticator window and select a different authentication method.
Default: Disabled
-
Enter the second factor authentication as per the selected authentication method.
After providing the authentication password, you will be successfully logged in to the Windows machine.
Multiple authenticators in offline mode
The following window shows the user experience in offline mode. This is applicable when the Windows machine is unable to communicate with SAS PCE during authentication.
Note
The offline login screen displays only the authenticators that are used at least once for online authentication.
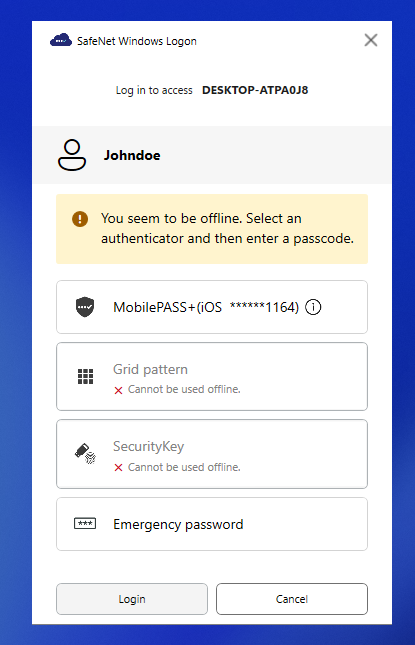
- MobilePASS+: Allows you to use Push OTP when working with MobilePASS+.
- Grid pattern: [Disabled] This option cannot be used in offline mode. Therefore, it is disabled.
-
SMS: Allows you to manually enter the SMS OTP that is fetched through an authenticator app.
Note
SMS authenticator allows you to log in only once using an advance authenticator.
-
Emergency password: Allows you to authenticate a Windows machine using an emergency password provided by the administrator.
- Hardware authenticator: Allows you to manually enter the OTP fetched via a hardware authenticator.
Fallback to the login screen
If authentication fails for any reason (for example, if the certificate is expired), the login flow falls back to the AD authentication screen. Click Other options to display and select the available authenticators.
Windows Logon (with UCA, FIDO, and Passwordless)
This section explains the following:
Passwordless enrollment
Note
See Enable passwordless logon for more information about enabling this feature.
At first logon, the user must enter the passcode followed by the AD password to enroll for passwordless authentication. After successful enrollment, the user is prompted for only a passcode on subsequent logon attempts.
Perform the following steps:
-
Log in as a user in a WLA-installed machine. On the login screen, select any of the authentication methods as per your preference.
*Figure: Login screen
In this example, Security key option (for FIDO authentication) is selected, as shown in the next step. Select Remember for future logins to select your default authentication method.
If no FIDO keys are connected, the application prompts you to insert one.
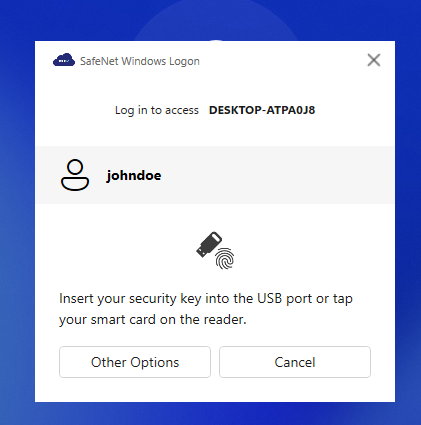
Figure: FIDO Key Insertion screen
- Click Other options to go back to the list of authenticators login screen.
- Click Cancel to go back to the passcode screen.
-
After inserting the FIDO key into the computer:
-
If your FIDO token is enrolled for biometric authentication
When the security key starts blinking, provide your biometric input (for example, a fingerprint). After successful biometric verification, proceed to Confirm user presence to confirm user presence.
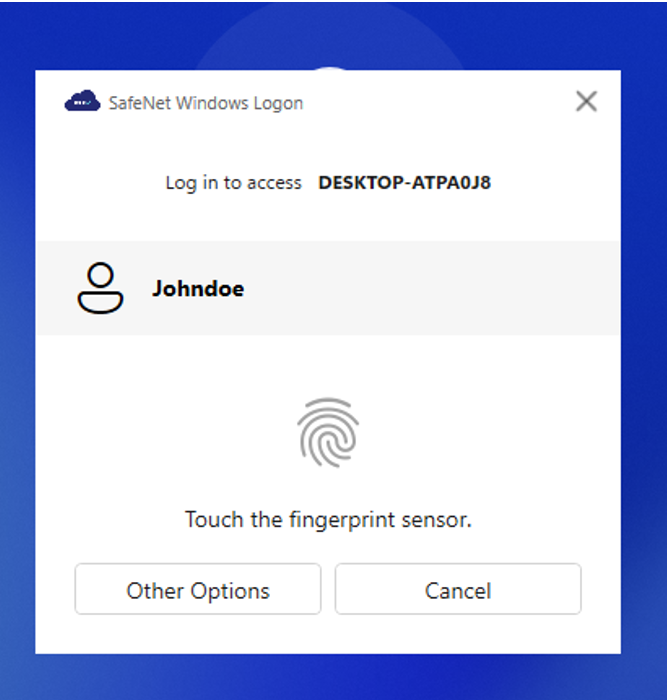
If biometric verification is unavailable or fails, the user has three attempts with a USB FIDO Bio Token. If three attempts fail, the system automatically falls back to PIN authentication. For a Bio Smartcard FIDO token, the system automatically falls back to PIN authentication if biometric verification is unavailable or fails.
-
If your FIDO token uses PIN authentication
In the Security key PIN window, enter your PIN and click OK.
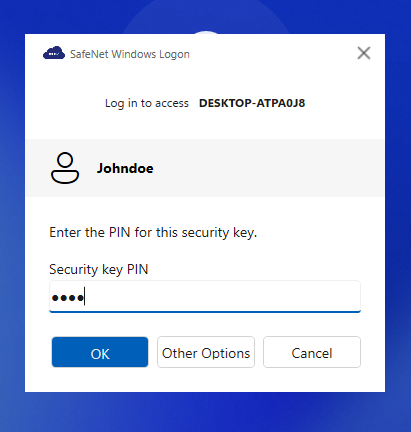
Figure: Security Key PIN screen
-
-
If the PIN or biometric authentication is successfully validated by the FIDO device, the following window appears asking the user to tap or touch the security key to verify their presence.
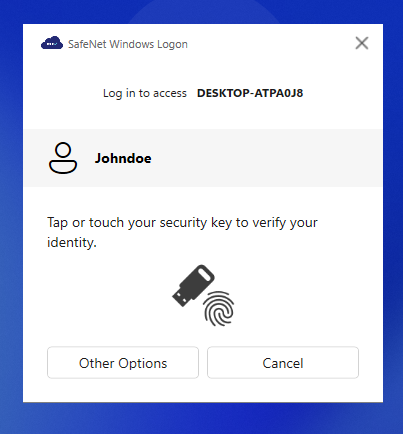
Figure: Tap or Touch screen
Note
This screen is only applicable for USB type FIDO device.
-
After successfully verifying the user's presence, the user is redirected to the password screen. Enter the AD password and click the forward arrow.
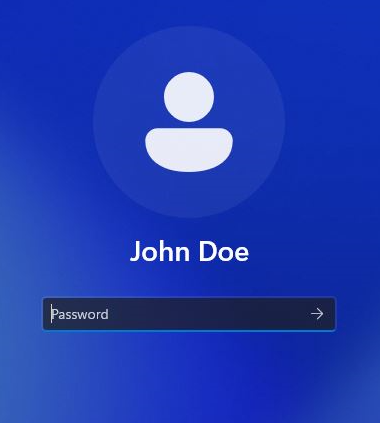
Figure: AD password screen
-
After successful login, a SafeNet Desktop Logon notification appears in the lower-right corner of the screen, prompting the user to enroll for passwordless authentication.
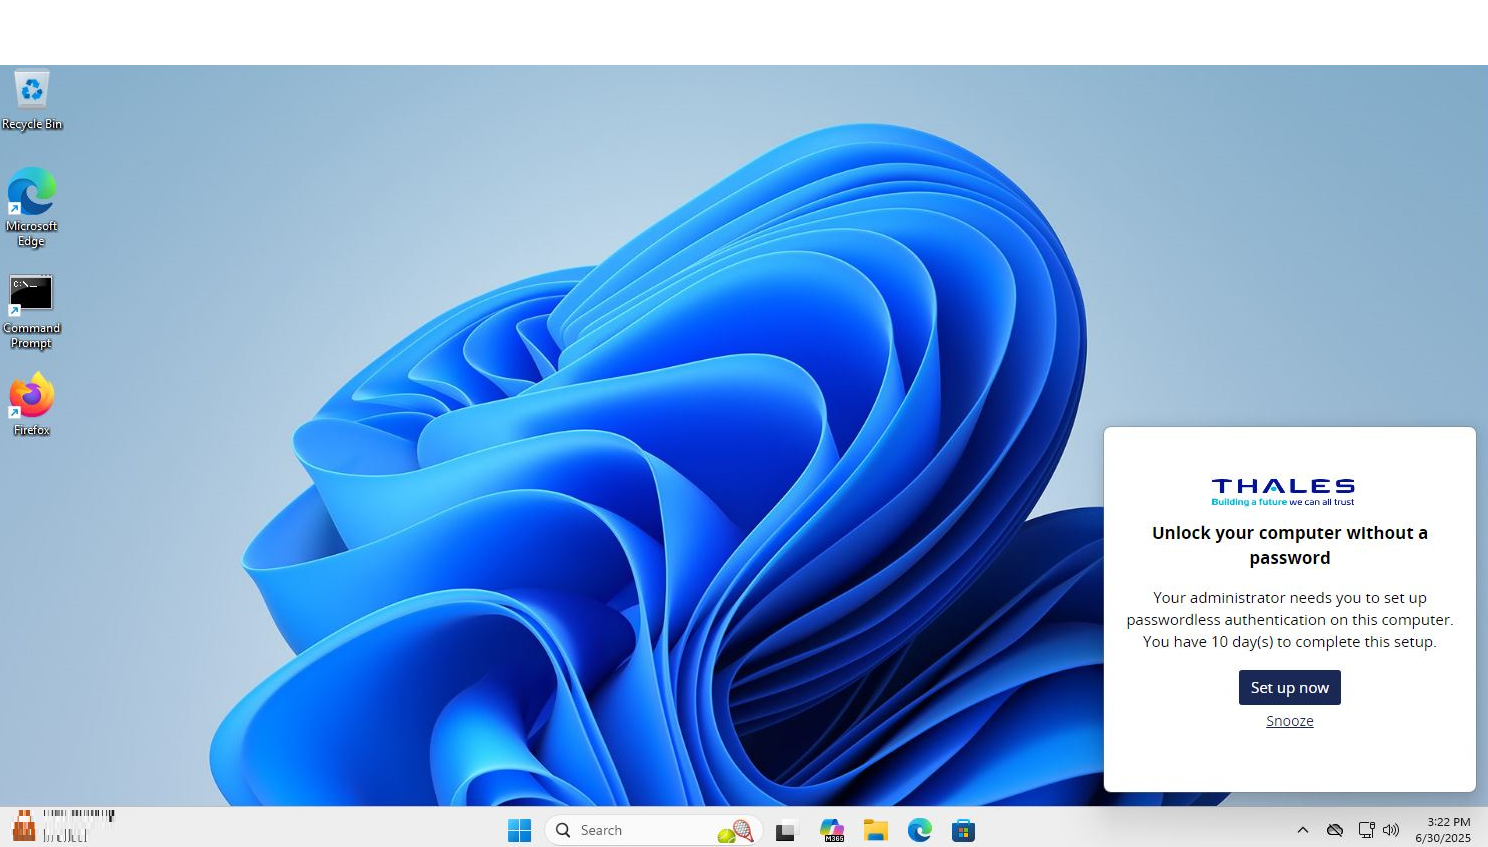
Figure: Enrollment Window
Click Snooze to ignore the notification on unlock. The notification appears again at each logon or restart until the user enrolls for passwordless authentication.
-
Click Set up now.
-
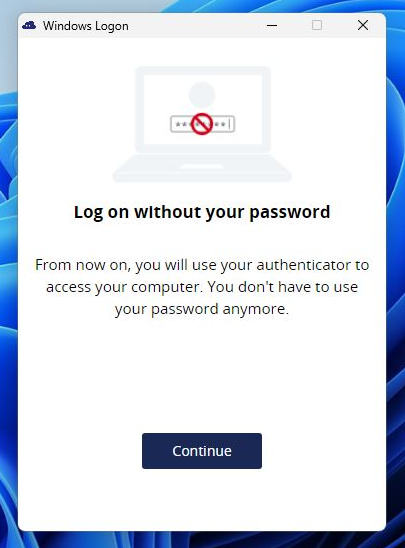
Click Continue.
-
Authenticate using any of the authenticators. If FIDO is not set as the primary authenticator in SAS PCE, then the Security key option is not displayed. Click Other ways to log in.
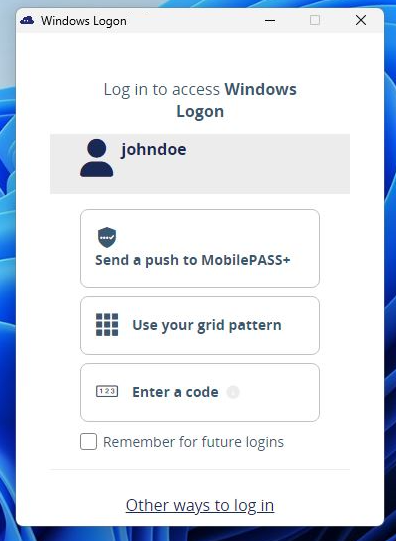
Figure: Authentication Window
-
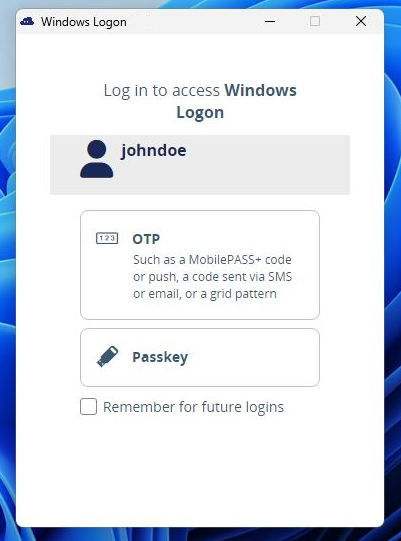
Click Passkey.
-
The process may take up to one minute.
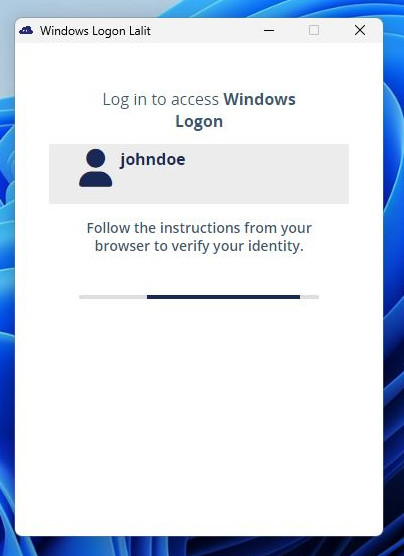
Figure: Waiting Window
-
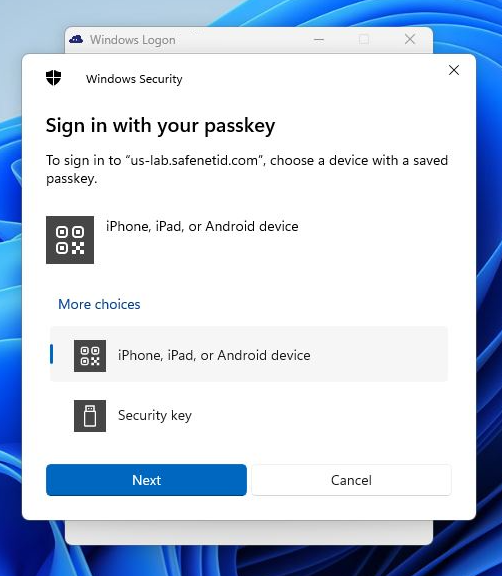
Click Security key and then click Next.
-
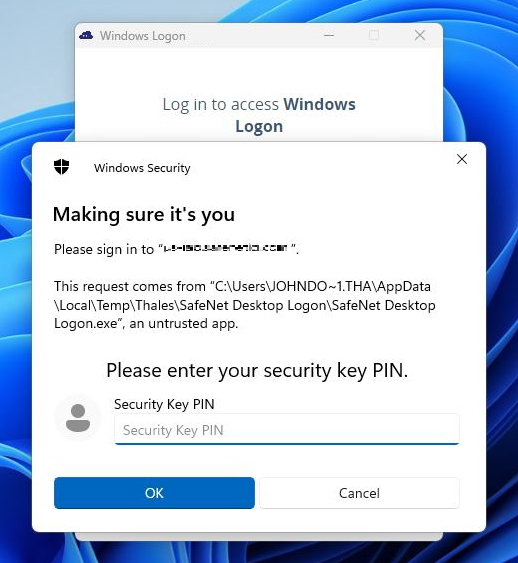
After the waiting period, enter the Security Key PIN and click OK.
Note
If a Type B or Type C FIDO device is used, touch the device to authenticate and proceed.
-
After successful authentication, the enrollment process may take up to one minute to configure the passwordless authentication.
Note
Ensure that the machine is in the corporate network to communicate with the SCEP server.
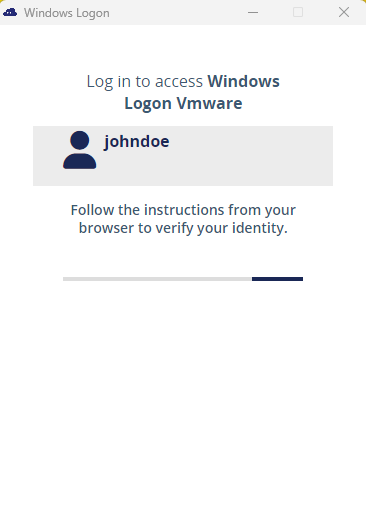
Figure: Waiting Window
-
After the successful enrollment for passwordless authentication, the following success message is displayed:
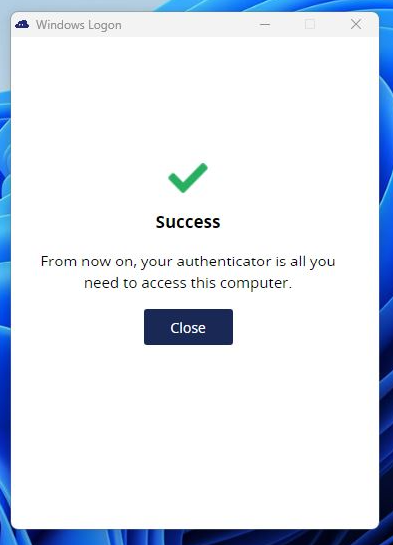
Figure: Success Window
-
Click Close to close the window.
In case of a failure, refer to the Troubleshooting section.
-
Now, the user will be successfully enrolled for passwordless authentication. On next logon, the user will be prompted only for the passcode.
Sign in with passwordless credential
Users enrolled for passwordless authentication can log in to the WLA-installed machine by entering only the passcode. The following login flow describes the user authentication using passwordless authentication.
Log in by selecting any of the authenticator options as per your preference.
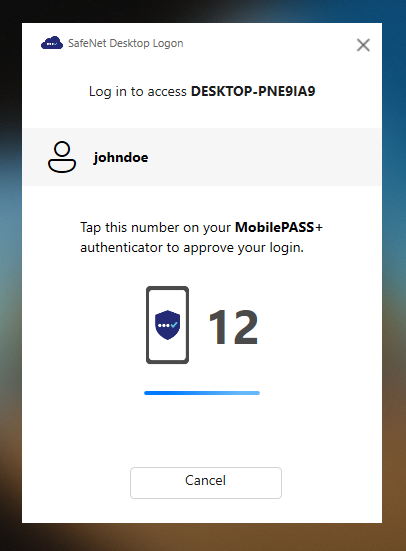
After entering the passcode, the user will be successfully logged in without using the AD password.
Fallback to AD password
If passwordless authentication fails (for example, if the certificate has expired), the login flow falls back to the AD authentication screen, where the user must enter the AD password.
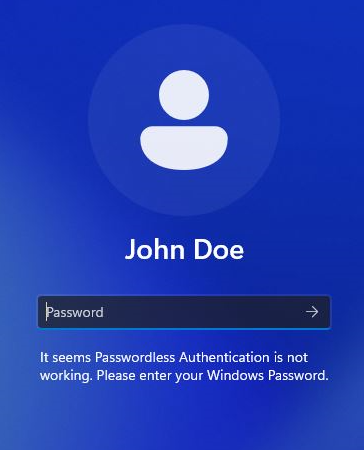
Figure: Fallback to AD password screen
Passwordless enrollment window expired
After the enrollment window (Default: 10 days) expires, an expiry notification is displayed to the user at every logon.
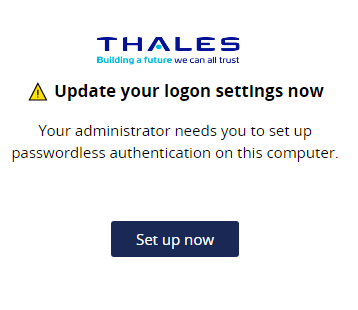
Figure: Enrollment Window Expired
Click Set up now and then perform steps 3(b) to 3(f) in Passwordless enrollment.
Passwordless renewal
Passwordless authentication about to expire
When the passwordless authentication is about to expire (depending upon the threshold), the user is presented with the following notification to renew it to continue using the passwordless authentication. Default: 21 days.
Perform the following steps to renew the passwordless authentication:
-
Click Authenticate.
Use Case 1: If the passwordless authentication is about to expire: The following window is displayed when the passwordless authentication is set to expire within the next 21 days.
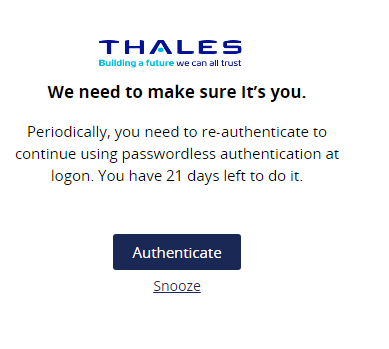
Figure: Passwordless authentication about to expire window
Use Case 2: If the passwordless authentication is about to expire (Last Day): The following window is displayed on the last day of the passwordless authentication expiry.
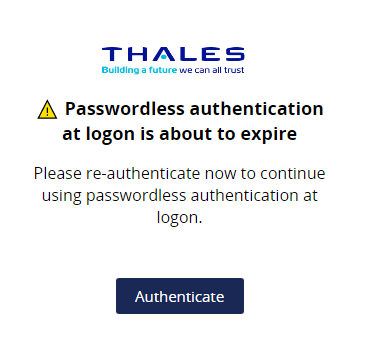
Figure: Passwordless authentication about to expire window (Last Day)
-
Perform steps 3(b) to 3(f) in Passwordless enrollment.
Now, the user will be successfully renewed for passwordless authentication. On next logon, the user will only be prompted for the passcode.
Passwordless authentication expired
If the renewal window threshold is over and the user has not renewed passwordless authentication, the user must enter the passcode followed by the AD password at the next logon. The following notification is also displayed, prompting the user to renew passwordless authentication.
Perform the following steps for the renewal:
-
Click Authenticate.
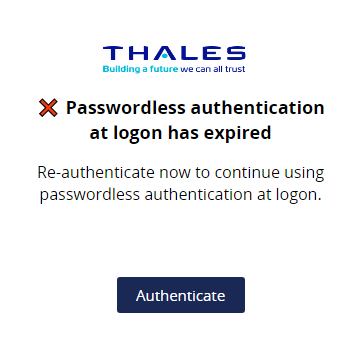
Figure: Passwordless authentication expired window
-
Perform steps 3(b) to 3(f) in Passwordless enrollment.
Now, the user will be successfully renewed for passwordless authentication. On the next logon, the user will be prompted only for the passcode.
If you face any problem with the passwordless configuration, refer to the Troubleshooting section.

