Configuring the agent file
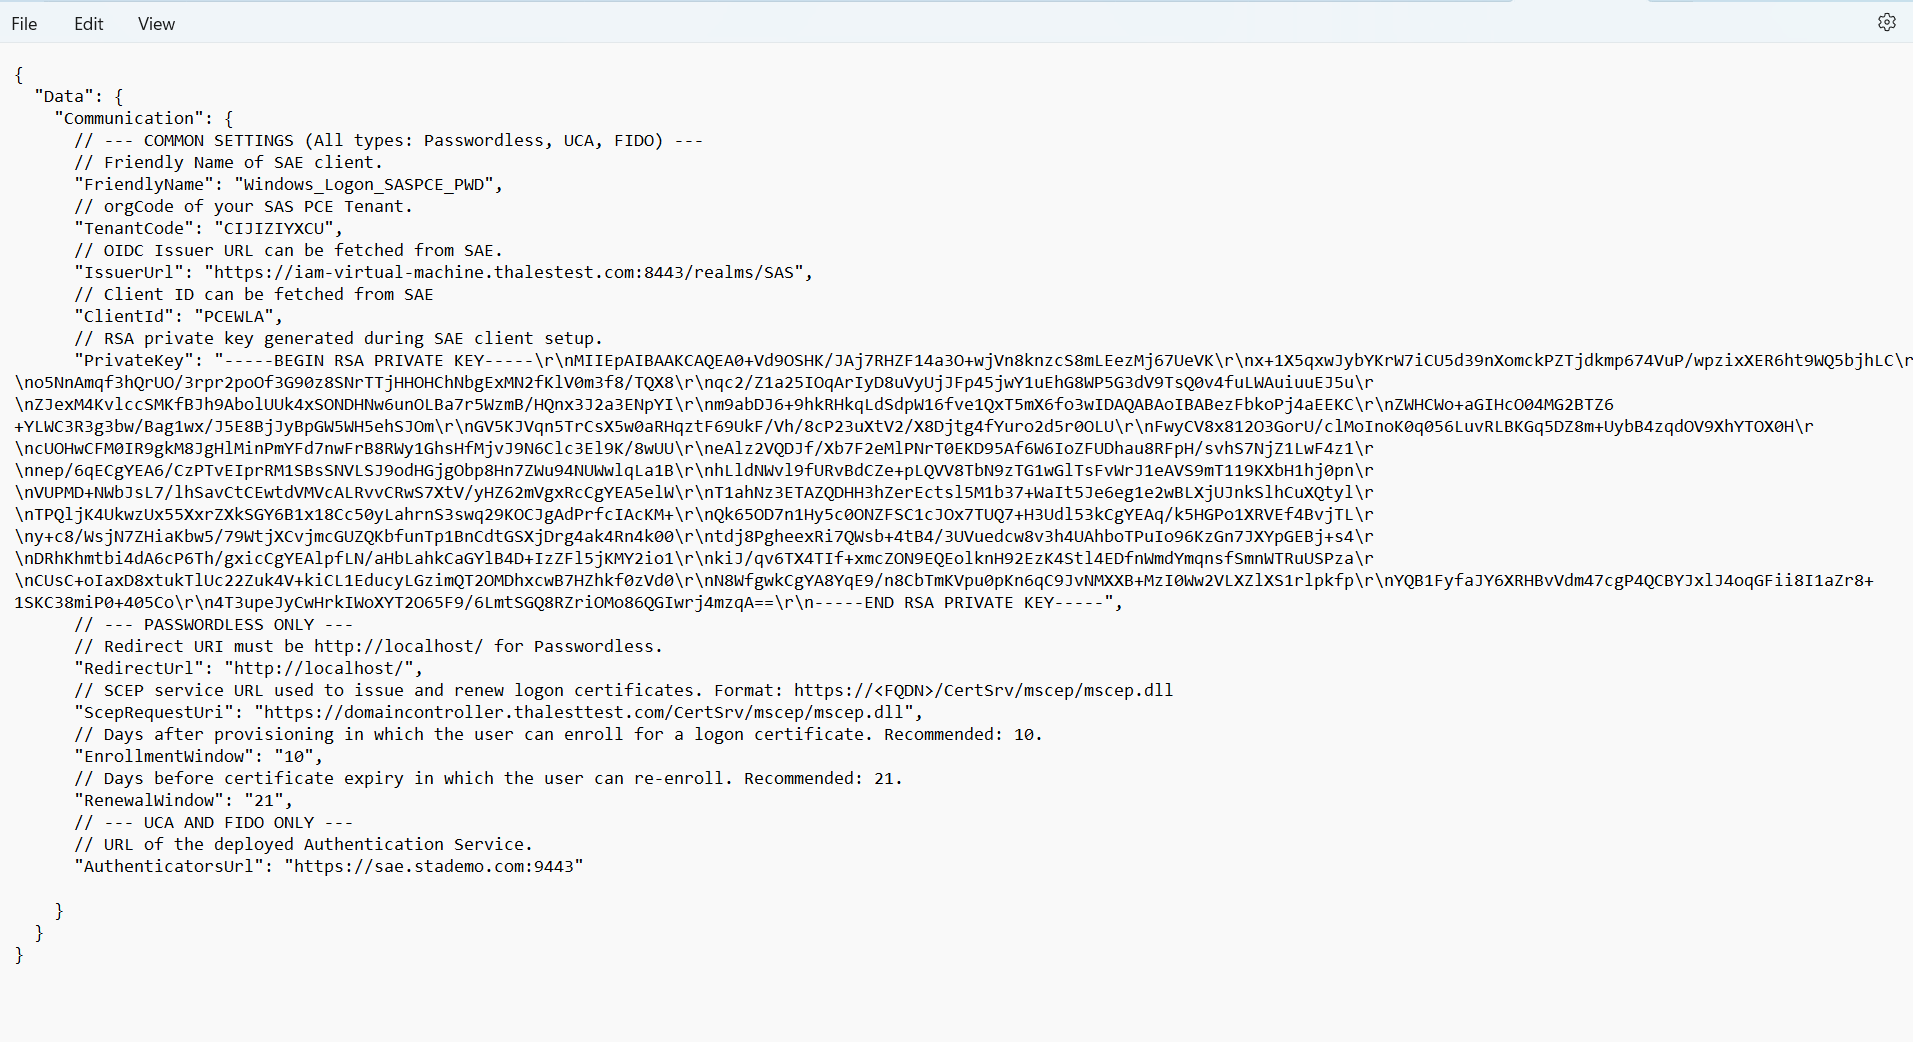
The agent file (.agent) contains the details of the IdP (SAE) and non-SAML/OIDC web applications. Configuring the agent file requires:
Obtaining values for the agent file
Before configuring the agent file, you must obtain certain values. Perform the following steps:
-
Go to the administrator console of your SAE instance.
-
In the left pane, under Configure, click Realm settings, and then in the right pane, on the General tab, perform the following steps:
-
Copy the Realm ID field's value and paste it in a text editor.
-
In the Endpoints field, click OpenID Endpoint Configuration. A new window opens. Copy the Issuer URL and save it in a text editor for future use.
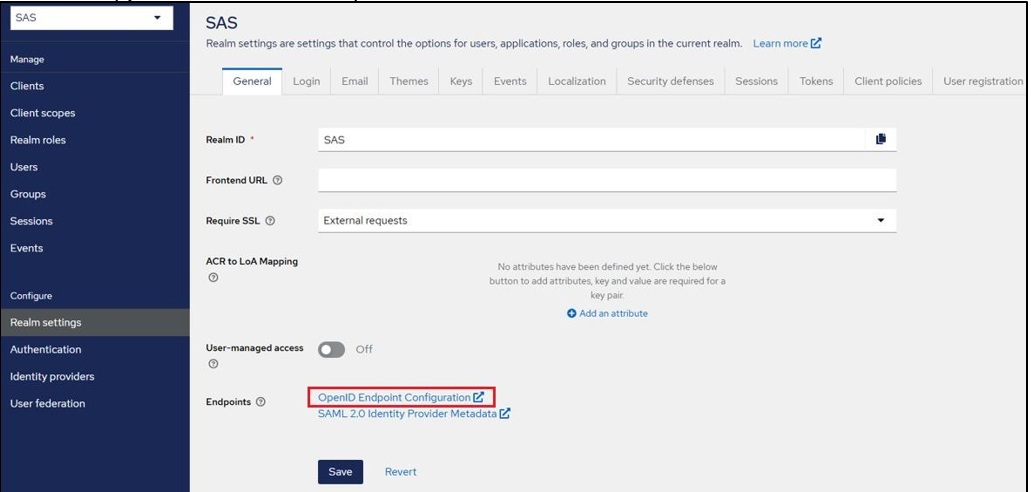
Figure: SAE Realm settings
For example:
"IssuerUrl":"https://your-sae-url/realms/your-realm-name" -
-
In the left pane, click Clients, and copy the Client ID (for example, PCE_WLA) of the client that you have created earlier. Paste the value in the text editor.
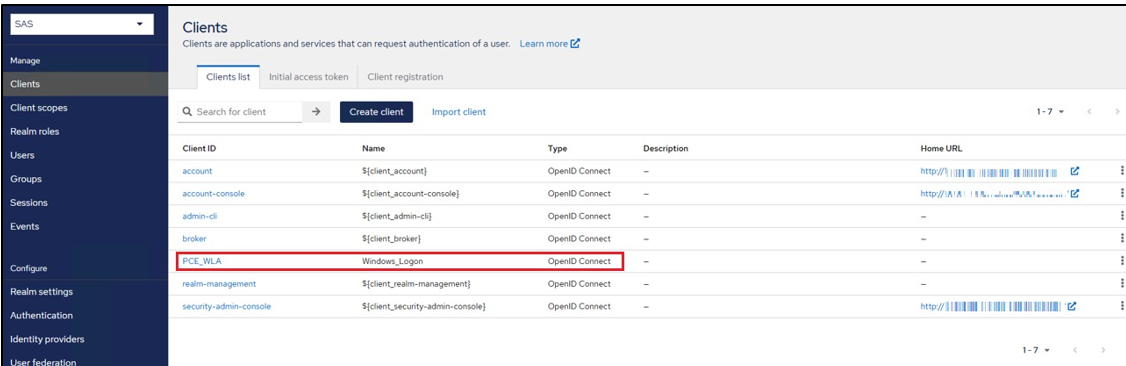
Figure: SAE Clients list
Updating the agent file
Perform the following steps to update the sample .agent file, Sample_Passwordless_UCA_FIDO.agent, available in the downloaded Windows Logon package:
Note
Steps 1–6 are common to the Passwordless, UCA, and FIDO configurations. Steps 7–10 apply only to Passwordless. Step 11 applies only to UCA and FIDO.
-
Open the
Sample_Passwordless_UCA_FIDO.agentfile in any text editor. -
In FriendlyName, enter a friendly name (for example, Windows Logon SASPCE_PWD).
-
In TenantCode, enter your organization's orgCode. You can find orgCode Comms > Authentication Processing > Authentication Agent Settings. In Token Validator url orgcode is present.
"TenantCode":"SASPCETenantCode"For example, in the below sample, IIKIZIZXCU is the orgCode.
-
In IssuerUrl, paste the Issuer URL as obtained in Step 2 (b) of the Obtaining values for the agent file section.
"IssuerUrl":"https://your-sae-url/realms/your-realm-name" -
In ClientId, paste the Client ID as obtained in Step 3 of the Obtaining values for the agent file section.
"ClientId":"PCE_WLA" -
Replace the value of PrivateKey with the key you retrieved in Step 3 of Generating a private key and selecting the credentials type for the client.
For Passwordless configuration only (steps 7–10):
-
Replace the value of RedirectUrl with
http://localhost/, which is used for accessing Windows Logon."RedirectUrl":"http://localhost/" -
In ScepRequestUri, specify the URL where the SCEP service is installed, for example,
https://<FQDN>/certsrv/mscep/mscep.dll -
In EnrollmentWindow, ensure that the value is set to 10, which specifies the number of days in which the user can enroll for the logon certificate.
"EnrollmentWindow":"10" -
In RenewalWindow, ensure that the value is set to 21, which specifies the number of days in which the user can re-enroll for the logon certificate.
"RenewalWindow":"21"For UCA and FIDO configuration only (step 11):
-
In AuthenticatorsUrl, specify the URL of the deployed Authentication Service.
-
Save the
Sample_Passwordless_UCA_FIDO.agentfile.
Now, the updated .agent file will look like: