



Configuring SafeNet Microsoft RDGateway Manager
Configure the agent using the SafeNet Microsoft RDGateway Manager.
Communications
On the SafeNet Microsoft RDGateway Manager, click the Communications tab.
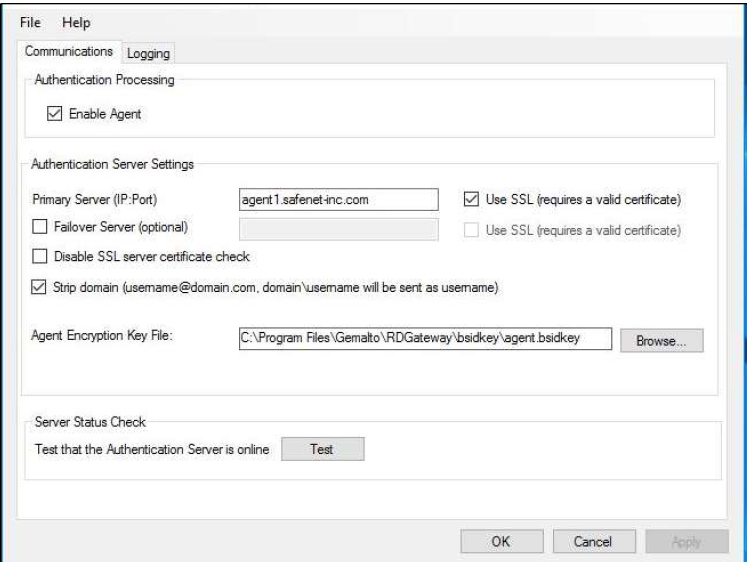
Complete the following fields, and click Apply.
Authentication Processing
- Enable Agent: Select the check box to enable the agent.
Authentication Server Settings
-
Primary Server (IP:Port): This setting is used to configure the IP address or hostname of the primary SAS server. Default Port: 80
Alternatively, the Use SSL check box option can be selected. Default TCP Port for SSL Requests: 443
-
Failover Server (optional): This setting is used to configure the IP address or hostname of the failover SAS server. Default Port: 80
Alternatively, the Use SSL check box option can be selected. Default TCP Port for SSL Requests: 443
Note
We strongly recommend using SSL.
-
Disable SSL server certificate check: Select the check box option to disable the SSL server certificate error check.
If the option is cleared, the agent checks if the certificate from the SAS server is correct. If selected, the certificate is not verified.
-
Strip domain (username@domain.com, domain\username will be sent as username): Select if the SAS username is required without the prefix
domain\or the suffix@domain. -
Agent Encryption Key File: This setting is used to specify the location of the agent's key file. The agent uses an encrypted key file to communicate with the authentication web service. This ensures all communication attempts made against the web service are from valid recognized agents.
Note
The administrator is advised to download a new
Agent.bsidkeyfile from the SAS and update the same in the agent. To download theAgent.bsidkeyfile, follow these steps:- Log in to your SafeNet Authentication Service (SAS) account, and navigate to COMMS > Authentication Processing.
- Under Task list, click Authentication Agent Settings link and download the
Agent.bsidkeyfile.
The key file must be kept at a location accessible by all authorized users.
Server Status Check
This function is used to execute a communication test to verify a connection to the SAS.
Logging
On the SafeNet Microsoft RDGateway Manager, click the Logging tab.
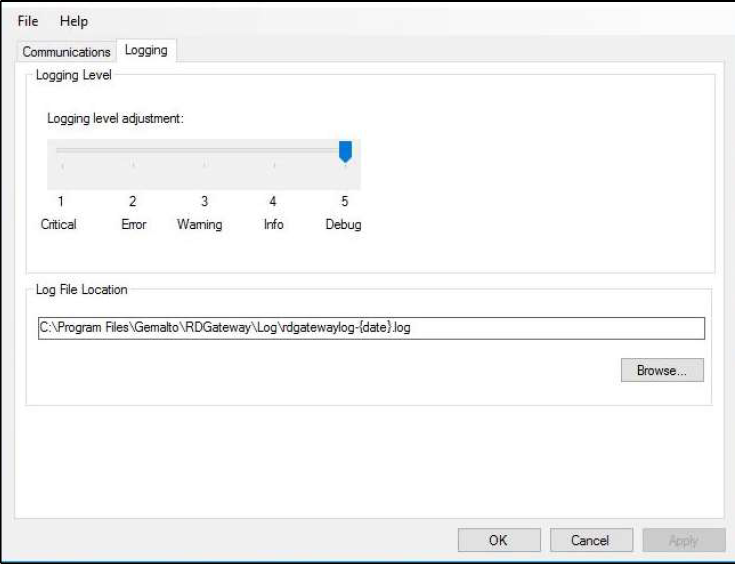
Complete the following settings, and click Apply.
Logging Level
This setting adjusts the logging level. For log levels 1, 2, and 3, only the initial connection between the agent and the server, and any failed connection attempts are logged.
Drag the pointer on the Logging level adjustment scale to the required level:
- 1 Critical - Critical issues
- 2 Error - Critical issues and errors
- 3 Warning - Critical issues, errors, and warnings
- 4 Info - Critical issues, errors, warnings, and information messages
- 5 Debug - All available information
Log File Location
This setting specifies the location where the log files are saved. The log files are rotated on a daily basis.
Blocking Direct Access To Remote Machines
If a client machine can directly access the remote machine (session host), the SafeNet Agent for RD Gateway Agent does not work. To block direct access to the remote machine, complete the following steps:
-
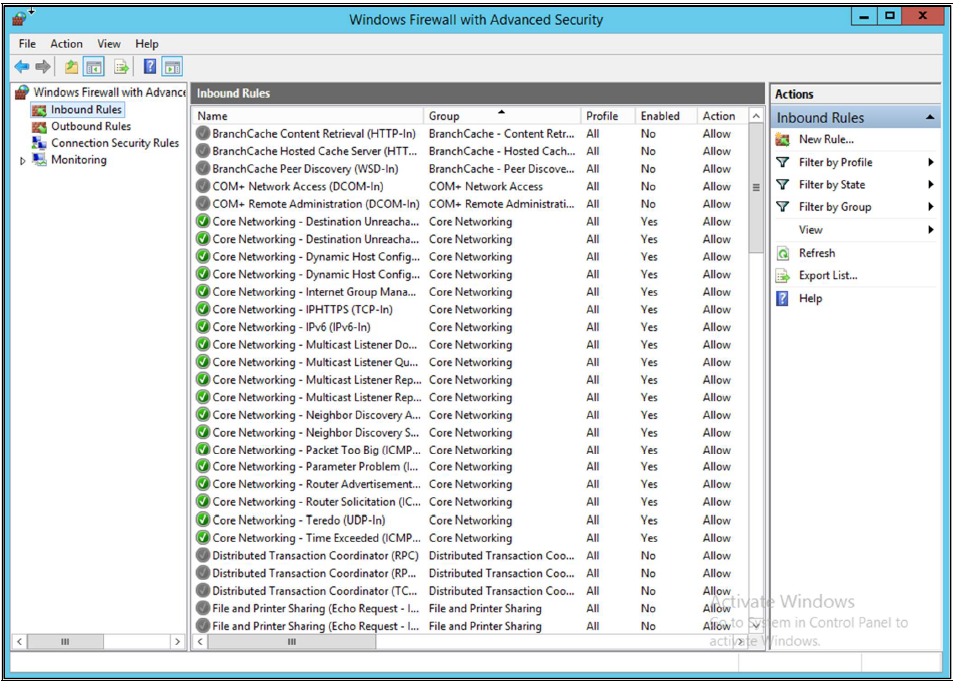
On the remote machine, open Windows Firewall with Advanced Security.
-
In the left pane, click Inbound Rules.
-
In the middle pane, search for Remote Desktop Services - Shadow (TCP-In) and double-click it.
-
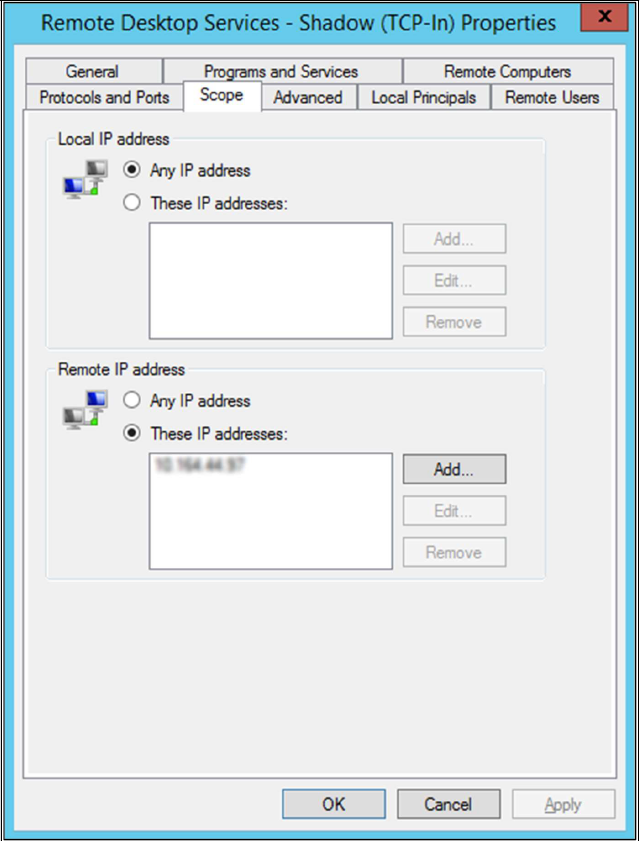
On the Remote Desktop Services - Shadow (TCP-In) Properties window, click the Scope tab.
-
Under Remote IP address, select These IP addresses.
-
Click Add and then add the IP address of the RD Gateway server.
-
Click OK.
-
Repeat steps 3 to 7 for Remote Desktop Services – User Mode (TCP-In) and Remote Desktop Services – User Mode (UDP-In).
Now, connection to the remote machine can be established only through the RD Gateway server.
Managing Remote Desktop Services Client Connections
To manage RD Services client connections using the Group Policy, follow these steps:
-
Navigate to Start > Administrative Tools > Group Policy Management.
-
From the left pane, locate the Organizational Unit (OU) you want to edit.
-
Modify an existing Group Policy Object (GPO) for the OU, or create a new one.
-
Right-click the GPO and click Edit.
-
Navigate to User Configuration > Policies > Administrative Templates: Policy definitions (ADMX files) retrieved from the central store > Windows Components > Remote Desktop Services > RD Gateway.
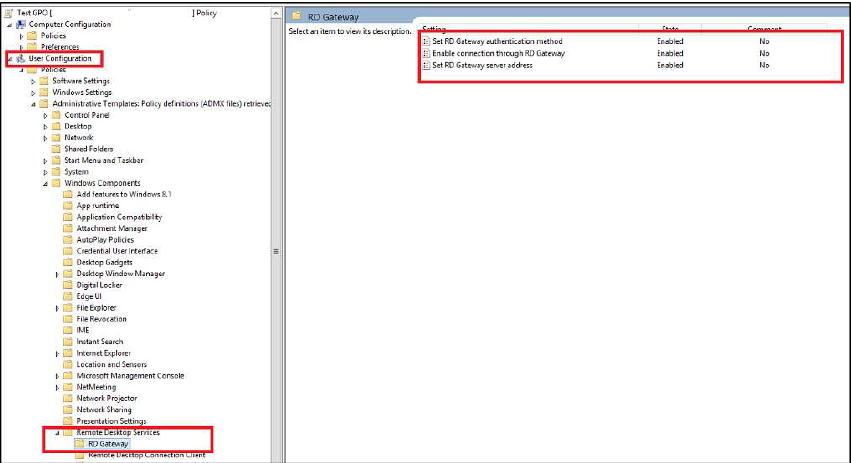
a. Double-click Enable connection though RD Gateway option, and perform the following steps:
- Click Enabled.
- Ensure that the Allow users to change this setting check box is not selected.
- Click OK.
b. Double-click Set RD Gateway server address option, and perform the following steps:
- Click Enabled.
- Specify a valid, fully qualified domain name (FQDN) of the RD Gateway server or RD Gateway server farm.
- Ensure that the Allow users to change this setting check box is not selected.
- Click OK.
Remote Desktop Gateway Server Settings
If RD Gateway server settings are not using the address from the Group Policy, the following updates are required to ensure proper functioning of the agent:
-
Open the Remote Desktop Connection from the Start screen.
-
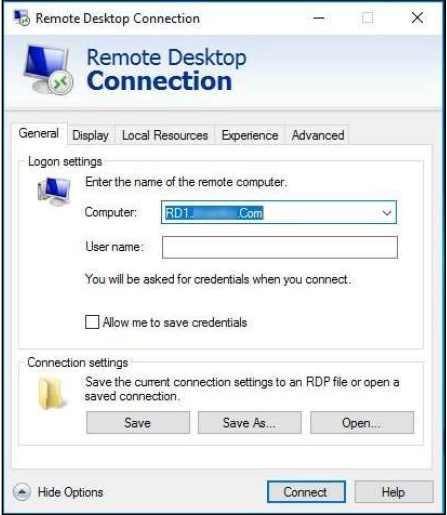
Click Show Options, and select the General tab.
-
Enter the IP or hostname of the remote client machine in the Computer field.
-
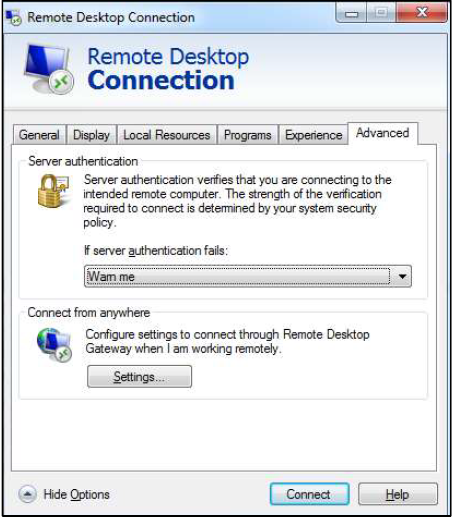
Select the Advanced tab, and click Settings.
-
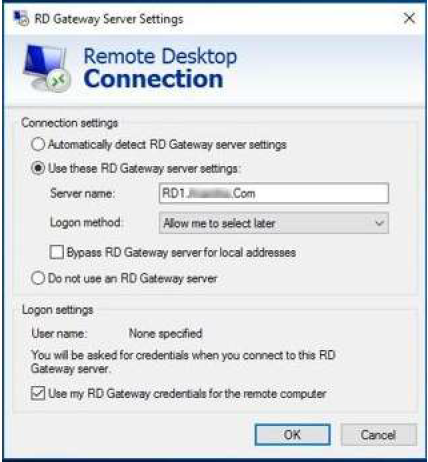
Perform or ensure the following actions:
- Select the Use these RD Gateway server settings radio option, and enter the Server name.
- Ensure that the Bypass RD Gateway server for local addresses option is not selected.
- Select the Use my RD Gateway credentials for the remote computer check box.
-
Click OK.

