Configuration
Enable IE Mode In Edge Browser
Perform the following steps to enable Internet Explorer (IE) mode on Microsoft Edge:
-
Open the Microsoft Edge browser.
-
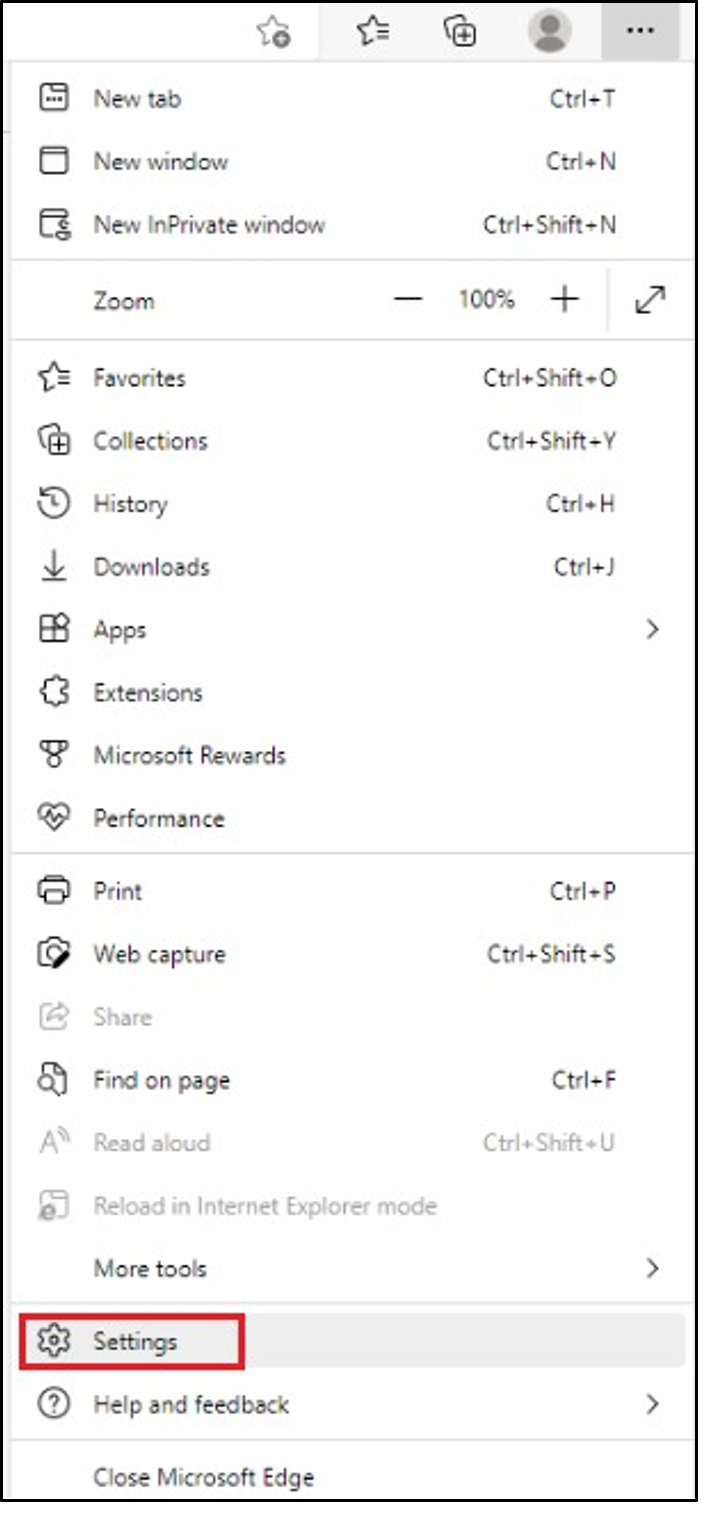
Click Options in the top-right corner of the Edge browser and select Settings.
-
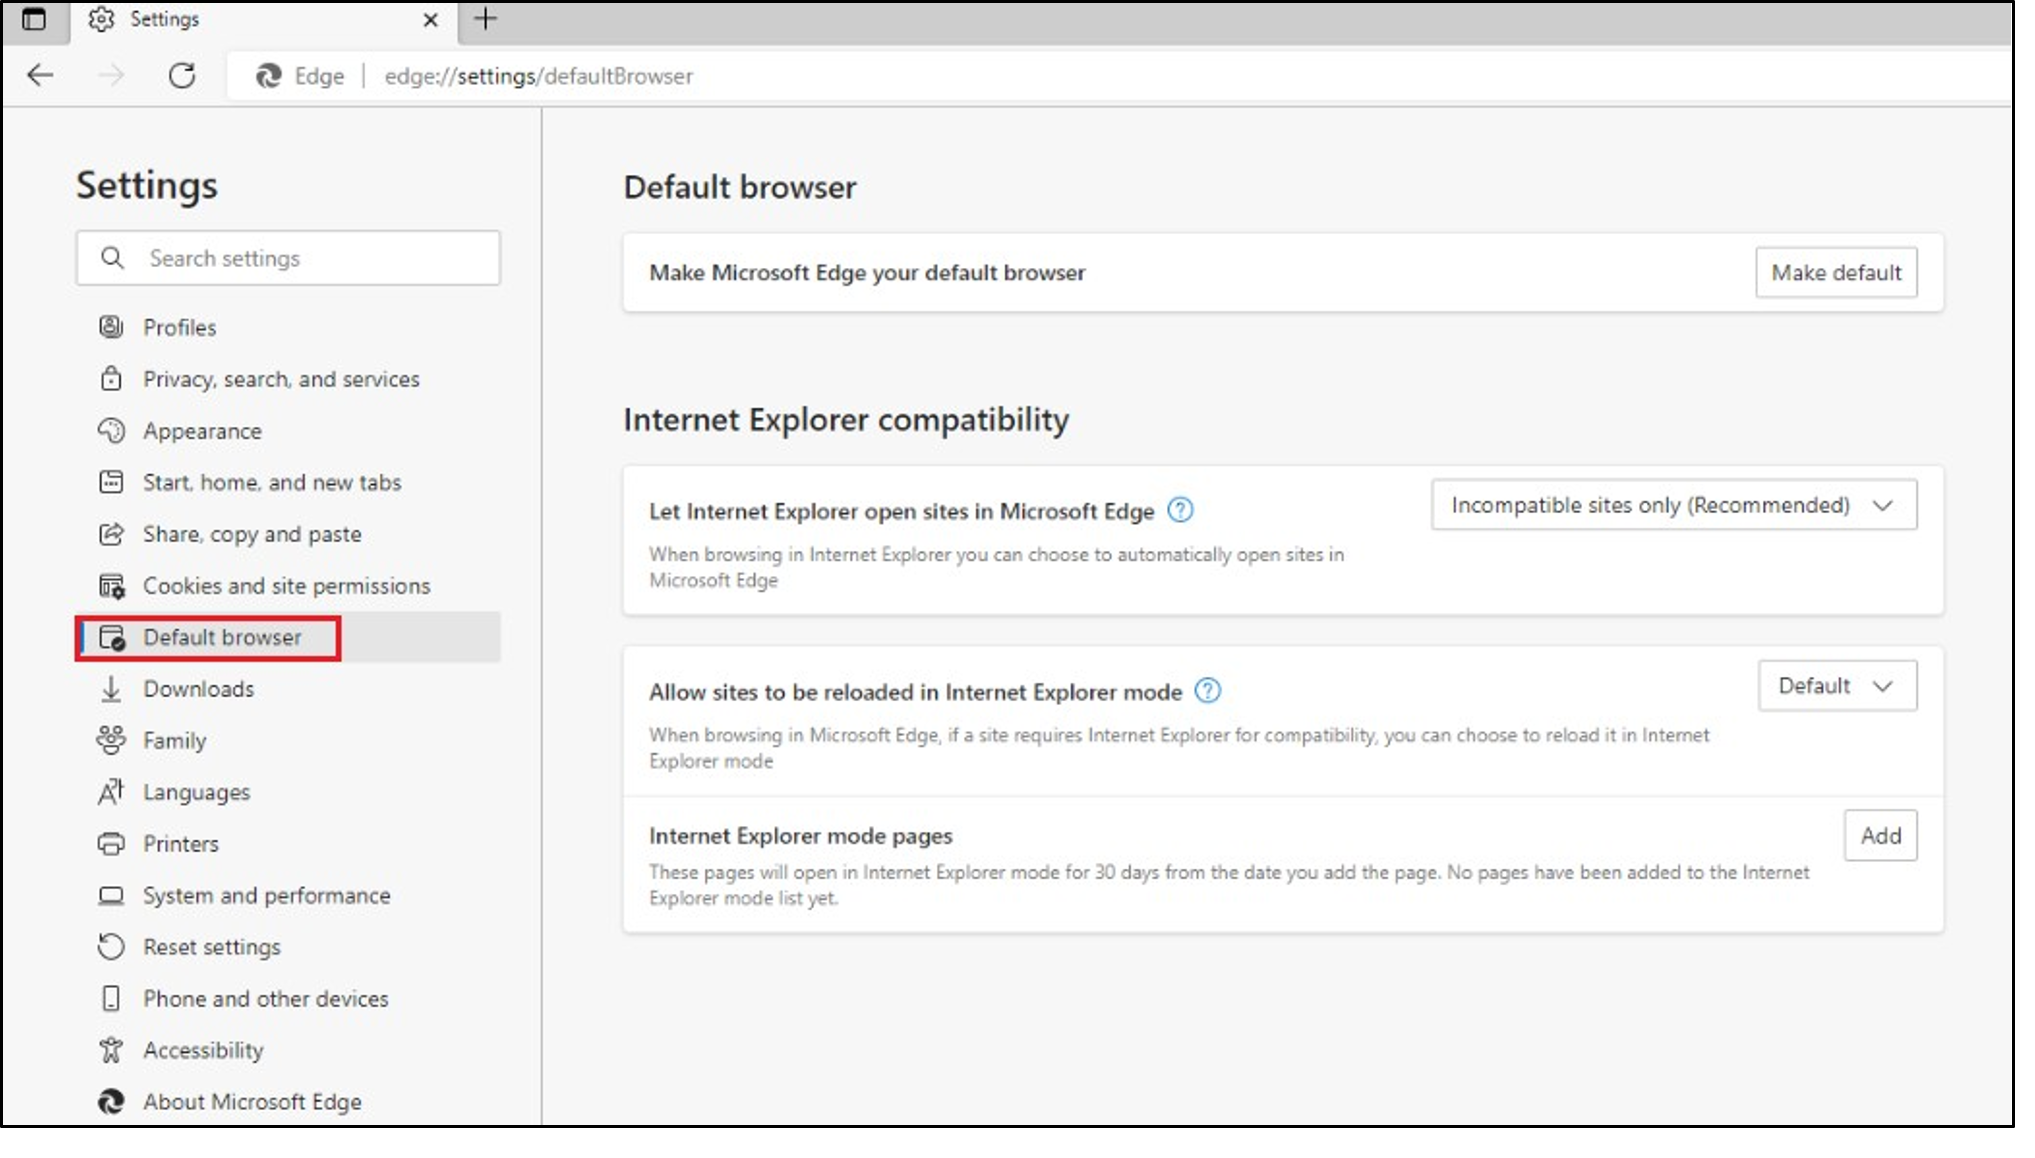
In the left pane, under Settings, click Default browser.
-
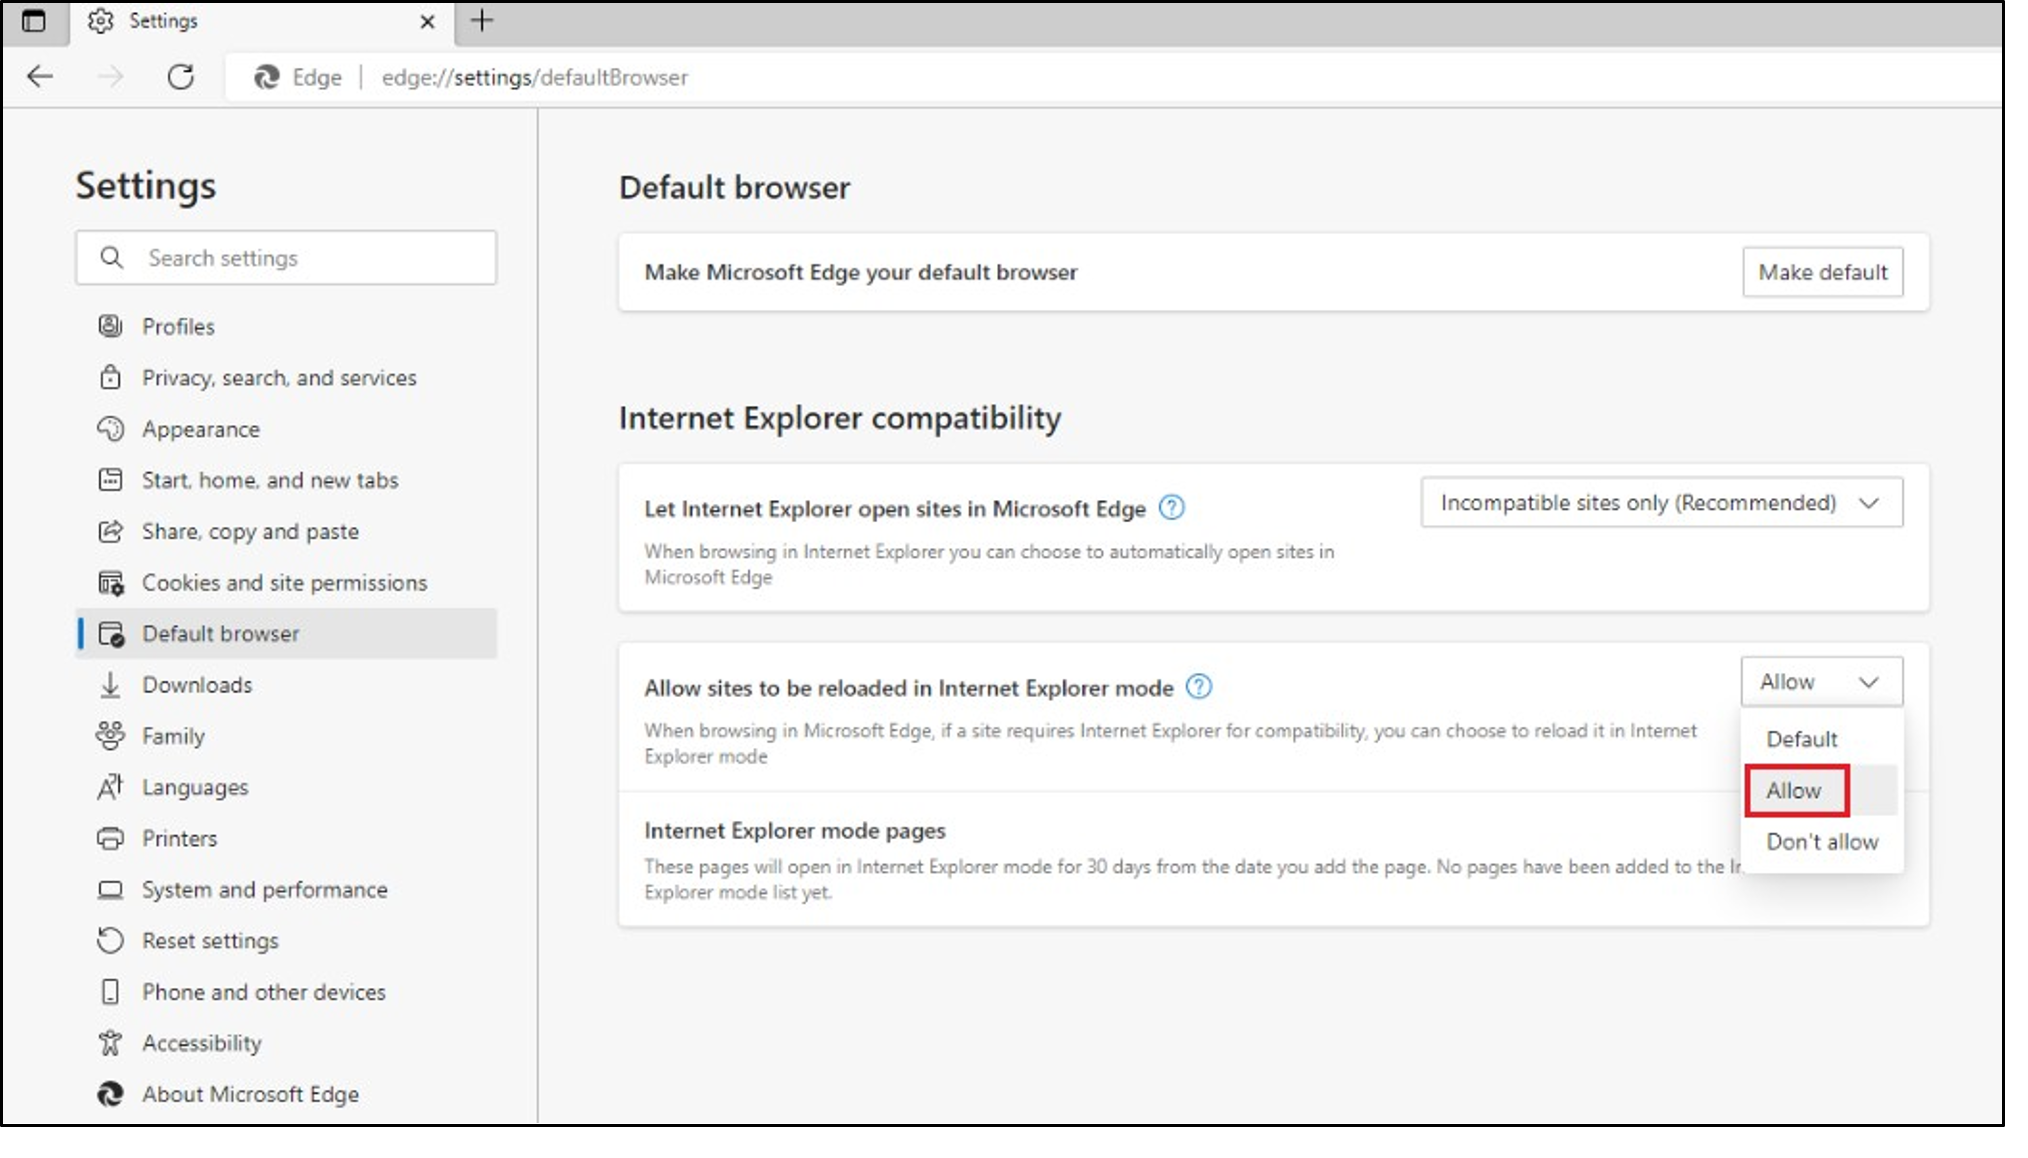
Select Allow from the Allow sites to be reloaded in Internet Explorer mode dropdown.
-
You will be prompted to restart the browser. Click Restart.
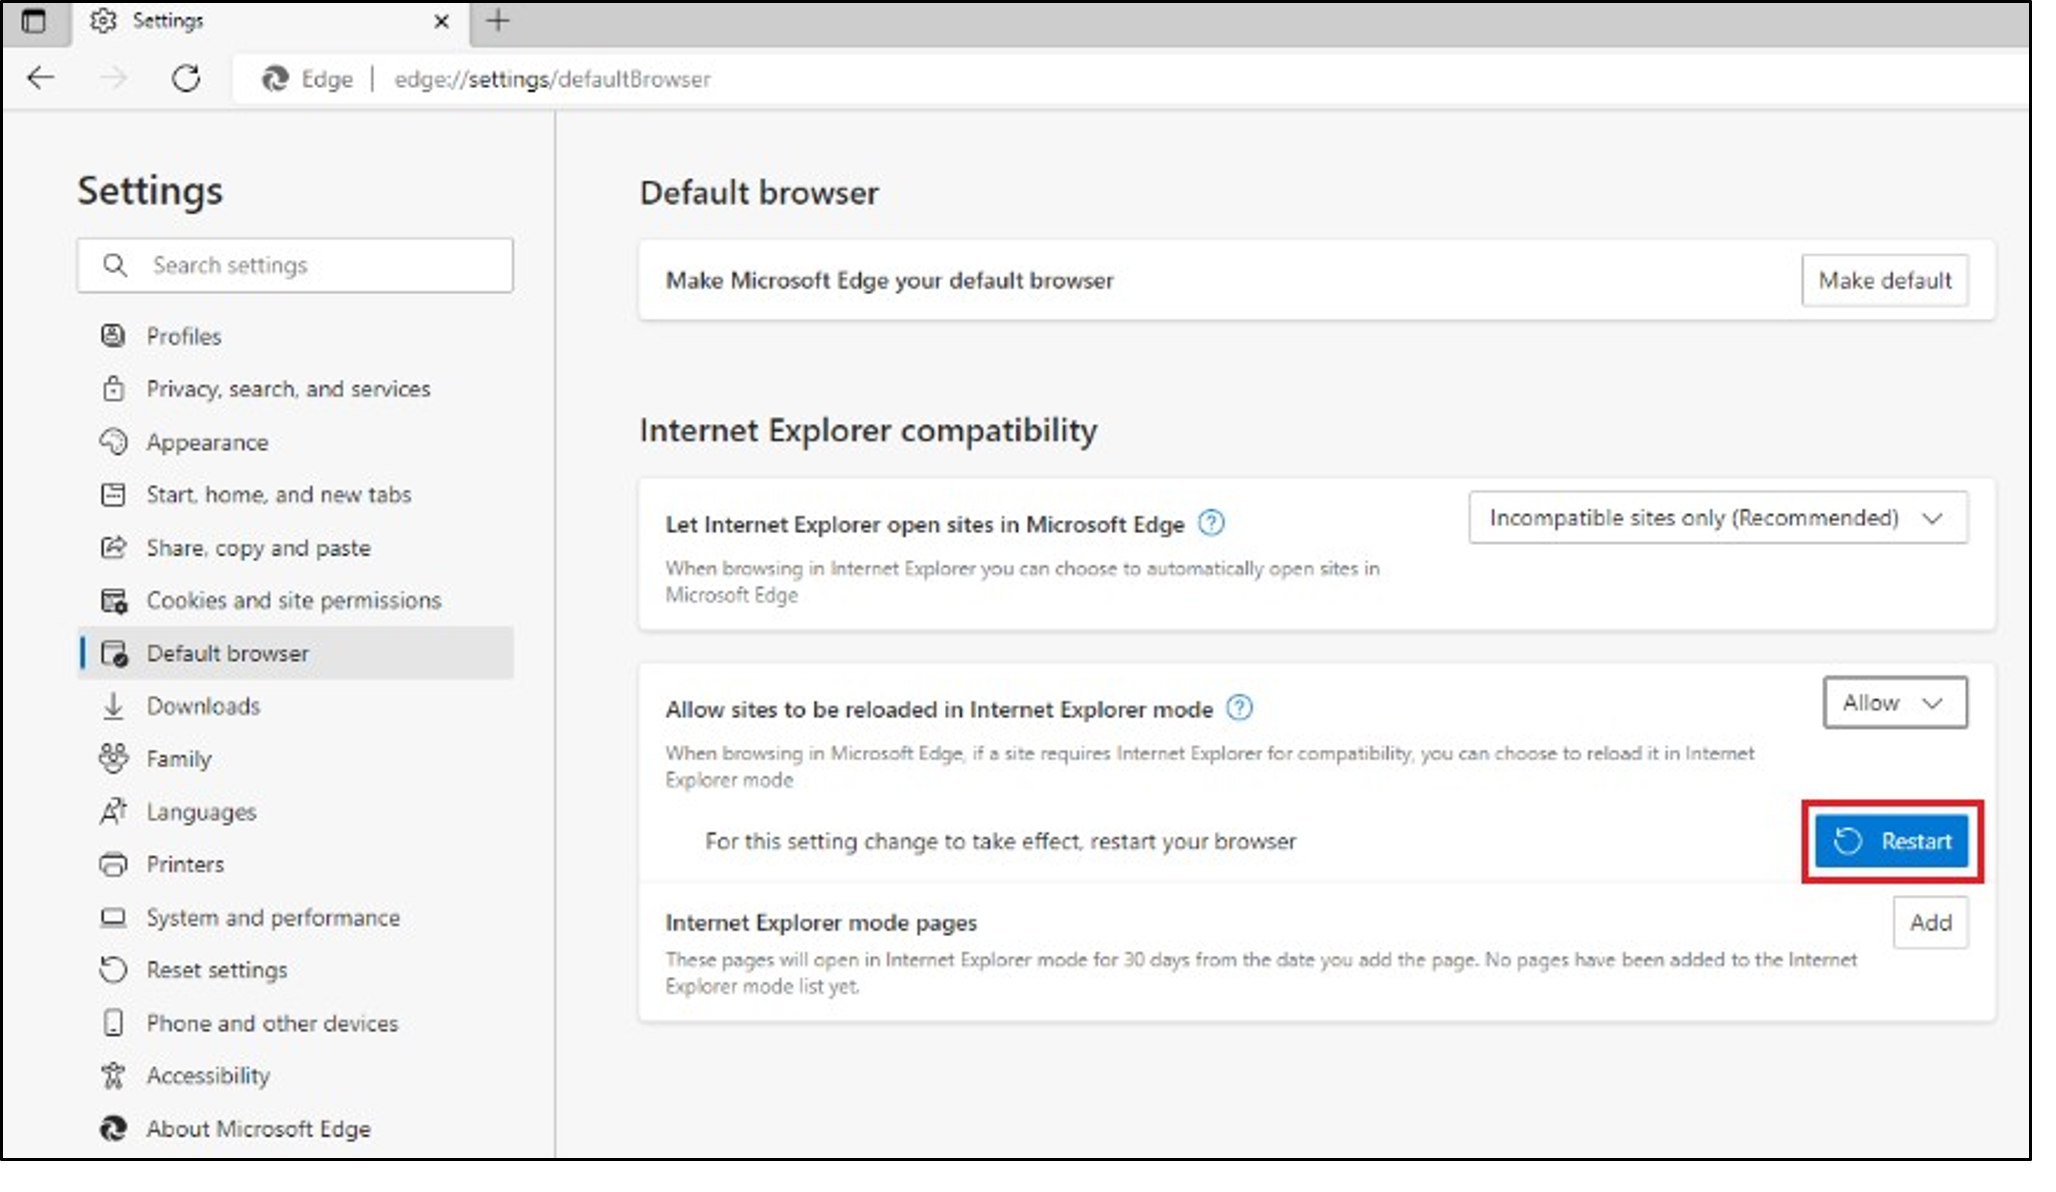
Alternatively, you can restart the Edge browser manually.
-
Click Add next to Internet Explorer mode pages.
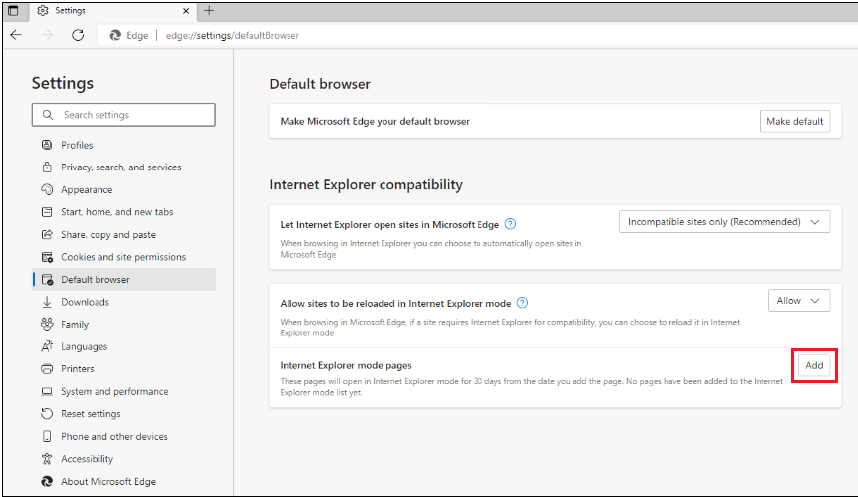
Add a page pop-up window will be displayed.
-
In the Enter a URL field, enter the RDWeb URL, for example,
https://<hostname>/RDWeb. Click Add.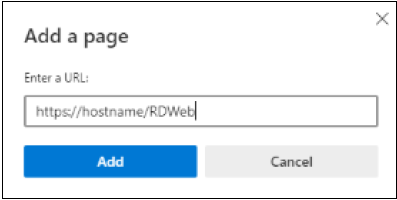
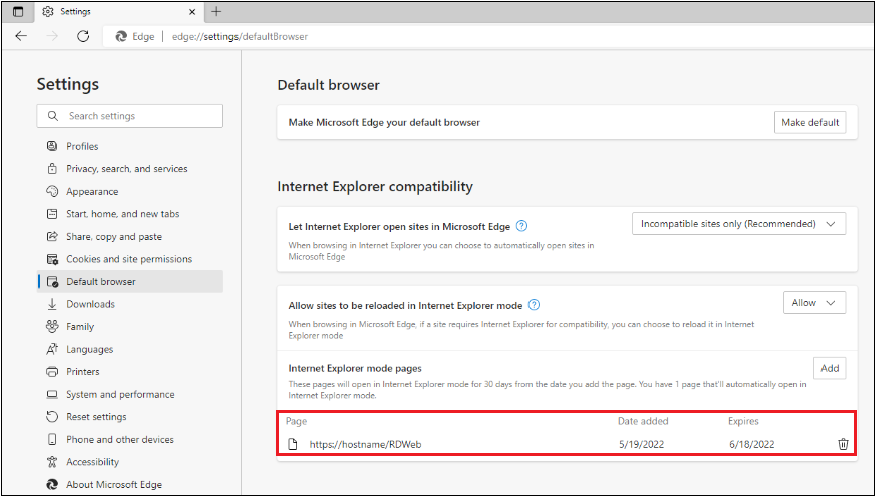
The URL will be added to the Page list.
Certificates
The following types of certificates are required:
- SHA256 signed certificate used for gateway access token signing with a private key — To be installed at Local Computer > Personal on RD Web Server.
For details on creating certificates for gateway access tokens, refer to Creating Certificates for Gateway Access Tokens.
- General purpose SHA1/SHA256 signed certificate, which is capable of digital signing — To be installed at Local Computer > Personal on RD Web. The purpose of this certificate is to identify the publisher of the RDP file to the user. It is recommended that the certificate is either generated from a trusted enterprise Certificate Authority (CA) or from any of the commercial certificate authorities. This certificate type (SHA1 or SHA256) should be the same as the one used for your default RD Web setup. It comes with the default RD Web install and helps in identification of the entity, which is distributing the RDP file, in this case, the enterprise itself.
Note
If RD Web and RD Gateway are deployed on separate machines, create the SHA256 certificate on the RD Web machine, and then export it without a private key to the RD Gateway machine. The RD Web needs a certificate with the private key, whereas RD Gateway needs only the public key.
Configuring RDG_CAP_AllUsers Network Policy
-
Open the Network Policy Server application.
-
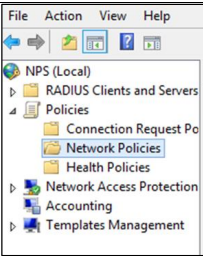
In the left pane, click NPS > Policies > Network Policies.
-
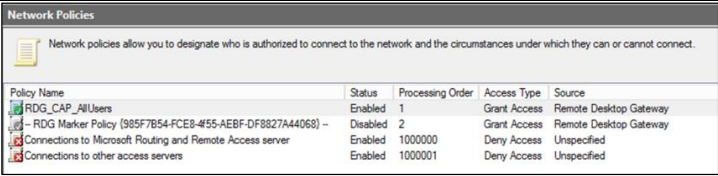
In the right pane, double-click RDG_CAP_AllUsers.
-
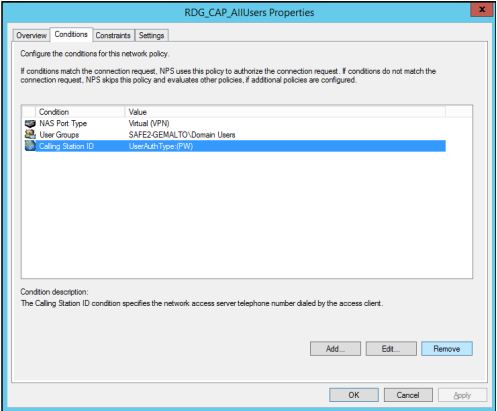
On the RDG_CAP_AllUsers Properties window, on the Conditions tab, select the Calling Station ID condition, and then click Remove.
-
Click OK.
-
Restart the NPS service.
Updating RD Gateway Configuration With Certificate Info
-
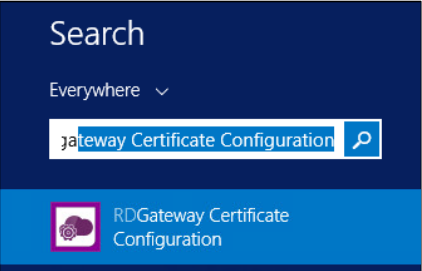
On the computer where you have installed the RD Gateway component of the agent, search for the RD Gateway Certificate Configuration application, and click it.
Note
If you have not logged into the system as an administrator, run the RD Gateway Certificate Configuration application as an administrator.
-
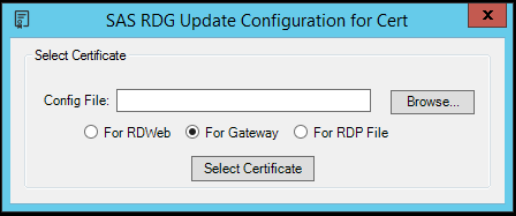
On the SAS RDG Update Configuration for Cert window, perform the following steps:
a. Select the For Gateway option.
b. Click Browse and select the following file:
<SystemDrive>\RDGPlugins\RD GatewayTokenVerification.dll.configNote
SystemDrive is a special system-wide environment variable found on Windows NT and its derivatives. Its value is the drive upon which the system directory was placed. In most of the cases, "C:" is the value of this variable.
c. Click Select Certificate.
-
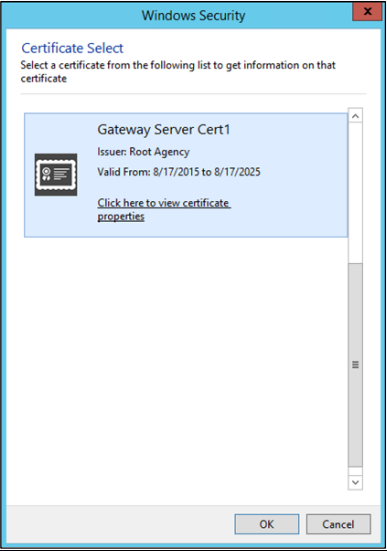
On the Windows Security window, select the SHA256 certificate intended for the gateway access token signing, and click OK.
-
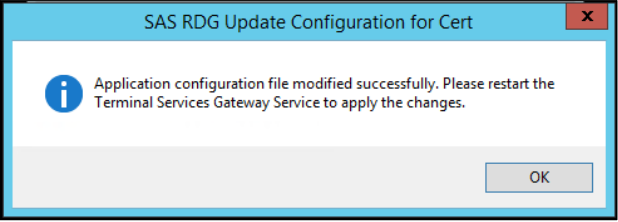
Click OK.
Updating RD Web Configuration With Certificate Info
-
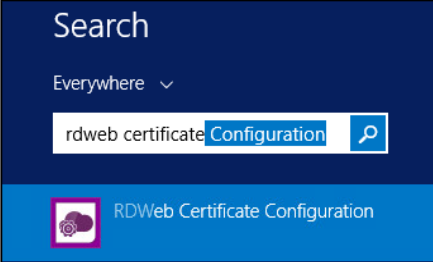
On the computer where you have installed the RD Web component of the agent, search for the RD Web Certificate Configuration application, and click it.
Note
If you have not logged into the system as an administrator, run the RD Gateway Certificate Configuration application as an administrator.
-
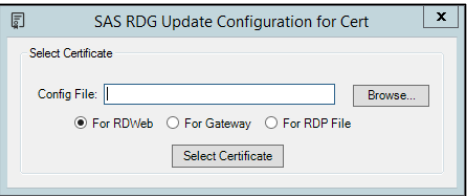
On the SAS RDG Update Configuration for Cert window, perform the following steps:
a. Select the For RD Web option.
b. Click Browse and select the following file:
<SystemDrive>\Windows\Web\RD Web\Pages\Web.configc. Click Select Certificate.
-
On the Windows Security window, select the SHA256 certificate intended for the gateway access token signing, and click OK.
-
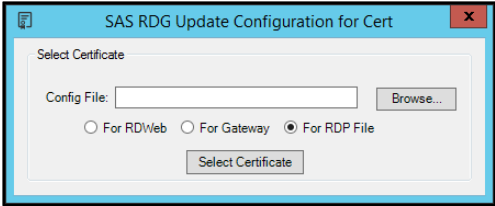
On the SAS RDG Update Configuration for Cert window, perform the following steps:
a. Select the For RDP File option.
b. Click Browse and select the following file:
<SystemDrive>\Windows\Web\RD Web\Pages\Web.configc. Click Select Certificate.
-
On the Windows Security window, select the SHA1/SHA256 certificate intended for digitally signing the RDP file, and click OK.
-
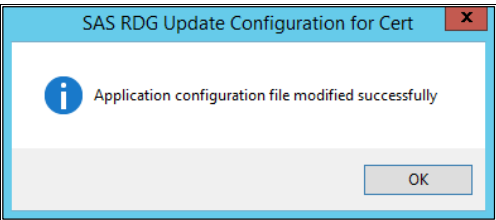
Click OK.
Configuring RD Web Parameters
-
Open the
web.configfile available at the following path:<SystemDrive>\windows\web\RD Web\pages -
Edit the following keys with an appropriate value, if required:
Key with no value Description <add key="RDPSignPath" value=""/>Path for the RDPSign utility. By default, the RDPSign utility is available in the system32 folder. <add key="RDPSignCertHashCode" value=""/>SHA1/SHA256 certificate hash code used for RDPSign. This is updated when you run the RD Gateway Agent Select Certificate Tool. <add key="RDPSignAlgo" value=""/>Signature Algorithm used for RDPSign. This is updated when you run the RD Web Agent Select Certificate Tool. <add key="RDPTokenTimeout" value=""/>RDP file validity, in minutes. <add key="CertThumbPrint" value=""/>SHA256 certificate for RD gateway access token hash creation. This is updated when you run the RD Gateway Agent Select Certificate Tool. <add key="DefaultTSGateway" value=""/>The hostname of the default Terminal Server Gateway. <add key="PublicModeSessionTimeoutInMinutes" value="" />The minutes after which the session will timeout, if This is a public or shared computer is selected as a security option on the gateway authentication window. <add key="PrivateModeSessionTimeoutInMiniutes" value="" />The minutes after which the session will timeout, if This is a private computer is selected as a security option on the gateway authentication window. Example of RD Web parameters in the web.config file:
<configuration> . . <appSettings> <add key="RDPSignPath" value="c:\windows\system32" /> <add key="RDPSignCertHashCode" value="6356cd93eb124ac48bc881a5089c4608702205d5"/> <add key="RDPSignAlgo" value="sha256RSA"/> <add key="RDPTokenTimeout" value="60" /> <add key="CertThumbPrint" value="52c6726c657c15c2a00ea3f4cfd1e89f3785"/> <add key="RDPFilePath" value="" /> <add key="DefaultTSGateway" value="Gateway.agent.com"/> <add key="PublicModeSessionTimeoutInMinutes" value="20" /> <add key="PrivateModeSessionTimeoutInMiniutes" value="240" /> </appSettings> . . <configuration> -
Save and close the web.config file.
Configuring RD Gateway Plugin Parameters
-
Open the
RD GatewayTokenVerification.configfile available at the following path:<SystemDrive>\RDGPlugins -
Edit the following keys with an appropriate value, if required:
Key with no value Description <add key="CertThumbPrint" value=""/>SHA256 certificate for RD gateway access token hash validation. This is updated when you run the RD Gateway Agent Select Certificate Tool. <add key="MonitorService" value=" "/>Name of the Gateway Monitor Service to communicate with. <add key="TokenReplay" value=""/>Enable or disable gateway access token reuse. To reuse gateway access token, set the value to false. Otherwise, set the value to true. By default, the value is set to false. Example of RD Gateway parameters in the RD GatewayTokenVerification.config file:
<configuration> . . <appSettings> <add key="CertThumbPrint" value="52C6726c657c15c2a082d30ea3f4cfd1e89f3785"/> <add key="MonitorService" value="SASRDGMonitor"/> <add key="TokenReplay" value="true"/> </appSettings> . . <configuration> -
Save and close the RD GatewayTokenVerification.config file.
-
Restart the RD Gateway service.
Configuring RD Gateway Monitor Parameters
-
Open the
RD GatewayMonitorservice.exe.configfile available at the following path:<SystemDrive>\RD GatewayMonitor -
Edit the following keys with an appropriate value, if required:
Key with no value Description <add key="RDPPath" value=""/>Path for reading authenticated and cancelled gateway access token queue. <add key="MonitorInterval" value=""/>Interval, in seconds, for monitoring active connections. <add key="Debug" value=" "/>Enable or disable additional logging. Example of RD Gateway Monitor parameters in the RD GatewayMonitorservice.exe.config file:
<configuration> . . <appSettings> <add key="RDPPath" value="c:\rdgplugins\rdp"/> <add key="MonitorInterval" value="5"/> </appSettings> . . <configuration> -
Save and close the RD GatewayMonitorservice.exe.config file.
-
Restart the SAS RD Gateway Monitor service.
Blocking Direct Access To Remote Machines
If a client machine can directly access the remote machine (session host), the SafeNet Agent for RD Gateway Agent will not work. To block direct access to the remote machine, complete the following steps:
-
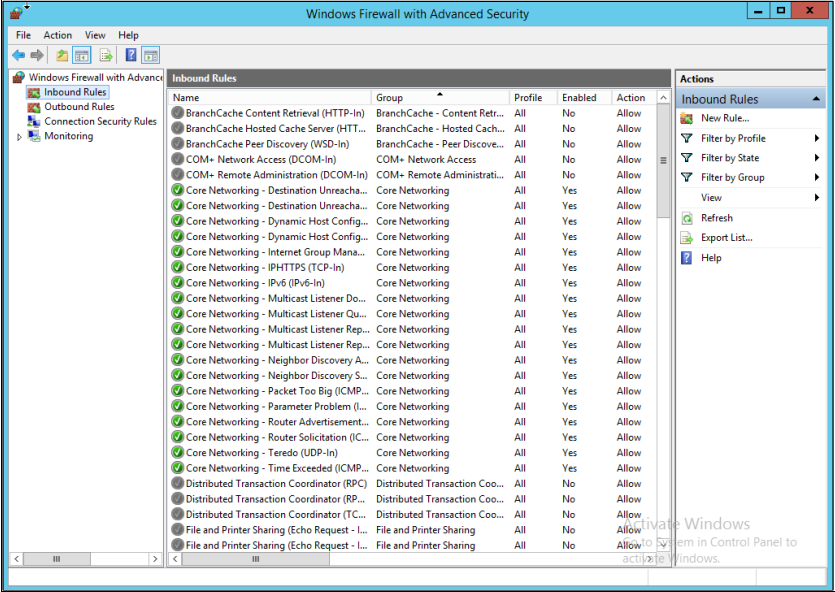
On the remote machine, open Windows Firewall with Advanced Security.
-
In the left pane, click Inbound Rules.
-
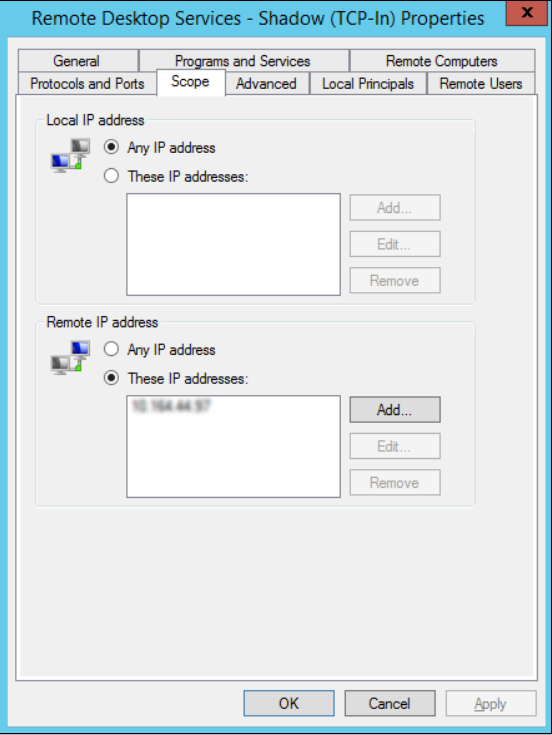
In the middle pane, search for Remote Desktop Services - Shadow (TCP-In) and double-click it.
-
On the Remote Desktop Services - Shadow (TCP-In) Properties window, click the Scope tab.
-
Under Remote IP address, select These IP addresses.
-
Click Add and then add IP address of the RD Gateway server.
-
Click OK.
-
Repeat steps 3 to 7 for Remote Desktop Services – User Mode (TCP-In) and Remote Desktop Services – User Mode (UDP-In).
Now, connection to the remote machine can be established only through the RD Gateway server.
Performing Web Browser Settings
The web browser settings to be completed on the client machine are given below.
-
In the Internet Explorer web browser, click Tools > Internet Options.
-
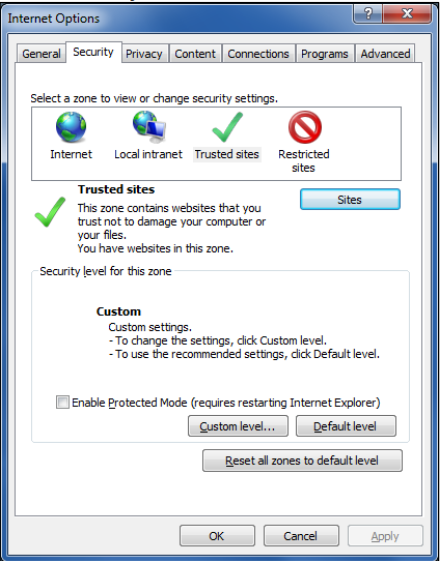
Click the Security tab. Select the Trusted sites zone, and click Sites.
Note
Please make sure that the Enable Protected Mode... checkbox is clear.
-
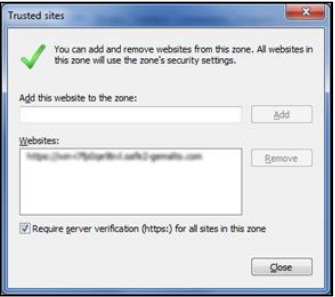
On the Trusted sites window, perform these steps:
a. In the Add this website to the zone field, enter the URL of the website that you want to add as a trusted website.
b. Click Add.
c. Click Close.
-
On the Security tab, click Custom level.
-
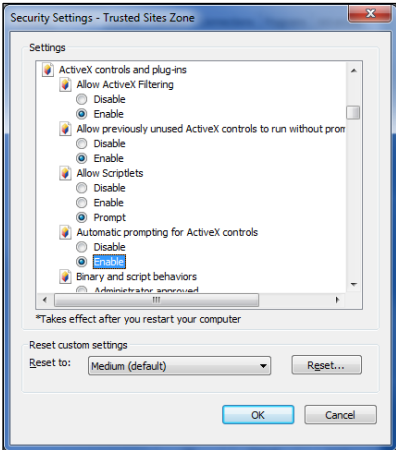
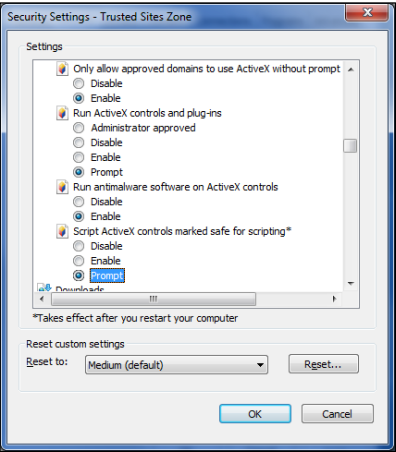
Under ActiveX controls and plug-ins, configure settings as described below. Then, click OK.
Setting Value Download signed ActiveX controls Disable Download unsigned ActiveX controls Disable Initialize and script ActiveX controls not marked as safe for scripting Enable Allow Scriptlets Prompt Automatic prompting for ActiveX controls Enable Only allow approved domains to use ActiveX without prompt Enable Run ActiveX controls and plug-ins Prompt Run antimalware software on ActiveX controls Enable Script ActiveX controls marked safe for scripting Prompt 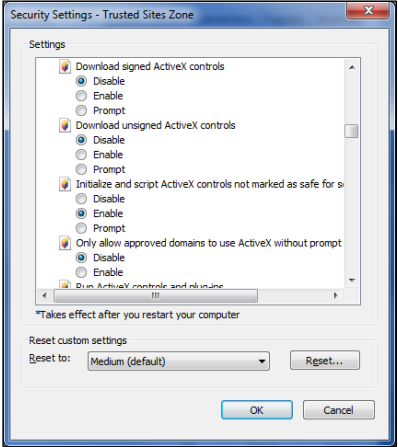
RD Gateway ActiveX Control
Installing RD Gateway ActiveX Control Silently
To install the RD Gateway Active X control in silent mode, run the following command as an administrator:
ActiveXforSafenetAuthenticationServiceAgent.exe /s /v/qn
Uninstalling RD Gateway ActiveX Control Silently
To uninstall the RD Gateway Active X control in silent mode, run the following command as an administrator:
ActiveXforSafenetAuthenticationServiceAgent.exe /x /s /v/qn
Installing RD Gateway ActiveX Control Via Installer
Run the ActiveX for Safenet Authentication Service Agent installer. If you have logged into the system as an administrator, the installation process will run successfully.
-
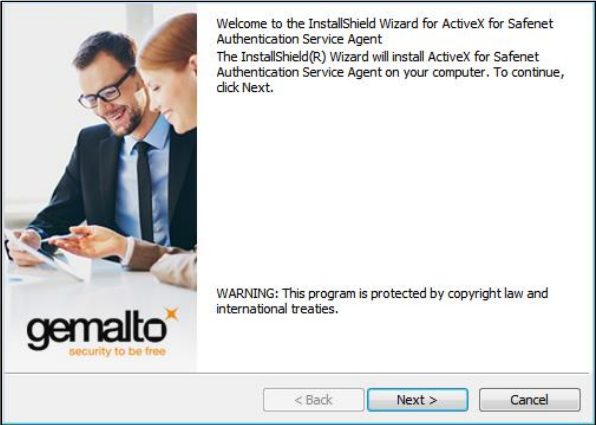
On the Welcome window, click Next.
-
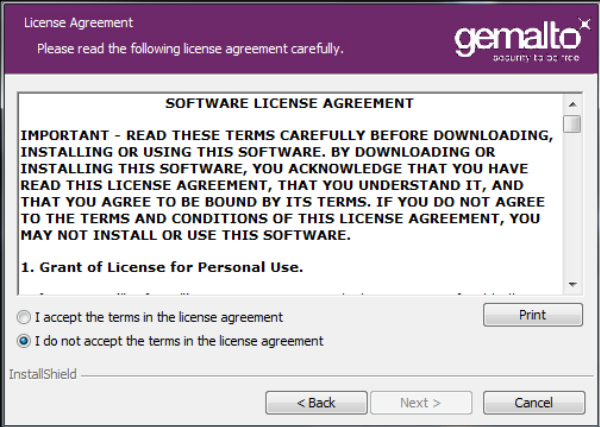
On the License Agreement window, select I accept the terms in the license agreement, and then click Next.
-
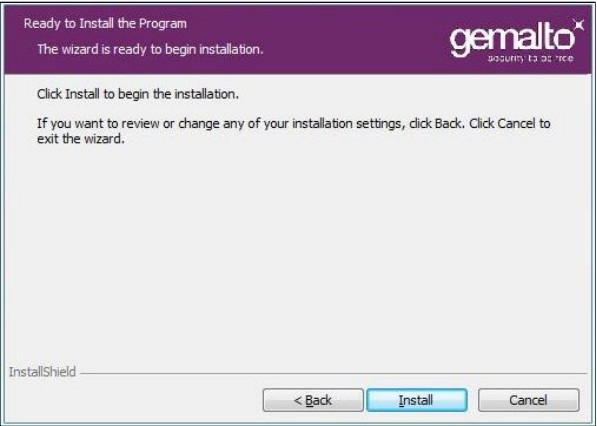
On the Ready to Install the Program window, click Install to begin the installation.
-
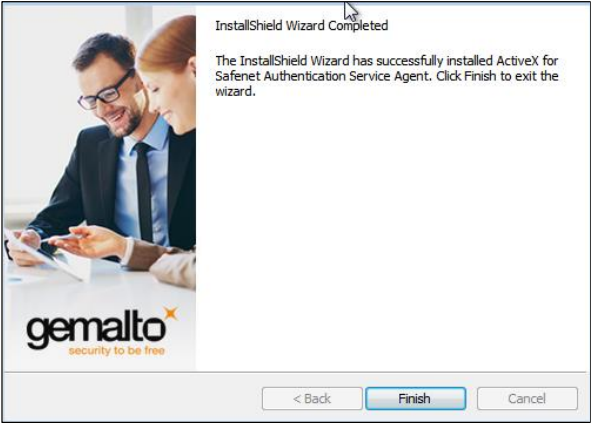
When the process completes, the InstallShield Wizard Completed window opens. Click Finish to exit the installation wizard.