



Setting up SAE
Configuring the IdP (for example, SafeNet Access Exchange) requires:
- Creating a client
- Generating a private key and selecting the credentials type for the client
- Configuring the client
Tip
Steps 1 and 3 can be completed faster by importing a pre-configured JSON file with a few modifications, instead of using the SAE UI. See Alternative: Configuring SAE using JSON import. Step 2 must always be completed manually using the SAE UI.
Creating a client
Perform the following steps to create a client in SafeNet Access Exchange (SAE):
-
Log in to SAE as an administrator.
-
On the administrator console, select your realm (for example, SAS).
-
In the left pane, under Manage, click Clients, and in the right pane, click Create client.
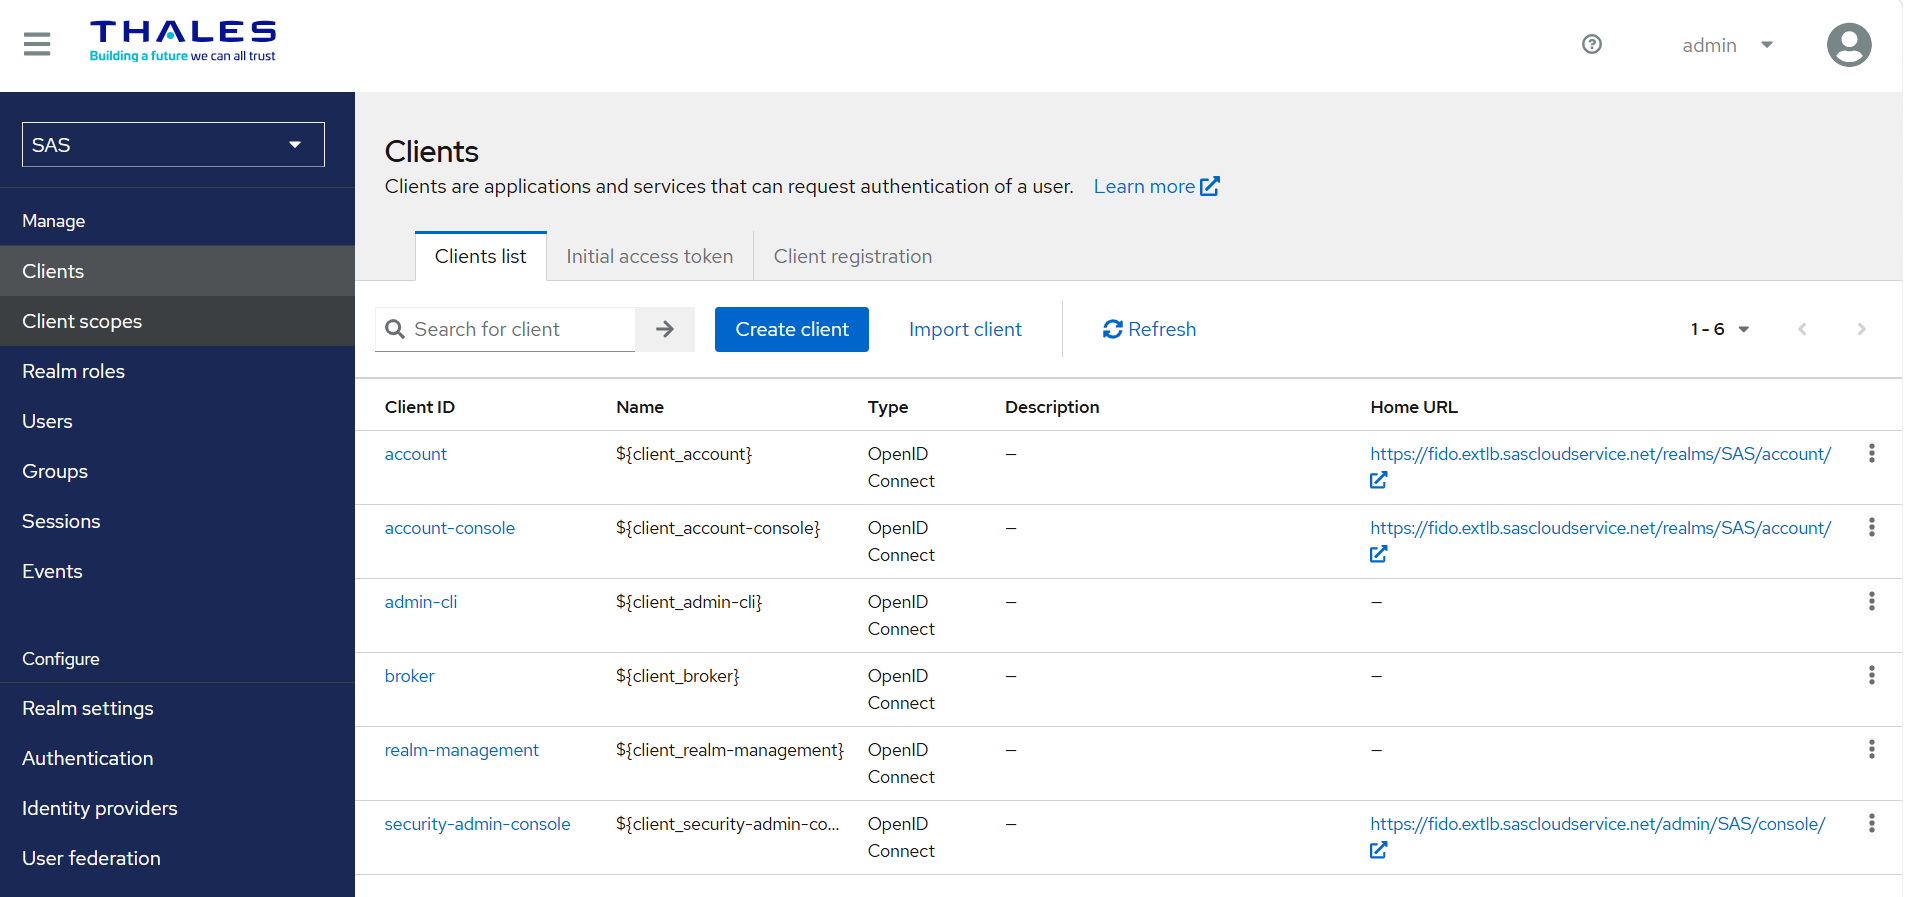
-
Under Create Client, perform the following steps:
-
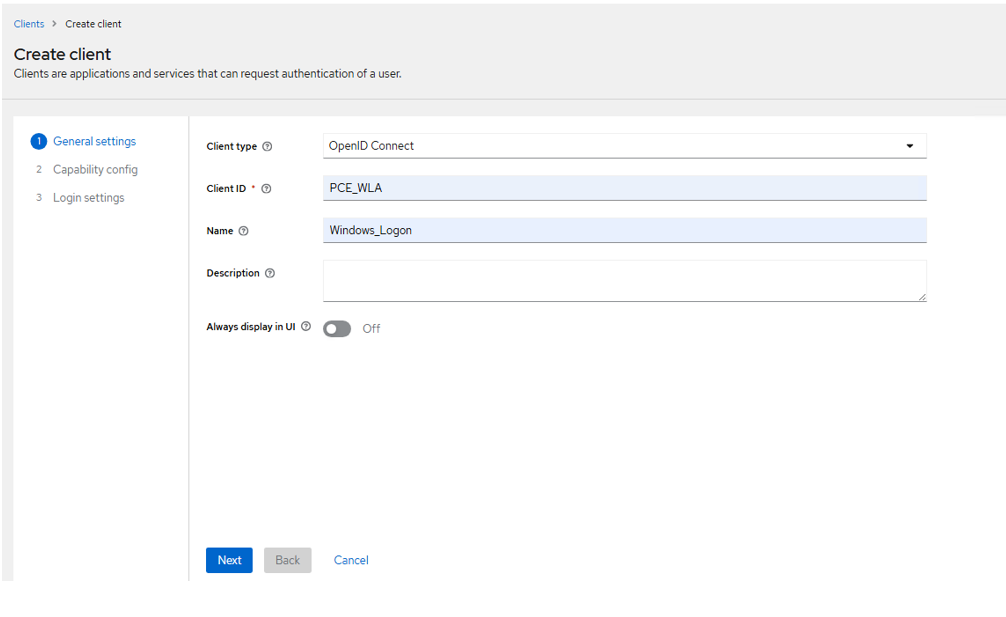
Under General Settings, perform the following steps:
-
In the Client type field, select OpenID Connect.
-
In the Client ID field, enter a client ID, which is a unique identifier for your application (for example, PCE_WLA). It is an alpha-numeric string that is used to identify the client in OpenID Connect (OIDC) requests. You can create this ID manually or use a naming convention that aligns with your organization's requirements.
-
(Optional) In the Name field, enter a name of your choice (for example, Windows_Logon).
-
Click Next.
-
-
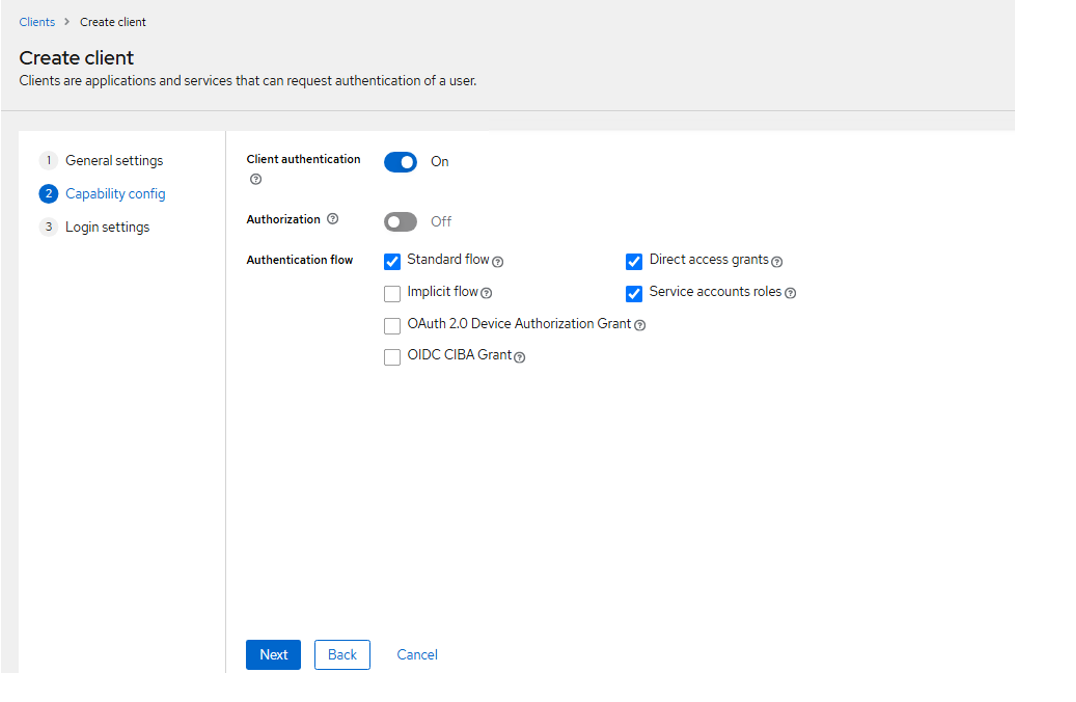
Under Capability config, perform the following steps:
-
Enable the Client authentication toggle button.
-
Under Authentication flow, select the Standard flow, Direct access grants, and Service accounts roles checkbox.
-
Click Next.
-
-
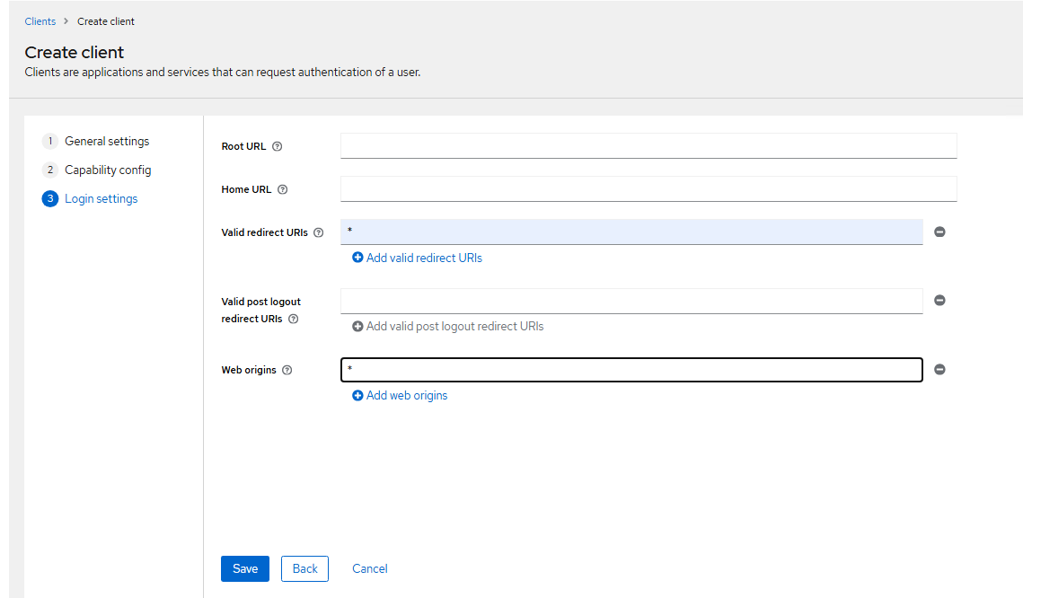
Under Login settings, perform the following steps:
-
In the Valid redirect URIs field, enter
"*"as the Windows Logon instance URL. -
Click Save to complete the client configuration.
-
-
Generating a private key and selecting the credentials type for the client
Under the client that you have created earlier, for example, PCE_WLA, perform the following steps:
-
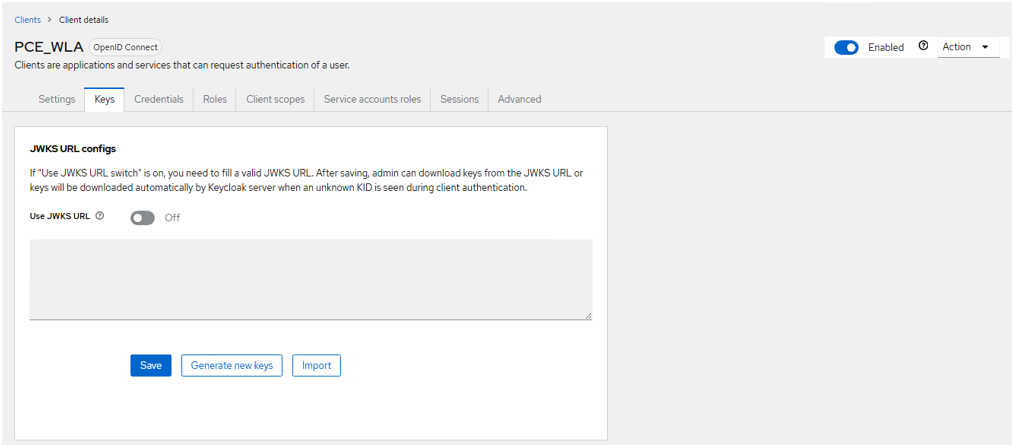
On the Keys tab, click Generate new keys to generate a private key for the client.
-
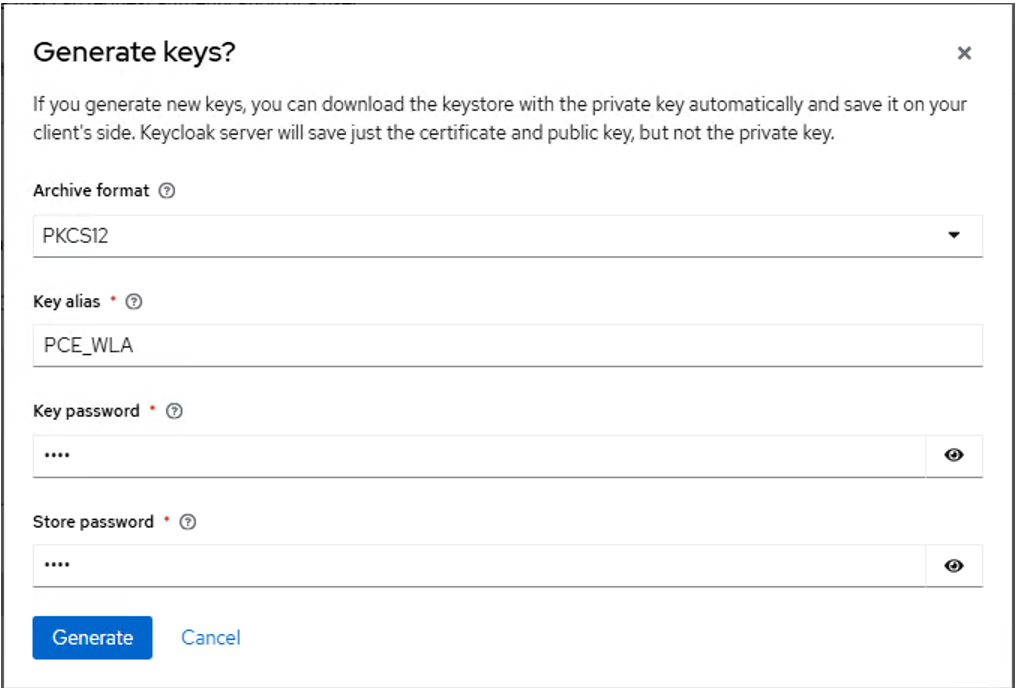
Under Generate keys?, perform the following steps:
-
In the Archive format field, select PKCS12.
-
In the Key alias field, ensure that client ID is present (for example, PCE_WLA).
-
In the Key password field, enter a value as per your preferred configuration.
-
In the Store password field, enter a value as per your preferred configuration.
-
Click Generate. The
keystore.p12file will be downloaded on your local machine, which contains the private key.
-
-
-
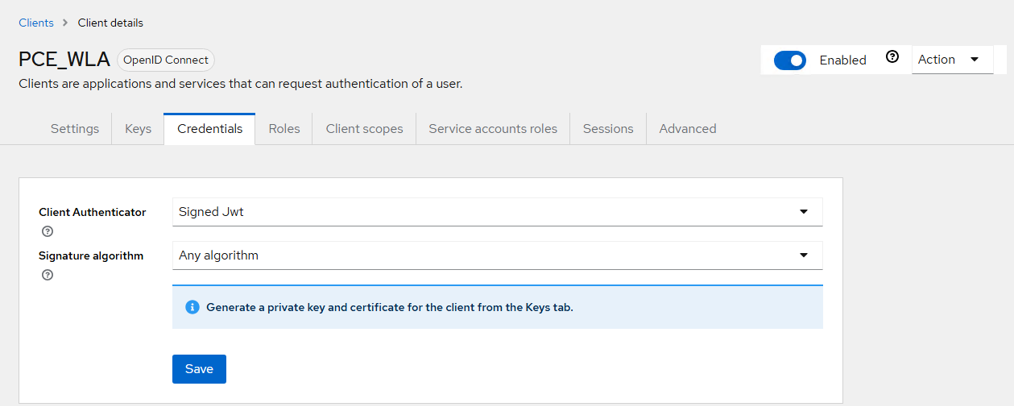
On the Credentials tab, perform the following steps:
-
From the Client Authenticator dropdown, select Signed Jwt.
-
Click Save.
-
-
On an Ubuntu machine, run the following command to extract the RSA private key from the
keystore.p12file:openssl pkcs12 -in keystore.p12 -nodes -nocerts | openssl rsa -out OUTFILE.key
Configuring the client
Additional steps for UCA:
-
In SAE, navigate to your Client > ClientScopes. Click on the
-dedicated option.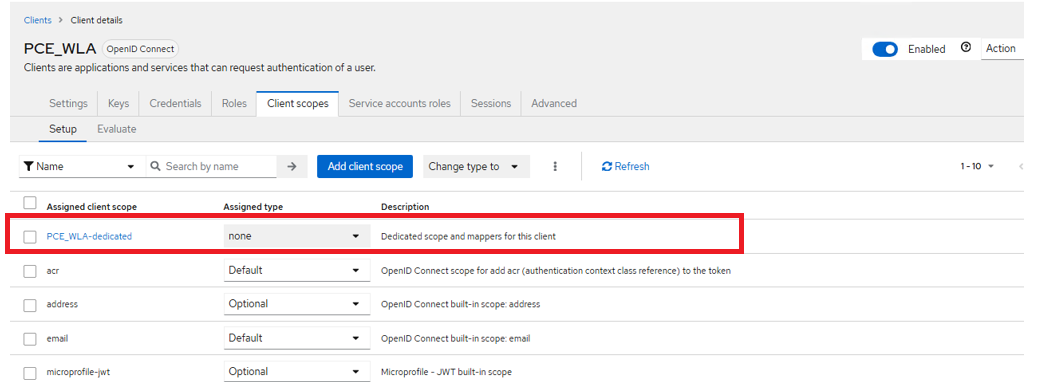
-
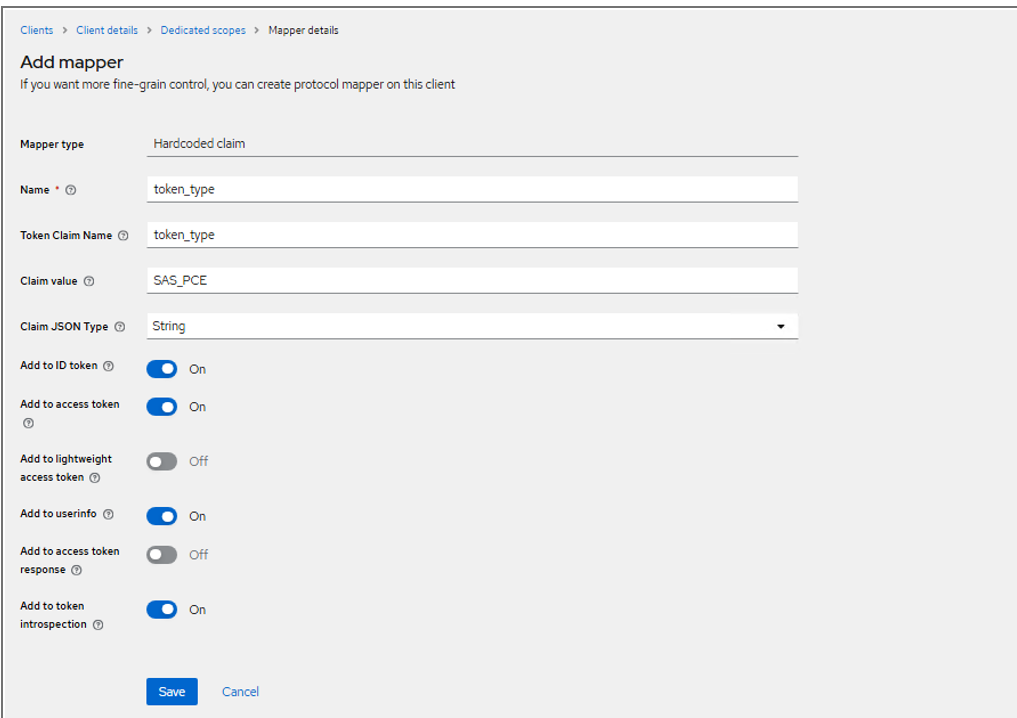
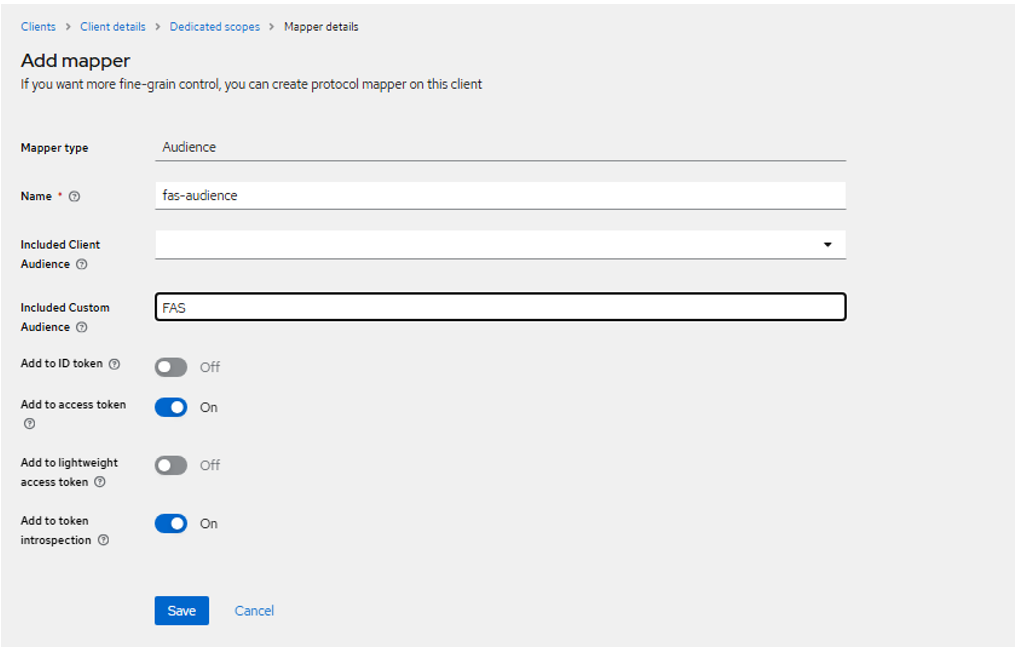
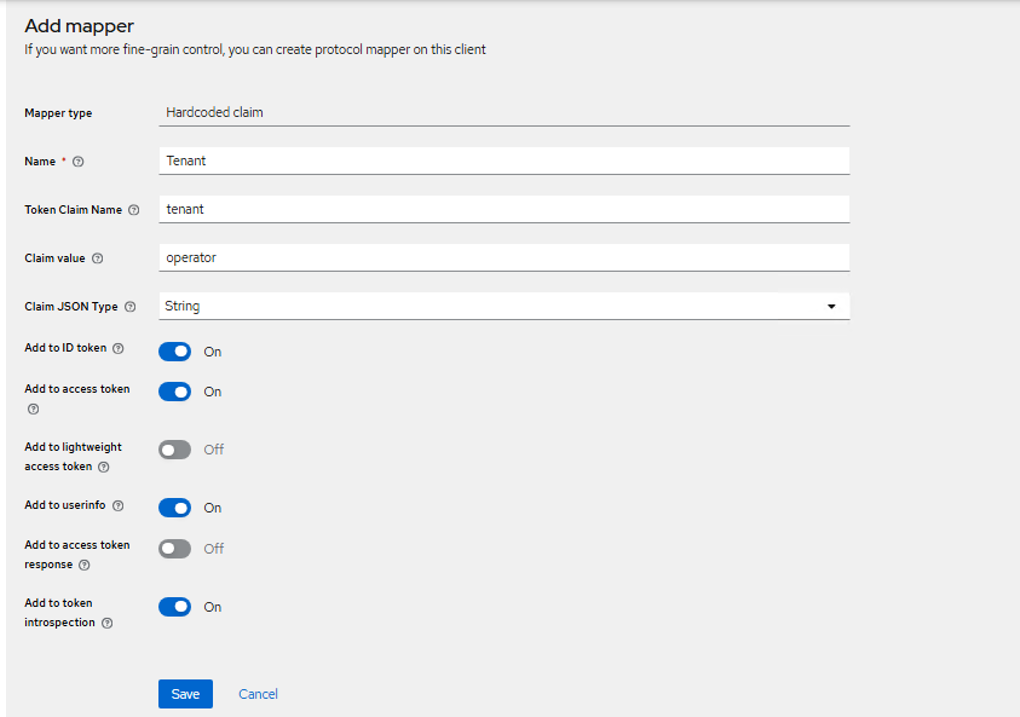
Configure the following claims and audience. To add a hardcoded claim or audience, click Add Mapper, select the By Configuration option, and then choose either Hardcoded Claim or Audience.
-
Configure the claims and audience as follows:
-
Token Type Hardcoded Claim
-
FAS Audience
-
Tenant Hardcoded Claim
-
-
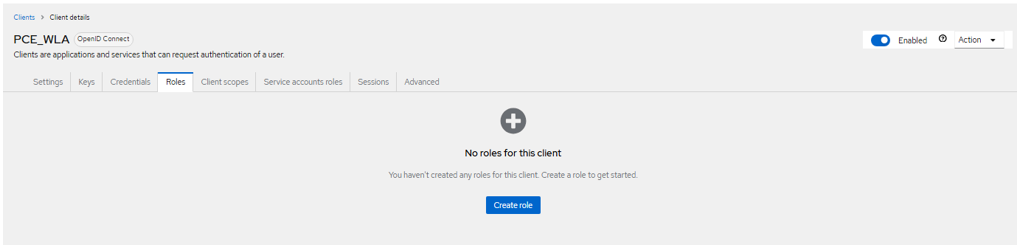
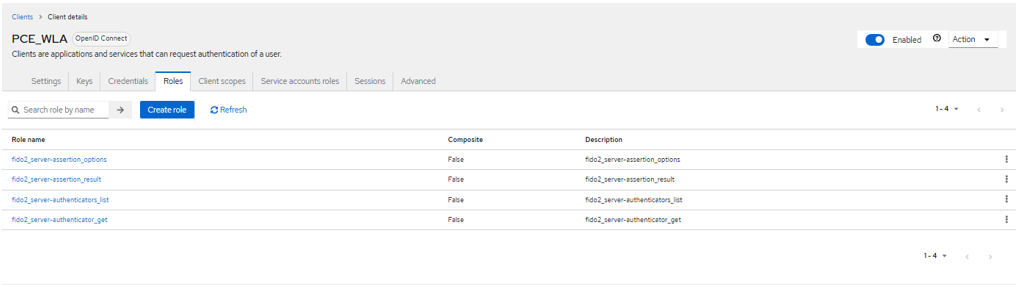
Assign the FIDO roles to the client to enable FIDO authentication. In SAE, navigate to Client > Roles, and perform the following steps to add the four required FIDO roles one by one:
-
Click Create role.
-
In the Role name field, enter the role name and click Save. Repeat this step for each of the following roles:
fido2_server-assertion_resultfido2_server-authenticators_listfido2_server-authenticator_getfido2_server-assertion_options
-
Click Save.
-
Alternative: Configuring SAE using JSON import
As an alternative to the manual UI steps in Creating a client and Configuring the client, you can import a pre-configured JSON file into SAE and make a few modifications. This approach is faster when setting up multiple environments or repeating the configuration.
Note
Step 2 — Generating a private key and selecting the credentials type for the client — must always be completed manually using the SAE UI. The JSON import does not cover key generation.
Step 1: Update the JSON file
Before importing, open the provided SAE_Configuration.json file present in the package in a text editor and replace the following placeholders with your actual values everywhere they appear in the file:
| Placeholder | Field | Description | Example |
|---|---|---|---|
<application_name> |
Client ID | The unique identifier for your client. This placeholder appears in the clientId, roles, users, and serviceAccountClientId fields. Replace all occurrences with your chosen client ID. |
PCE_WLA |
<application_friendly_name> |
Friendly name | The display name for the client. This placeholder appears in the client name field. Replace all occurrences with your chosen display name. |
Windows_Logon |
<application_description> |
Description | A brief description of the client. This placeholder appears in the client description field. Replace all occurrences with a meaningful description. |
SAS PCE Windows Logon Agent |
Caution
Search the entire JSON file for <application_name>, <application_friendly_name>, and <application_description>, and replace every occurrence with your actual values. The <application_name> placeholder appears in multiple locations throughout the file, including client roles, service account configuration, and the client definition. Leaving any placeholder unchanged will cause the import to fail or produce an incorrect configuration.
Step 2: Import the JSON file into SAE
Perform the following steps to import the updated JSON file:
-
Log in to SAE as an administrator and select your realm.
-
In the left pane, under Manage, click Realm roles.
-
Click default-realm-roles.
-
Click Action > Partial import.
-
Click Browse, select the updated PCE_WLA_client.json file, and click Import.

