Creating Certificates For Gateway Access Tokens
Creating Certificates Using makecert Command
If you want to generate a certificate on your own using the Command Line Interface (CLI), use the following command:
makecert [basic | extended options] [outputCertificateFile]
Example of the makecert command:
makecert -pe -n "CN=Gateway Server Cert" -b 08/17/2015 -e 08/17/2025 -ss My -sr LocalMachine -sky exchange -sy 24 -a sha256
Note
MakeCert is available as part of the Windows SDK, which you can download from Microsoft's website.
Command Options
The table below contains the list of options used in the above command:
| Command Option | Description |
|---|---|
-pe |
Mark generated private key as exportable |
-ss <store> |
Subject's certificate store name that stores the output certificate |
-sr <location> |
Subject's certificate store location <CurrentUser \| LocalMachine>. Default value used is CurrentUser. |
-n <X509name> |
Certificate subject X500 name (for example, CN=Fred Dews) |
-a <algorithm> |
The signature's digest algorithm, which should be SHA256. |
-sy <type> |
Subject's CryptoAPI provider's type |
-sky <keytype> |
Specifies the subject's key type, which must be a signature, an exchange, or an integer that represents a provider type. Here, pass 1 for an exchange key. |
-b <mm/dd/yyyy> |
Start of the validity period; default value used is now |
-e <mm/dd/yyyy> |
End of validity period; defaults value used is 2039 |
Creating Certificates Using Enterprise Certificate Authority
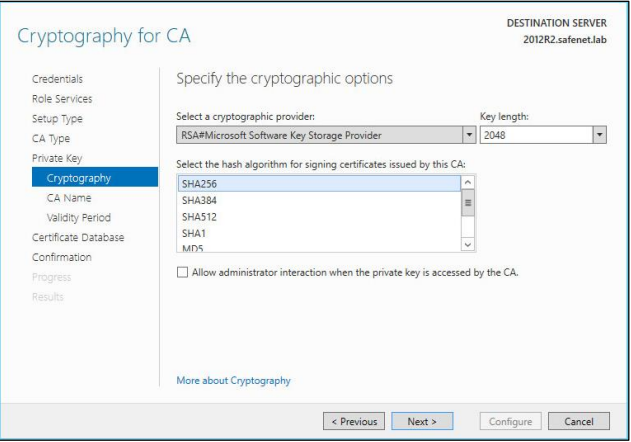
Ensure that the Microsoft Enterprise Certificate Authority is set up. Also, while configuring AD CS, ensure that the SHA256 algorithm is specified as a cryptographic provider for signing certificates.
Note
If you have RD Gateway and RD Web installed on separate machines, perform the steps:
- On the RD Web machine, create a certificate using a certificate template.
- On the RD Web machine, export this new certificate (without a private key).
- On the RD Gateway machine, import this certificate.
The subsections below discuss creating a certificate template and creating a certificate using a template.
Creating Certificate Template For SHA256 Certificates
-
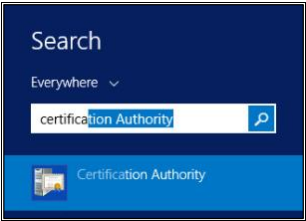
Search for the Certificate Authority application, and click it.
-
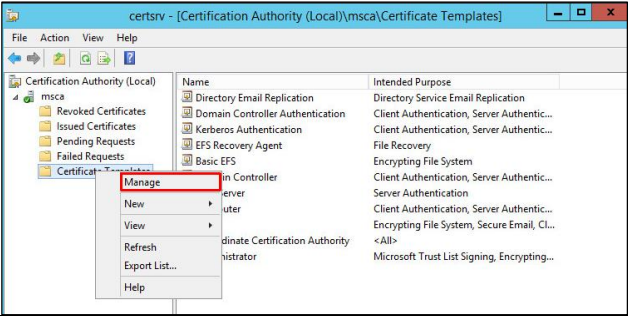
On the Certification Authority Management Console window, in the left pane, right-click Certificate Templates, and then select Manage.
-
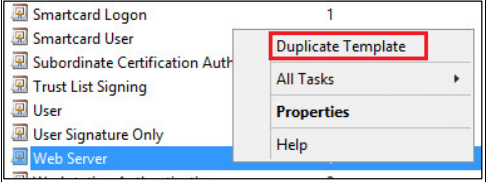
Scroll down to the Web Server certificate template, right-click it, and select Duplicate Template.
-
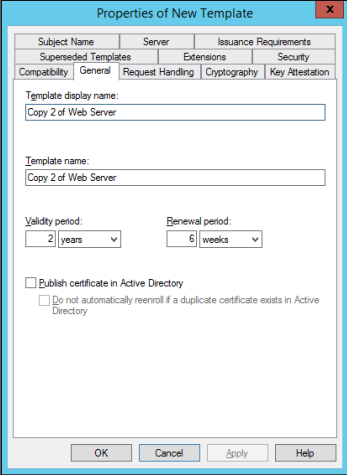
On the Properties of New Template window, on the General tab, enter the Template display name and Template name.
-
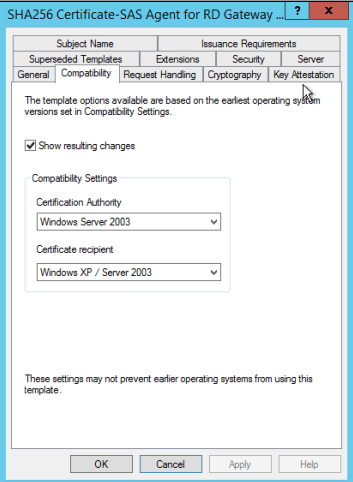
On the Compatibility tab, specify the applicable compatibility settings.
-
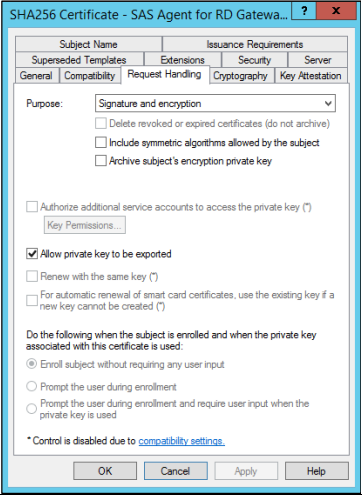
On the Request Handling tab, select Allow private key to be exported if the certificate is to be deployed to multiple servers.
-
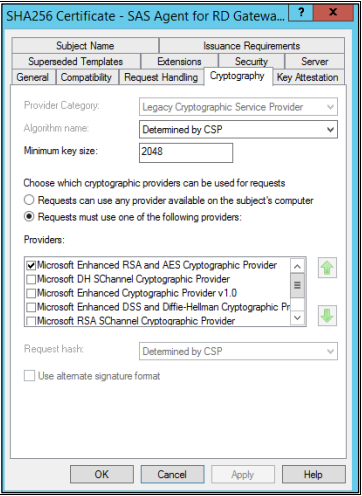
On the Cryptography tab, select Requests must use one of the following providers. Then, in the list of providers, select only Microsoft Enhanced RSA and AES Cryptographic Provider.
-
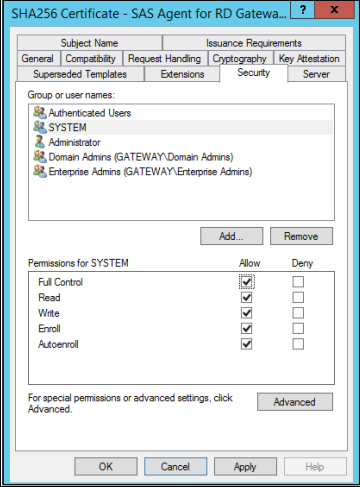
On the Security tab, add SYSTEM as a user. Then, provide Enroll permission to the SYSTEM user.
-
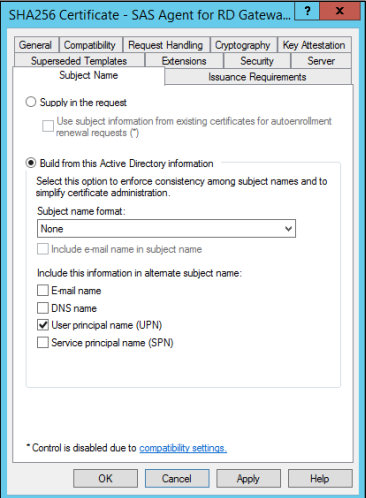
On the Subject Name tab, select Build from this Active Directory information.
-
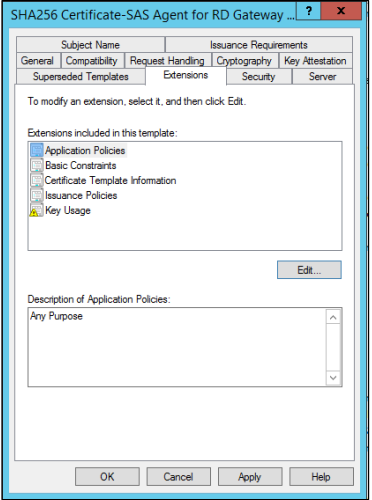
On the Extensions tab, select the Application Policies extension, and then click Edit.
-
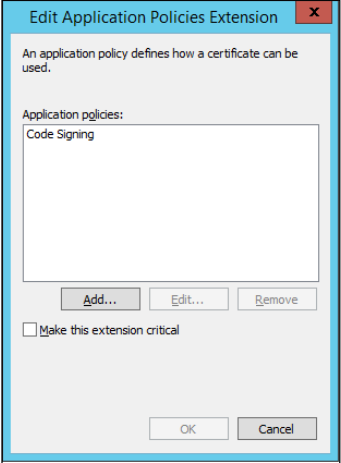
On the Edit Application Policies Extension window, add Code Signing as an application policy, and then click OK.
-
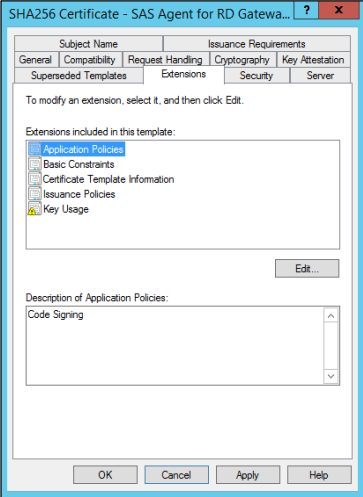
On the Extensions tab, under Description of Application Policies, Code Signing is added. Remove all other application policies. Then, click OK.
-
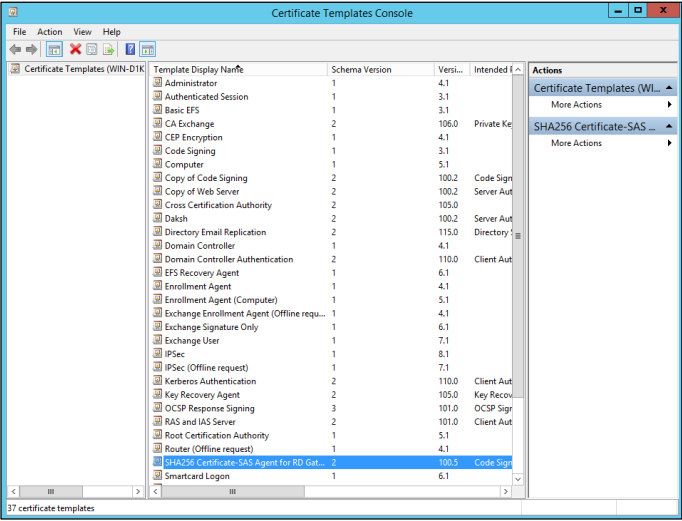
The newly created template, SHA256 Certificate - SAS Agent for RD Gateway, is now available in the list of certificate templates.
-
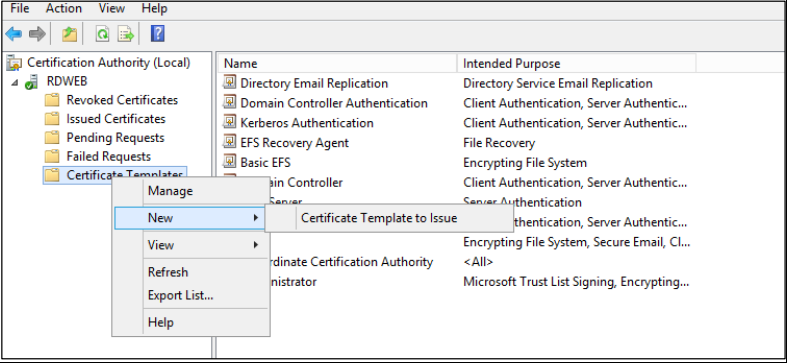
On the Certification Authority Management Console window, in the left pane, expand RD WEB, right-click Certificate Templates, and then click New > Certificate Template to Issue.
-
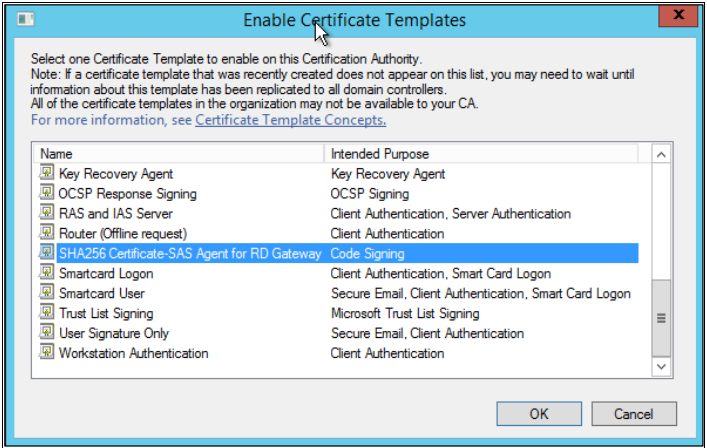
On the Enable Certificate Templates window, select your certificate template, and click OK.
-
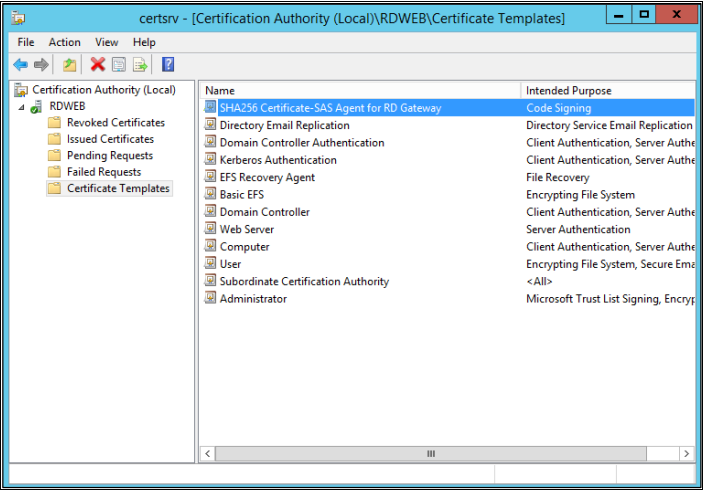
The certificate template you selected is added to the list certificate templates. Close this window.
Creating SHA256 Certificate Using Certificate Template
-
Open the Microsoft Management Console.
-
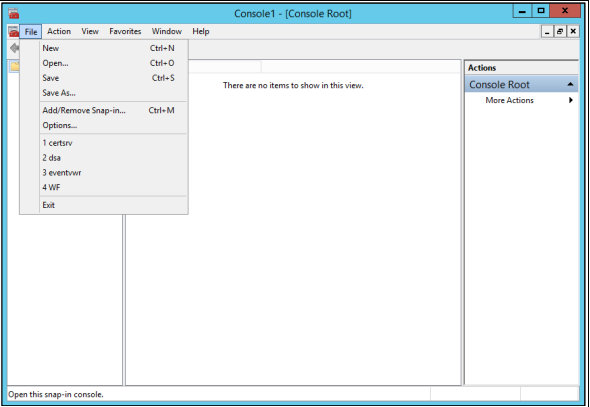
From the File menu, select Add/Remove Snap-in.
-
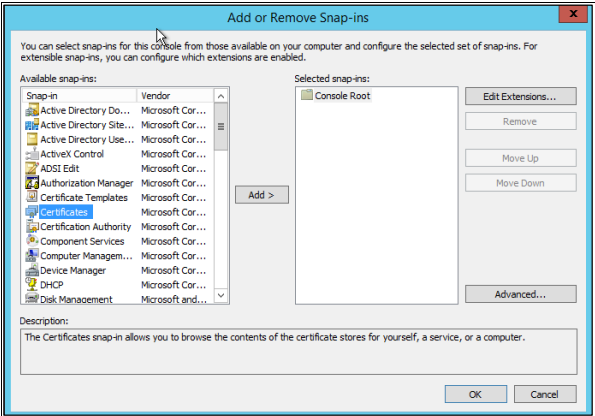
On the Add or Remove Snap-ins window, in the Available snap-ins list, select Certificates, and click Add >.
-
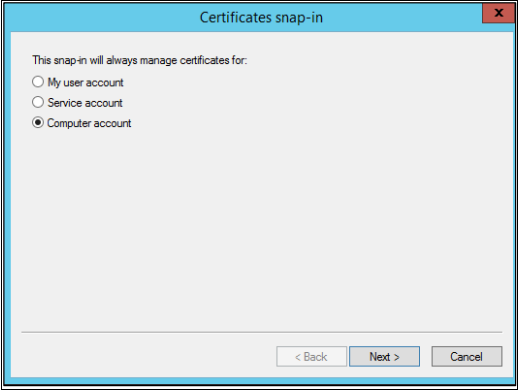
On the Certificates snap-in window, select Computer account, and then click Next.
-
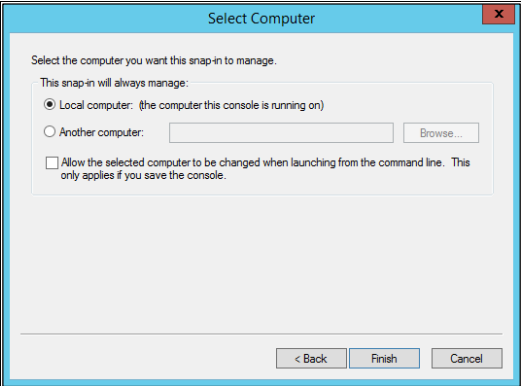
On the Select Computer window, click Finish.
-
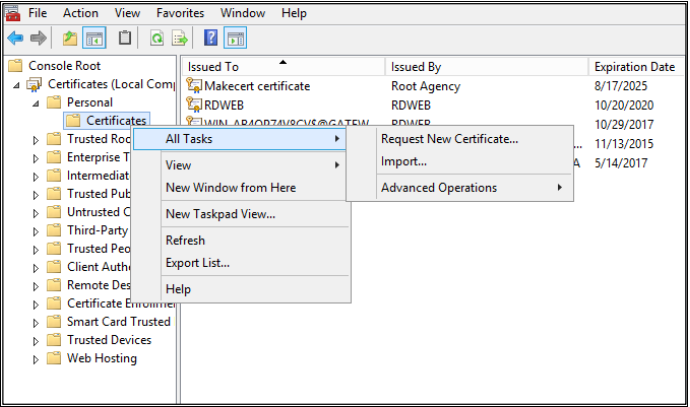
On the Console Root window, expand Console Root > Certificates > Personal. Then, right-click Certificates and click All Tasks > Request New Certificate.
-
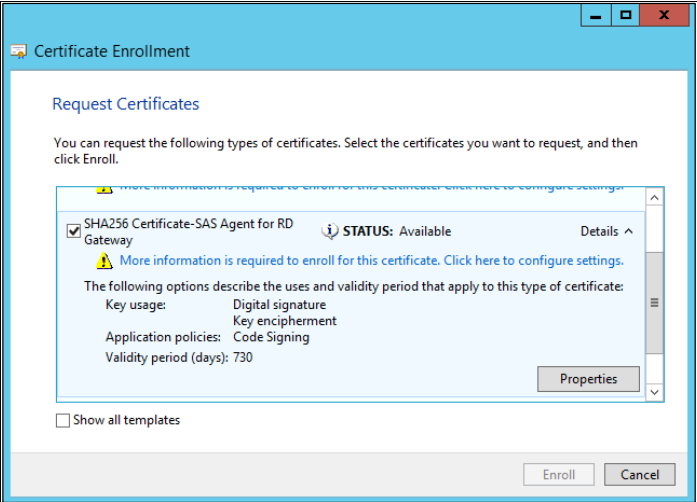
On the Certificate Enrollment window, select your certificate template, and click Enroll.