Self-Service FIDO Registration
The self-service registration portal enables users to register their own FIDO devices without administrator assistance. The registration process consists of the following steps:
-
Registration Process Initiation – The user launches the self-service registration portal.
-
User Authentication – The user authenticates through the configured identity provider (IDP).
-
Device Selection – The portal detects available FIDO devices, and the user selects a device for registration.
-
Configuration and Enrollment – The portal applies the assigned policy, configures the device, and completes the FIDO device registration.
Prerequisites
Administrator Prerequisites
Before end users can access the portal, a Thales Authenticator Lifecycle Manager administrator needs to complete the following prerequisites:
-
Register the external identity provider used to authenticate end users in the self-service portal with the OneWelcome Identity Broker. For more information, see External IDP and Identity Broker setup.
-
Provide the Self-service Portal URL to end users that is required to start self-service registration. The URL is generated automatically based on the selected identity provider and can be copied from the IDP's Self-service settings.
-
Configure the identity provider (for example, Microsoft Entra ID) in FIDO Provisioning that will be used to enroll end-user FIDO devices during self-service registration. For more information, see FIDO Provisioning.
-
Configure a policy with the Enable for self-service setting enabled to use it as the self-service enrollment policy. The policy is automatically applied during device configuration in the self-service portal. For more information, see Policy Management.
Note
For more information about enabling and configuring self-service, see FIDO Provisioning, where self-service is configured as part of a Microsoft Entra ID identity provider.
User Prerequisites
Before you register a device, ensure that:
- You have a corporate account that is registered with the configured identity provider.
-
You have a supported FIDO device, such as a SafeNet eToken FIDO NFC Enterprise device.
Caution
The FIDO device must be new or reset before registration. If the device is already configured or already has a PIN set, contact your administratore.
-
The Thales Authenticator Lifecycle Service is installed and running on your computer. For more information, see Thales Authenticator Lifecycle Service.
FIDO Device Registration
Registration Process Initiation
-
Physically connect your FIDO device to your computer.
-
In a web browser, open the self-service portal URL provided by your administrator.
-
The Authenticator Registration page is displayed. Click Get started.
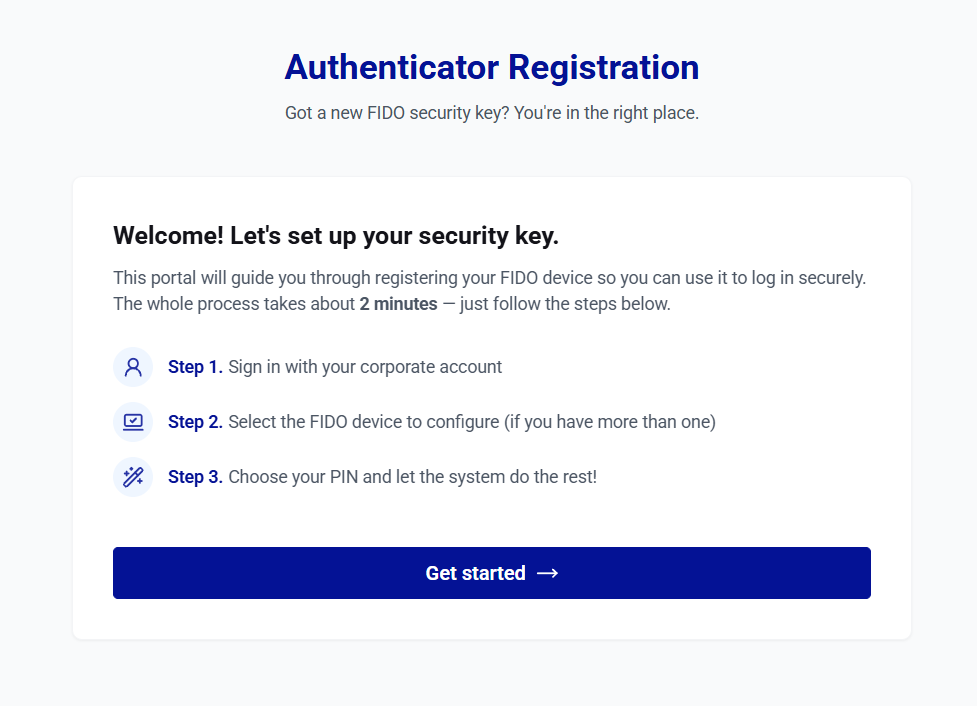
The portal redirects you to your organization's configured identity provider.
User Authentication
-
On the identity provider sign-in page, enter your corporate credentials and complete any multi-factor authentication if configured.
-
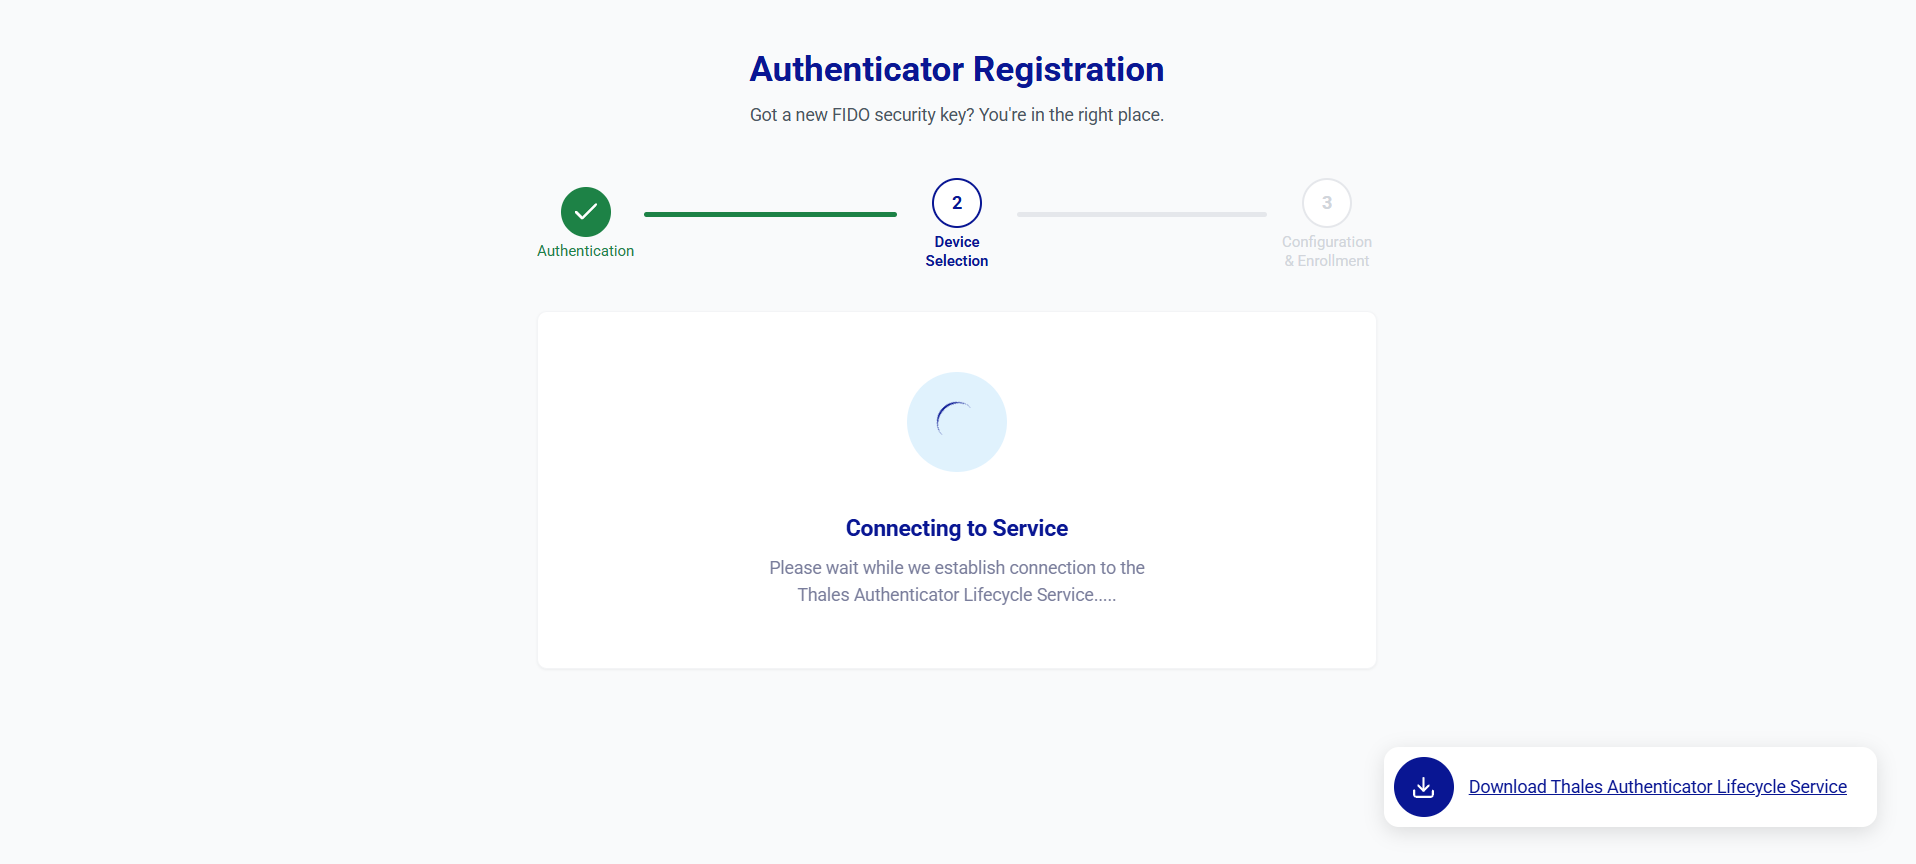
After successfull authentication, the portal connects to the Thales Authenticator Lifecycle Service to detect your device.
Device Selection
-
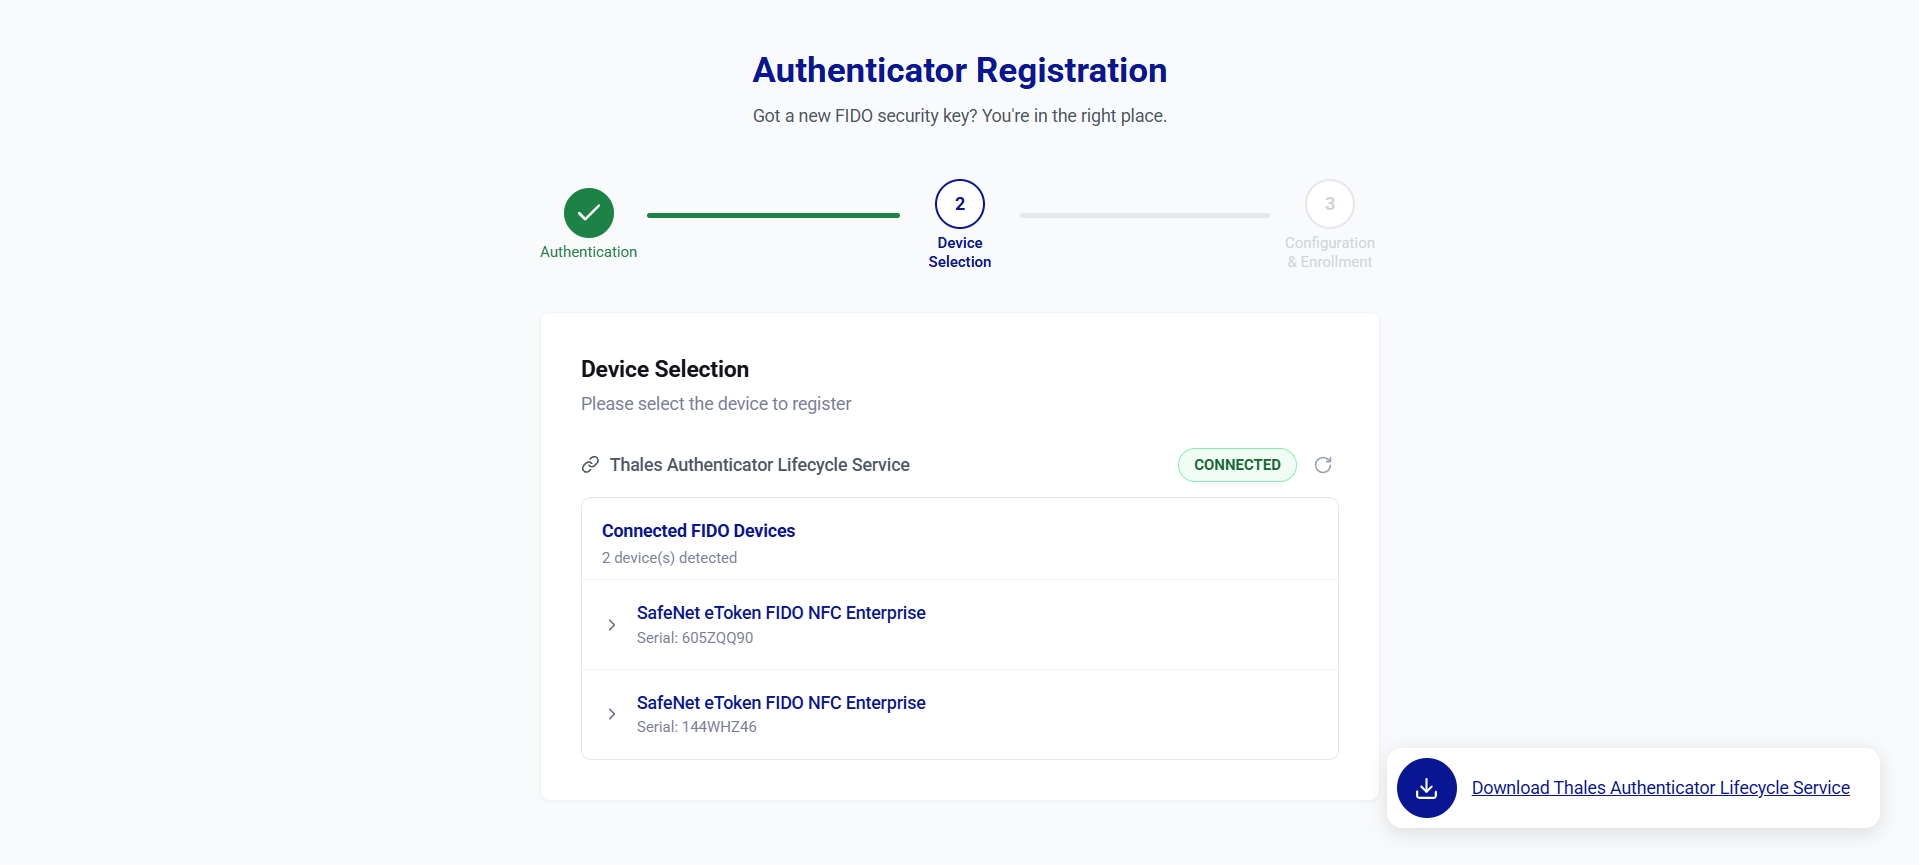
Wait for the Thales Authenticator Lifecycle Service status to show CONNECTED. After the connection is estabished, the portal lists all connected devices under Connected FIDO Devices.
-
To view the details of a device, click the expand arrow
 icon.
icon. 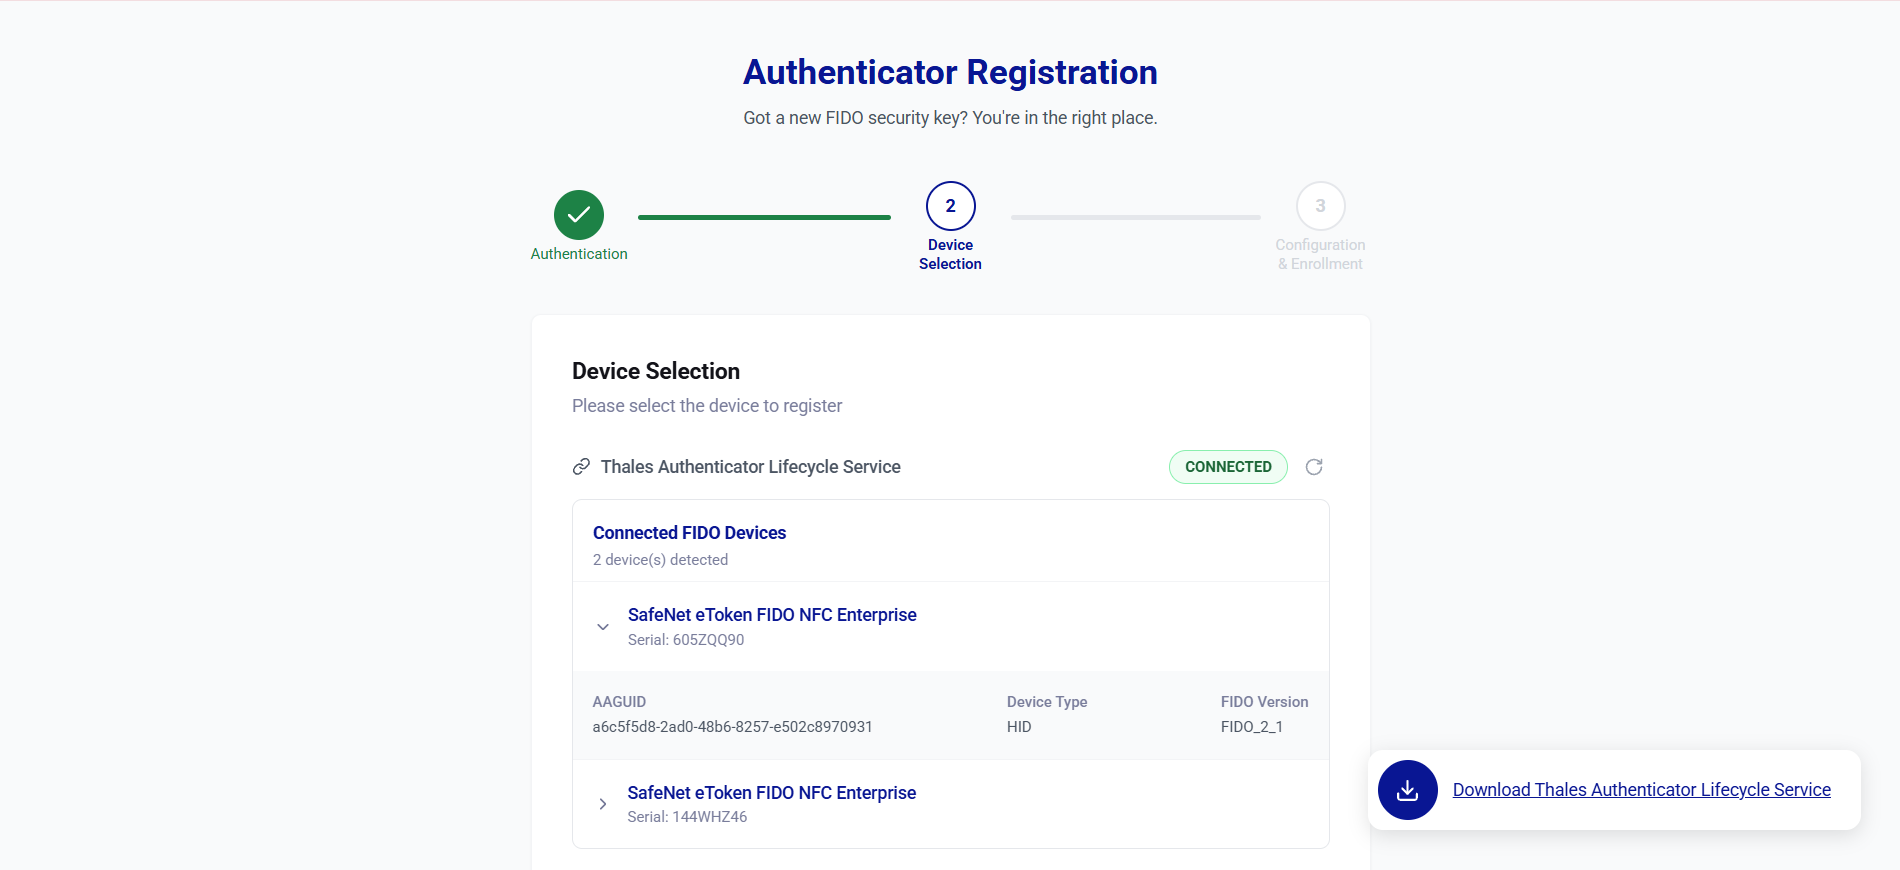
-
Click on the device that you want to register to continue to the Configuration & Enrollment step.
Note
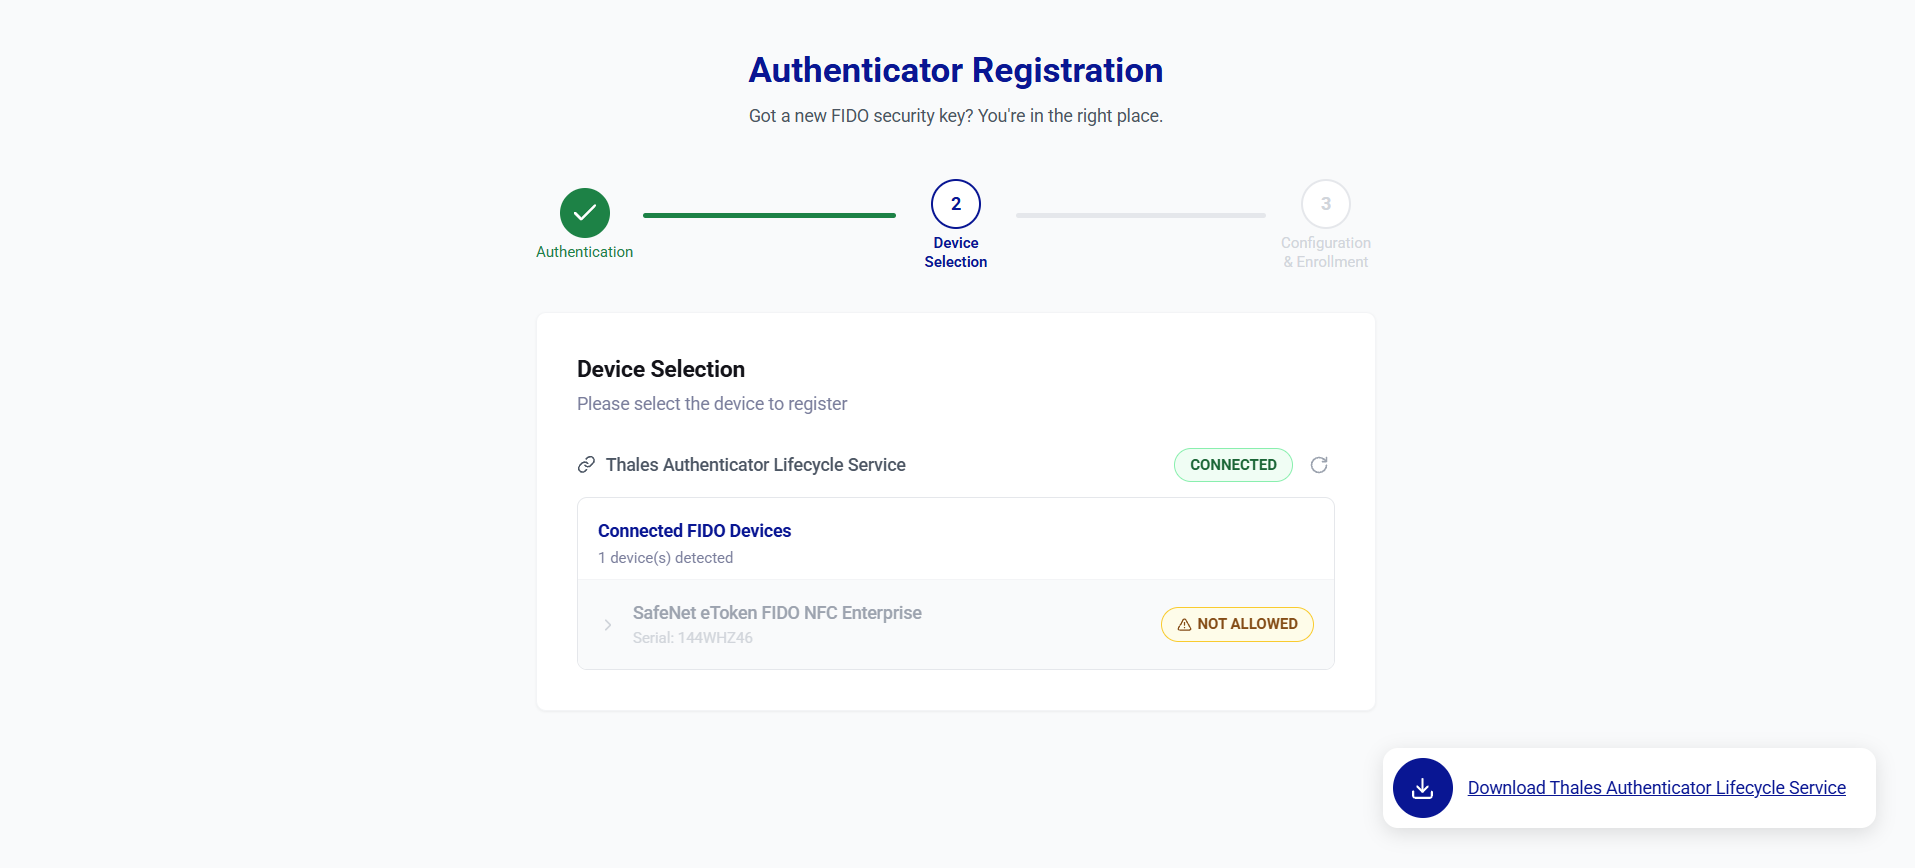
The portal evaluates each connected device individually. Devices that are not supported, are already configured, or already have a PIN set are marked NOT ALLOWED and cannot be selected for registration.
To continue, connect a compliant device. If the device that you want to register is marked NOT ALLOWED, contact your administrator for assistance.
Configuration and Enrollment
-
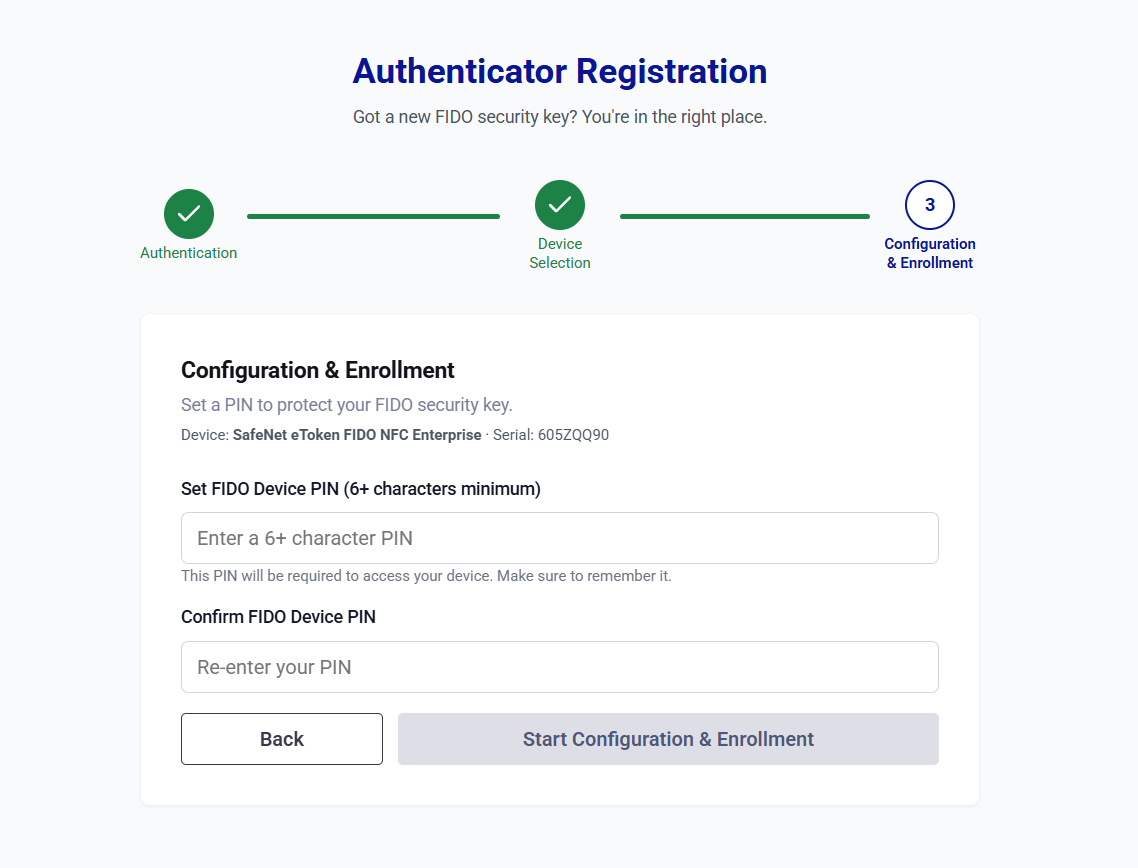
Confirm that the selected device and serial number are correct.
-
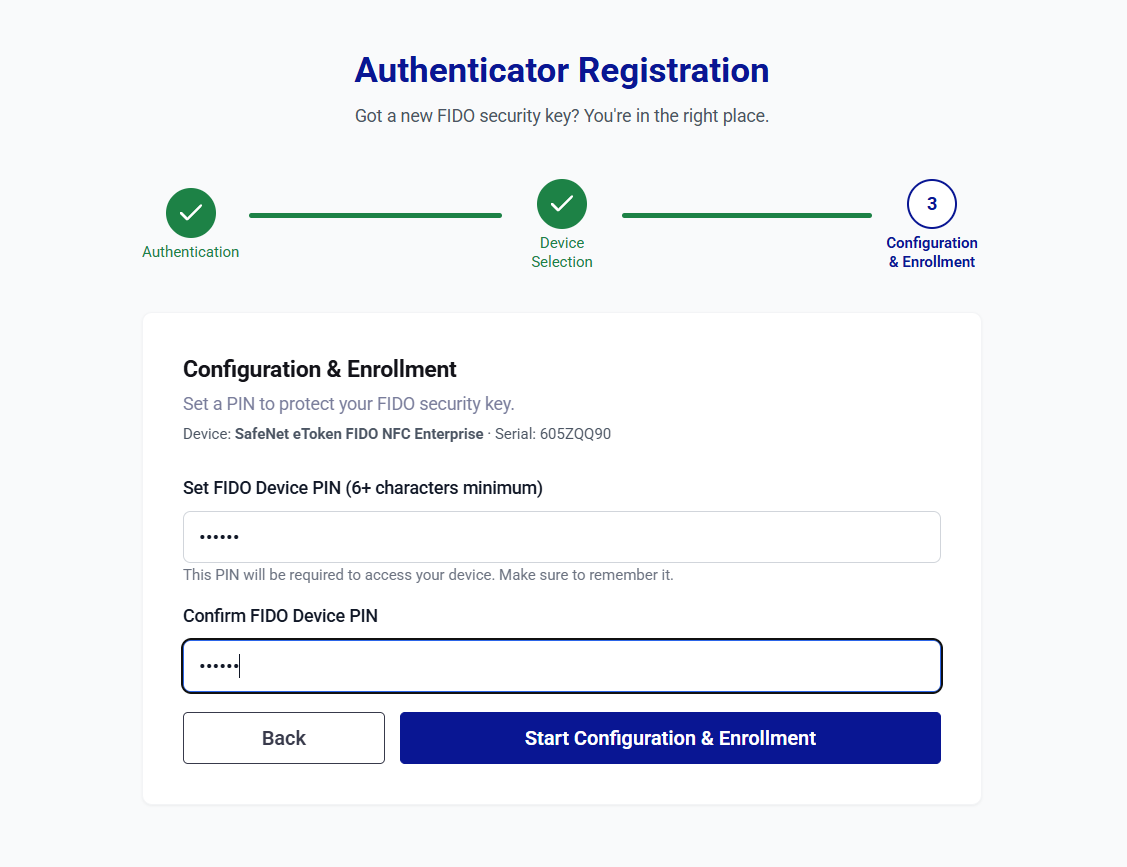
In Set FIDO Device PIN, enter a PIN that meets the minimum length defined by the assigned policy.
-
In Confirm FIDO Device PIN, enter the same PIN again.
Caution
This PIN is required to access the device. Store it securely and ensure that you remember it.
-
-
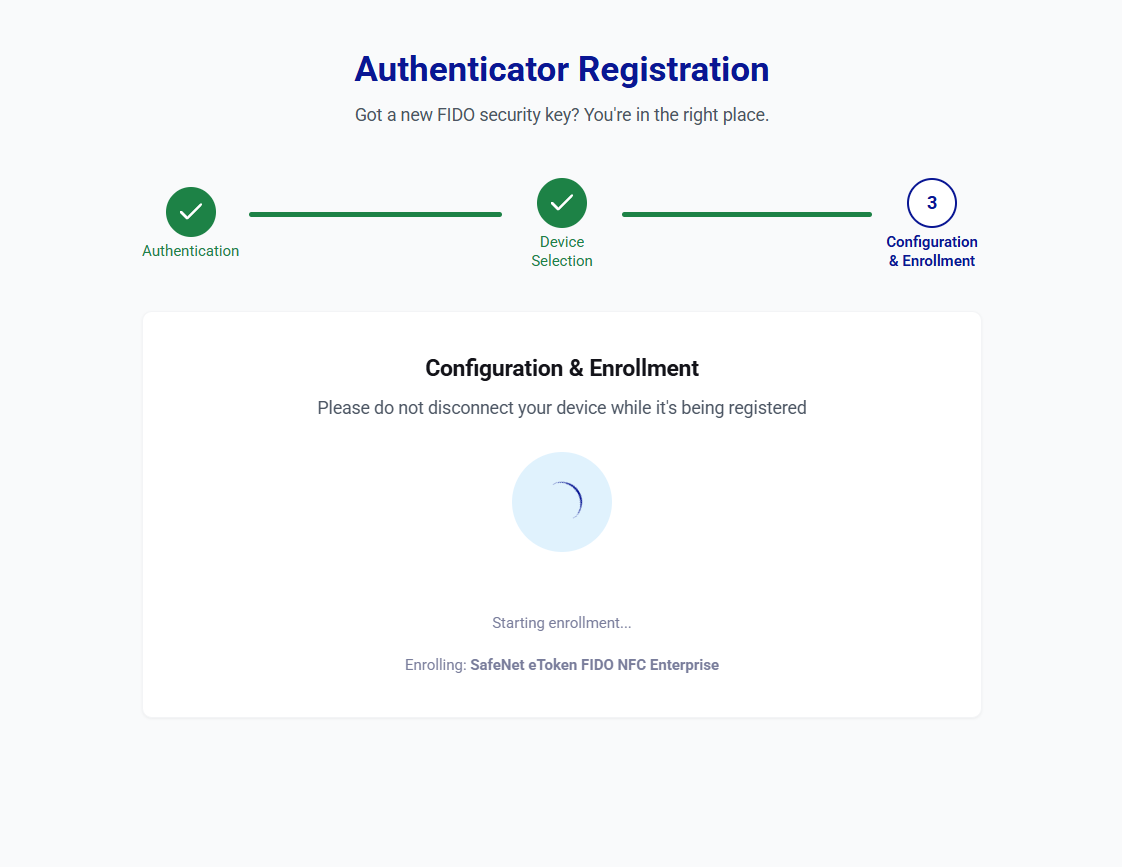
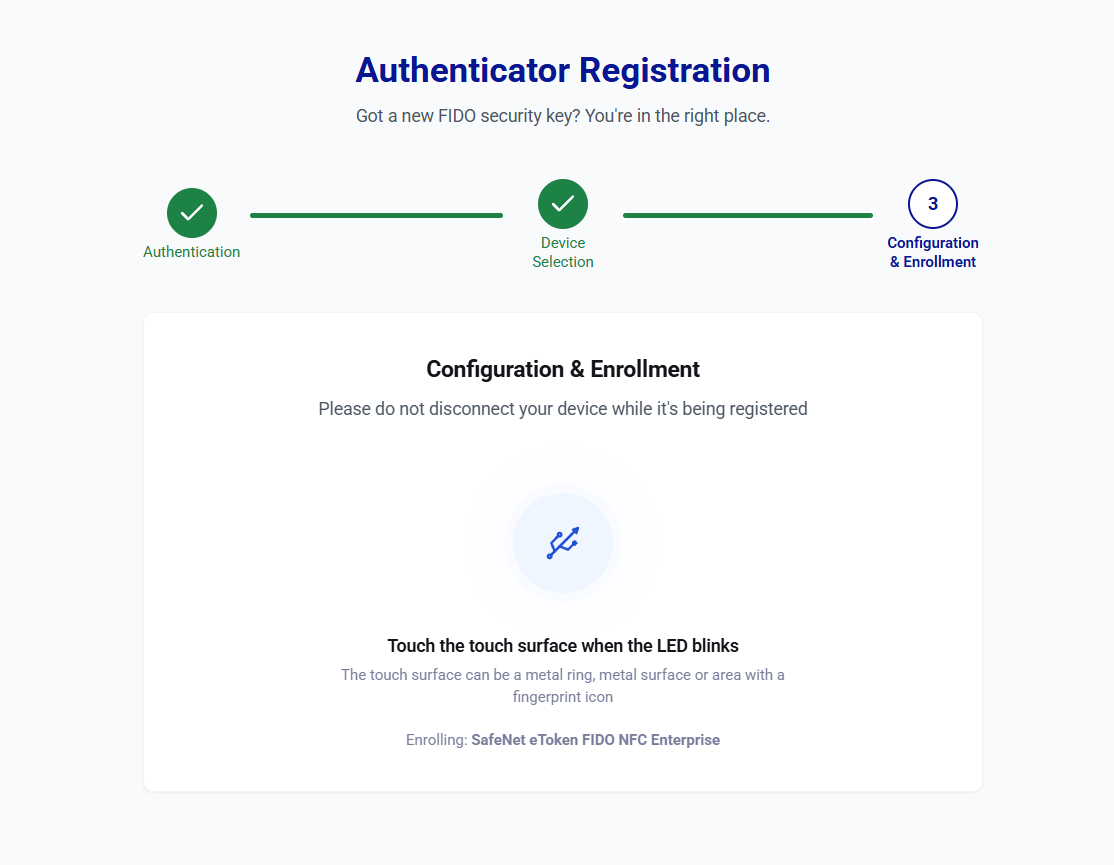
Click Start Configuration & Enrollment. The portal starts the device configuration and enrollment.
Caution
Do not disconnect your device while it is being registered.
Note
If the device configuration completes, but enrollment fails, see Resolve a Device Enrollment Failure.
-
When prompted, touch the device to verify the your presence (most devices blink).
-
When registration completes, the portal displays a Registration successful message. The device is ready to use for sign-in.
You can click Register another device to register an additional FIDO device, or close the window to finish.
Resolve a Device Enrollment Failure
If device configuration succeeds but device enrollment fails, the portal displays the Enrollment Failed screen.
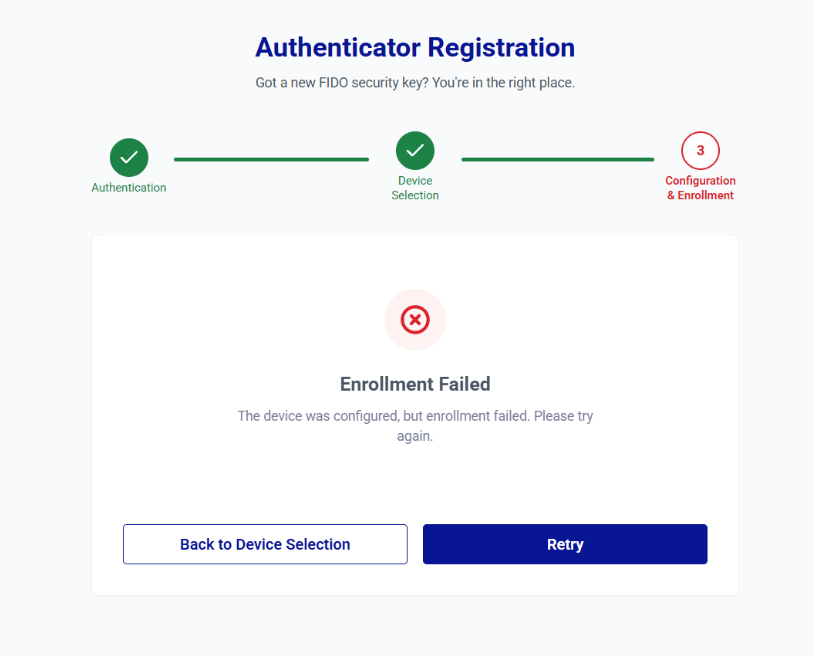
The Enrollment Failed screen provides the following options:
- Retry – Retry the enrollment process. You can retry enrollment up to three times. If enrollment still fails after the final attempt, contact your administrator.
-
Back to Device Selection – Return to Device Selection. The configured device is displayed with a NOT ALLOWED status and cannot be registered again. Contact your administrator.