



Passkeys on Windows
SafeNet MobilePASS+ for Windows can act as a passkey manager on your Windows device. Once you enable it, you can register passkeys for supported websites and services.
Enable the passkey manager
Before you can register a passkey, you must enable SafeNet MobilePASS+ as a passkey manager in Windows.
-
Open the SafeNet MobilePASS+ app on your Windows device.
-
Click the more options (...) icon and select Enable Passkey Manager.
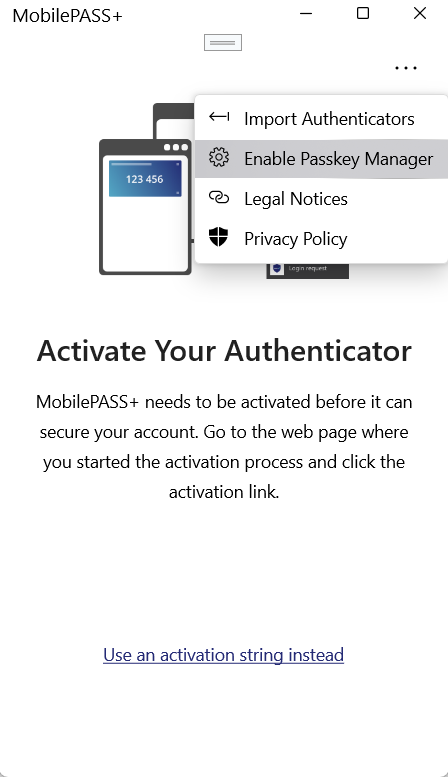
The Windows Settings app opens.
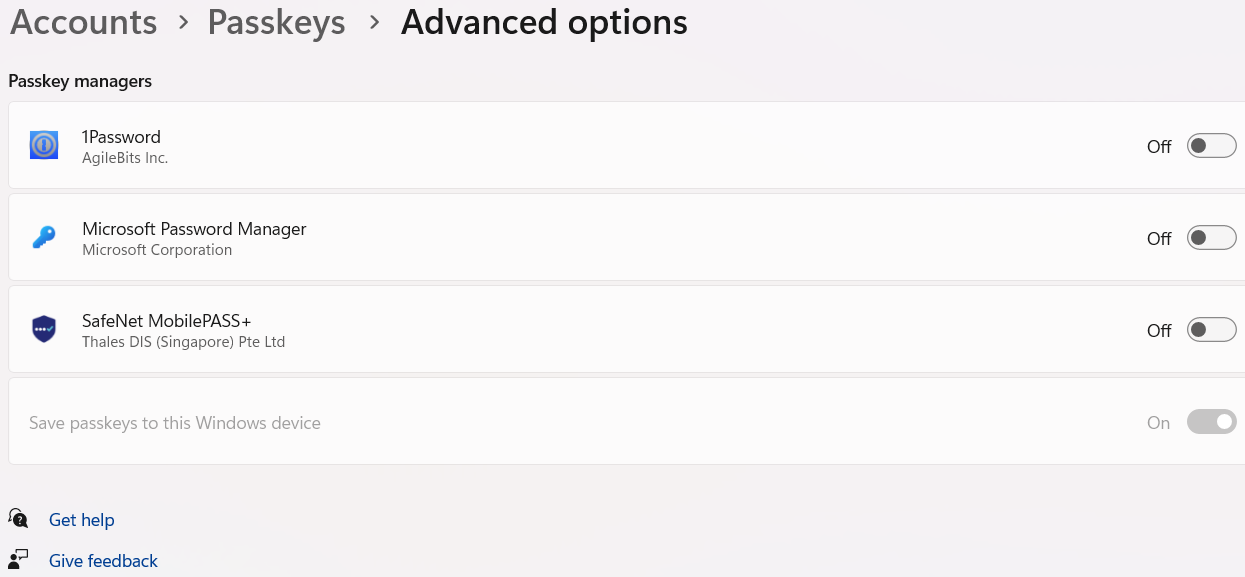
-
Turn on the toggle for SafeNet MobilePASS+.
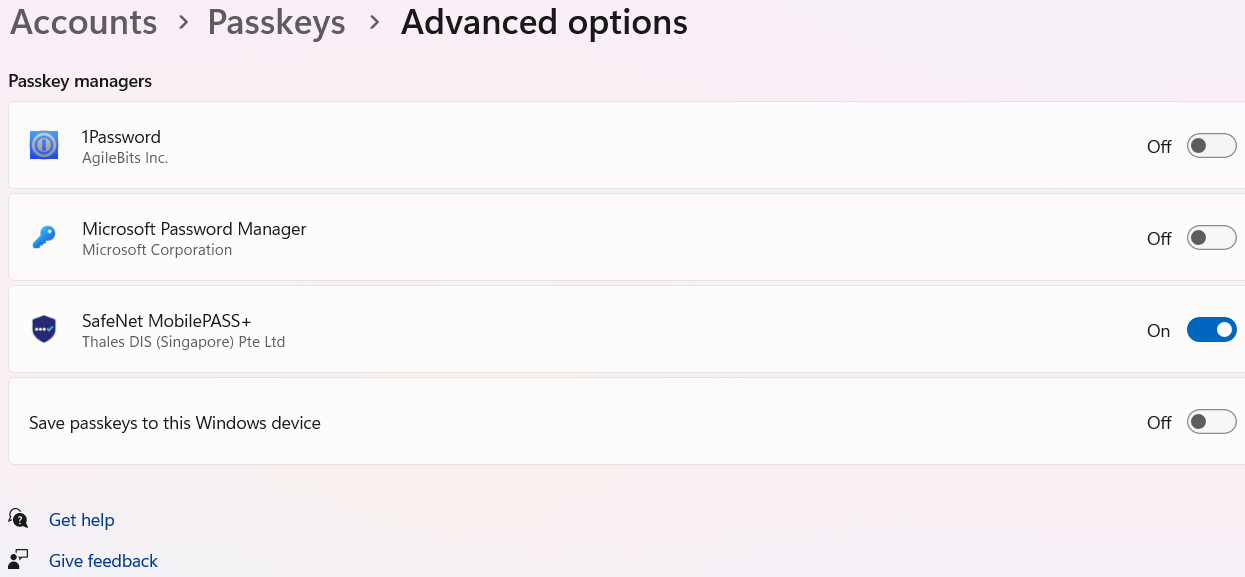
-
Return to the SafeNet MobilePASS+ app.
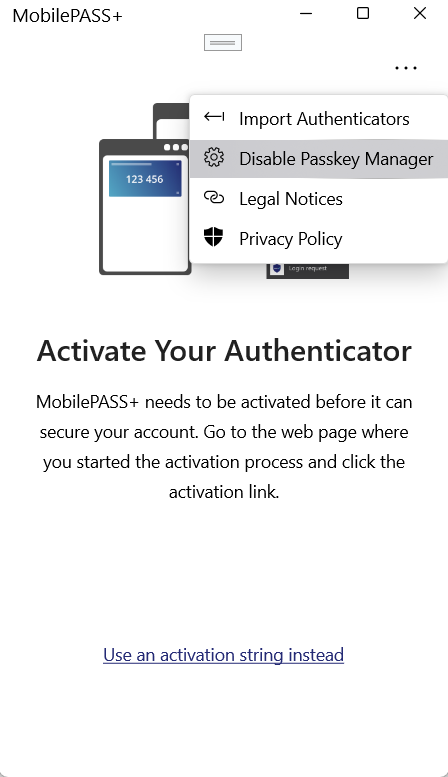
When Passkey Manager is enabled, the Disable Passkey Manager option appears in the menu. Select this option to disable Passkey Manager.
Register a passkey
Passkey enrollment is a self-provisioned process that follows the standard passkey registration flow used by all passkey providers.
To enroll a passkey with SafeNet MobilePASS+, use a supported browser on your Windows device, such as Google Chrome or Mozilla Firefox.
-
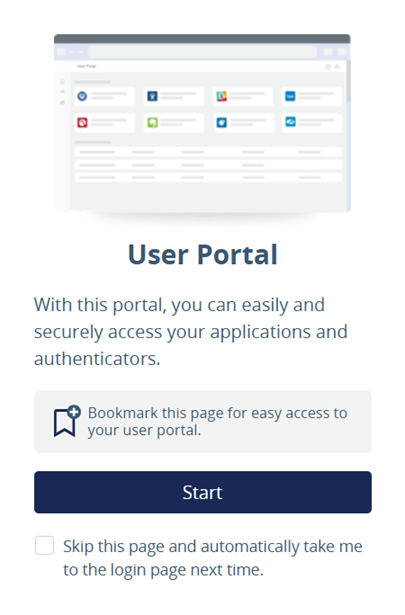
On your device, open the user portal using the link provided by your system administrator.
-
On the user portal start window, select Start.
-
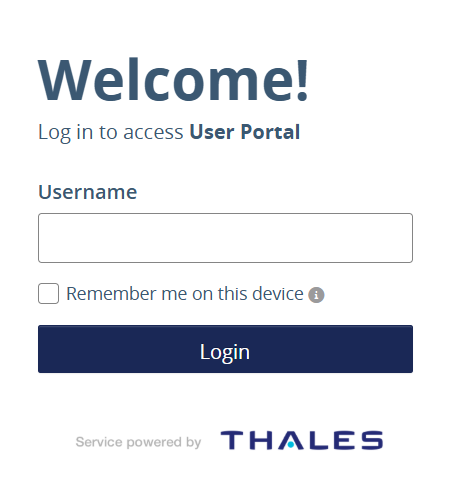
Enter your Username and then select Login.
-
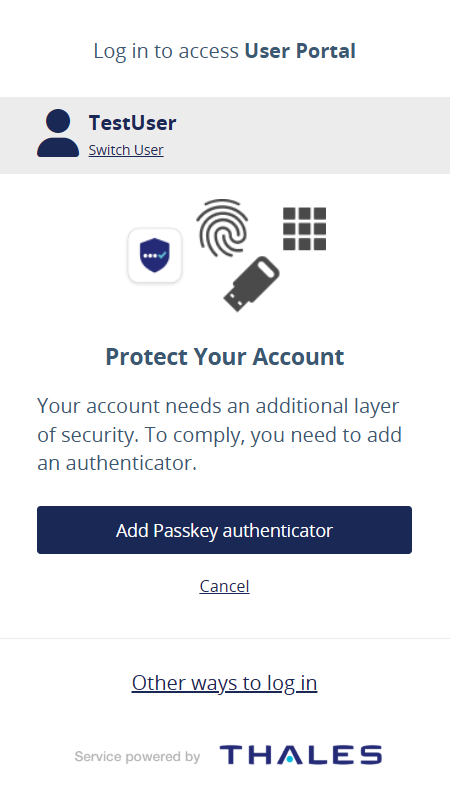
On the Protect Your Account window, select Add Passkey authenticator.
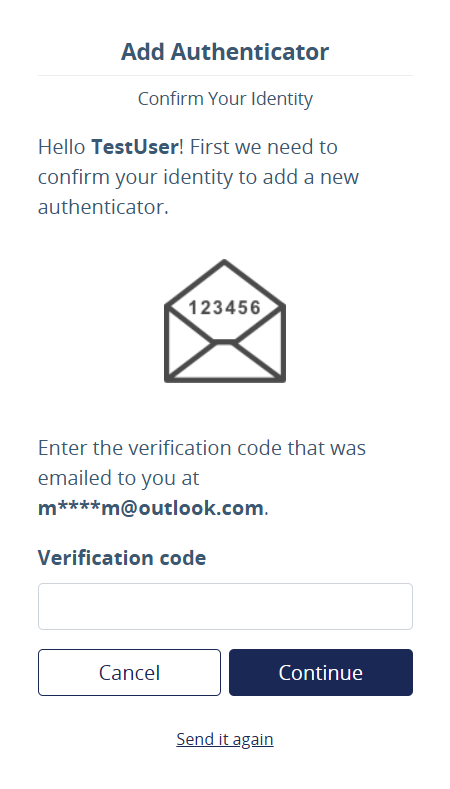
The system sends you an email that contains a verification code.
-
On the Confirm Your Identity window, enter the Verification code from the email and then select Continue.
-
To confirm your identity, enter your password and then select Submit.
-
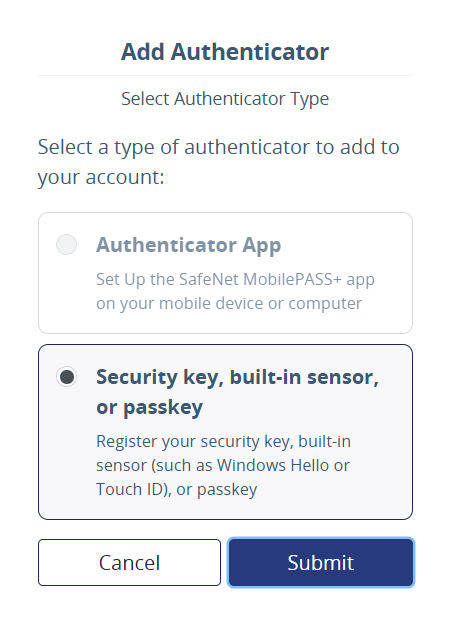
On the Select Authenticator Type window, select Security key, built-in sensor, or passkey option and then select Submit.
Note
The next steps are specific to Google Chrome. The steps might be slightly different in other browsers.
-
If the browser prompts you to save the passkey elsewhere, select Save another way and then select Windows Hello or external security key.
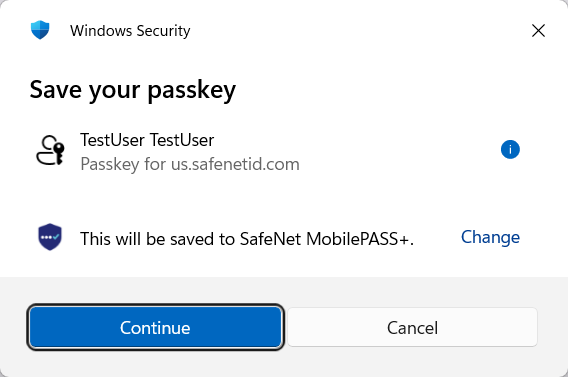
The Windows Security dialog opens and shows where the passkey will be saved.
-
Verify that the dialog box displays This will be saved to SafeNet MobilePASS+, and then select Continue.
To save the passkey to a different passkey manager, select Change.
-
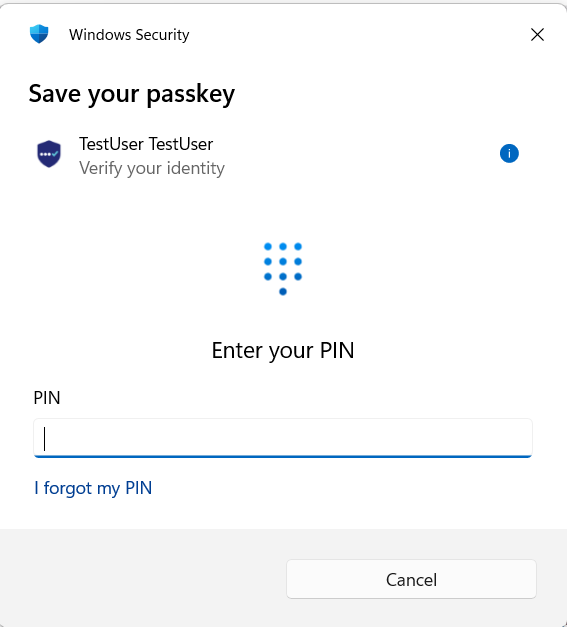
Enter your Windows Hello PIN when prompted.
-
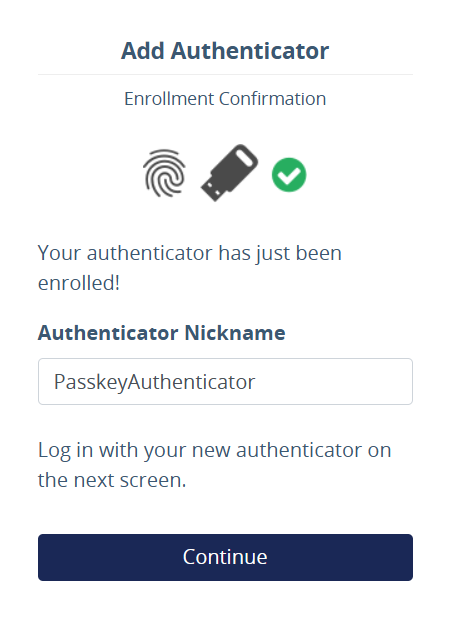
On the browser, enter an Authenticator Nickname for the passkey and then select Continue.
The nickname helps you identify the passkey in the STA portal and is for your personal reference only.
-
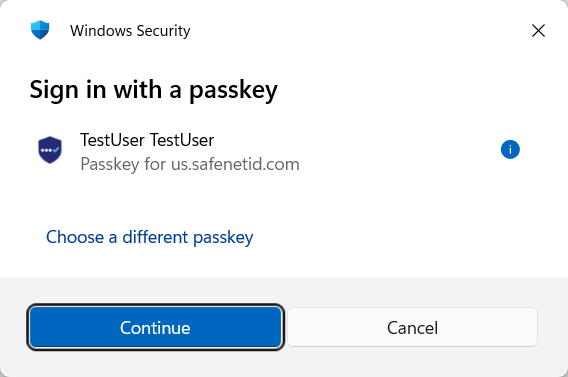
To complete the enrollment, sign in with the passkey you just created. In the Sign in with a passkey dialog, select Continue.
-
Enter your Windows Hello PIN again to verify your identity.
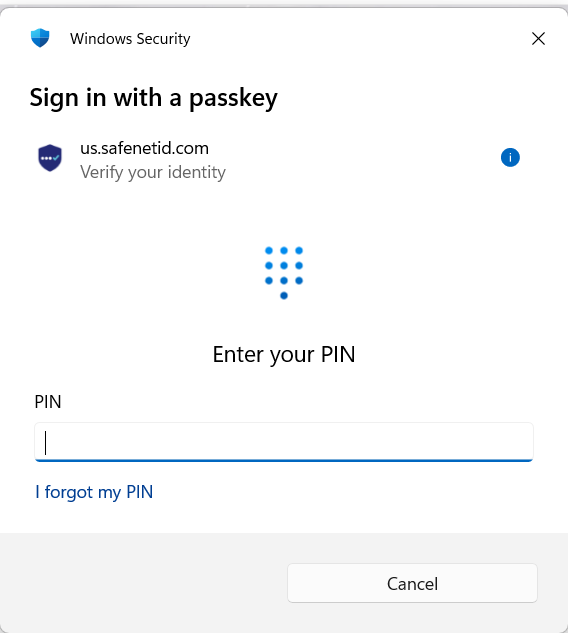
After the PIN is verified, the passkey is ready to use.
-
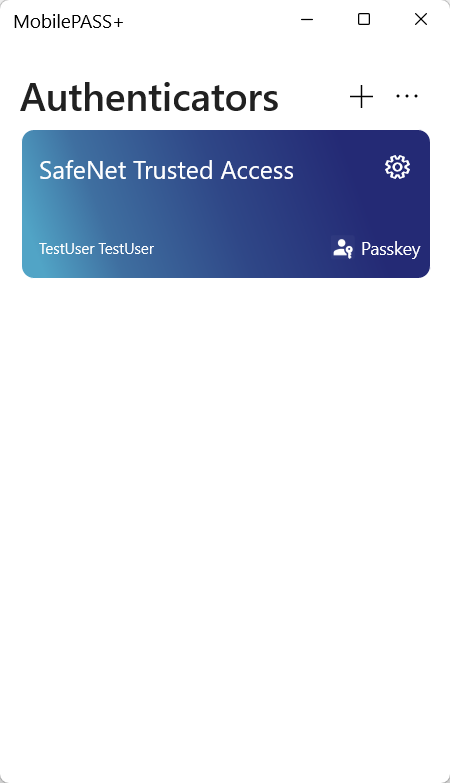
Open the SafeNet MobilePASS+ app.
The new passkey displays in the list of authenticators.
View passkey details
-
Open the SafeNet MobilePASS+ app.
-
Click the settings icon
 on the passkey you want to view.
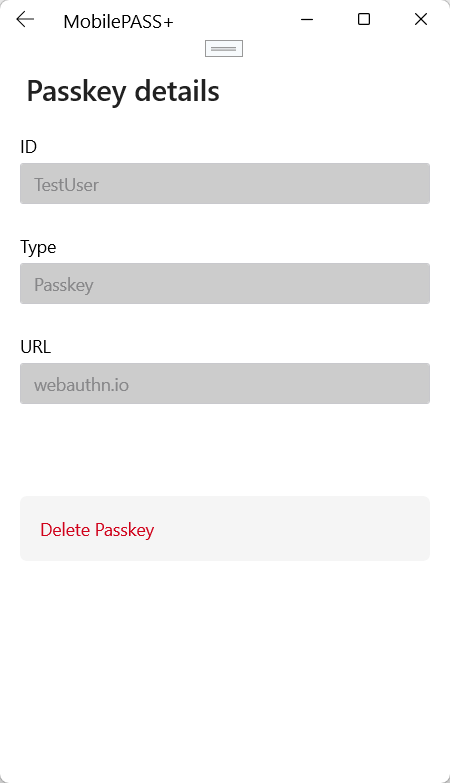
The Passkey details window displays the ID, Type, and URL of the passkey, along with the Delete Passkey option.
Delete a passkey
-
Open the SafeNet MobilePASS+ app.
-
Click the settings icon
on the passkey you want to delete. -
The Passkey details window displays. Click Delete Passkey.
-
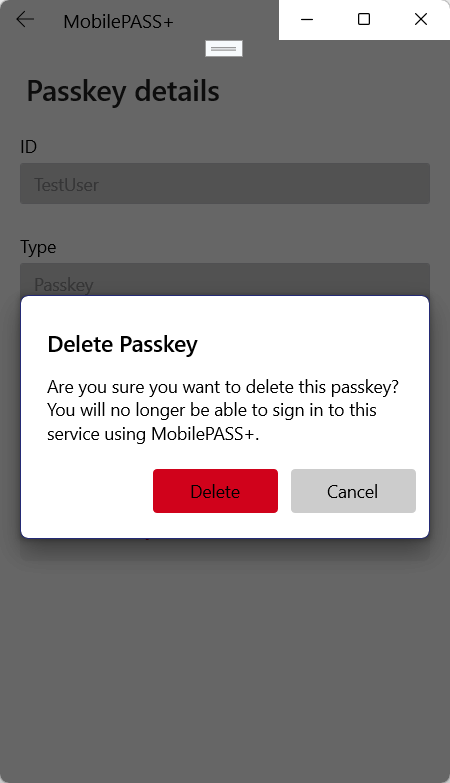
Click Delete to confirm the passkey deletion.
Caution
The Delete passkey confirmation displays: Are you sure you want to delete this passkey? You will no longer be able to sign in to this service using MobilePASS+.
-
To keep the passkey, click Cancel. The confirmation closes, the passkey is not deleted, and you remain on the Passkey details screen.
-
After the passkey is deleted, a Passkey deleted successfully message displays. Close the window.
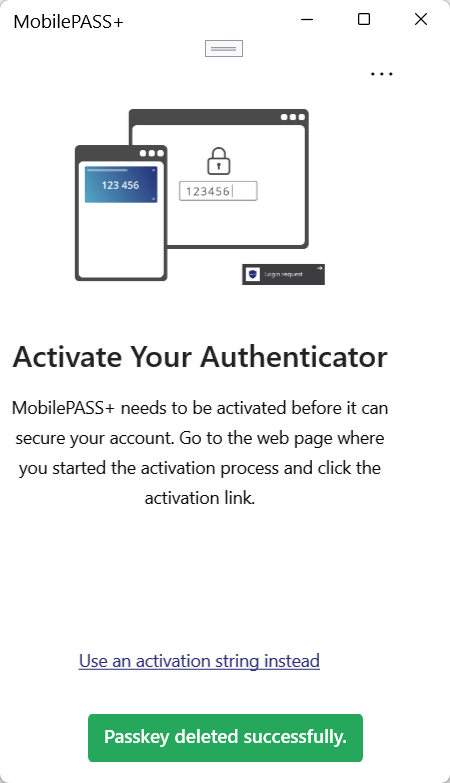
Once deleted, you can no longer use SafeNet MobilePASS+ to sign in to that service. To use it again, register a new passkey.

